
Hey everyone! And welcome again to another awesome post! Today I wanted to talk about how you can actually grow roses from cut flowers! Like actual rose bushes from your bouquets! Let’s get started!
So first, I have to admit, when I heard about this cut flower-to-plant idea, I was pretty skeptical. I did some research and saw that yes, some people were actually having success growing their roses into plants, and after several months of testing, I finally did as well. But you have to do it right, or you’ll just end up with a bunch of dead stems…
Here are the 3 steps:
- Prepare your Cutting
- Root in Water
- Transplant in Soil

Step 1: Prepare your Cutting
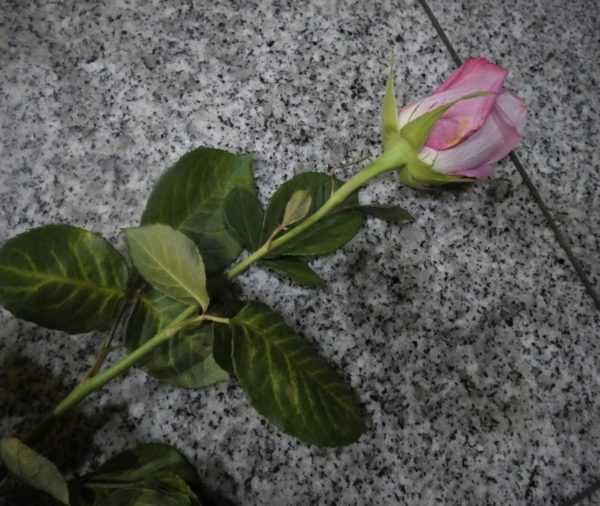
In order to be successful, you NEED to have a good, healthy cutting. Select a cut flower that hasn’t begun to wilt yet. Also, make sure that the stem doesn’t have any brown portions in the middle.
For this post, my cutting’s leaves had a bit of yellow in the veins. I normally prefer them to not have any yellow in the leaves, but they were the only cut flowers I had at the time… that being said, I only kept the best leaves on each stem…
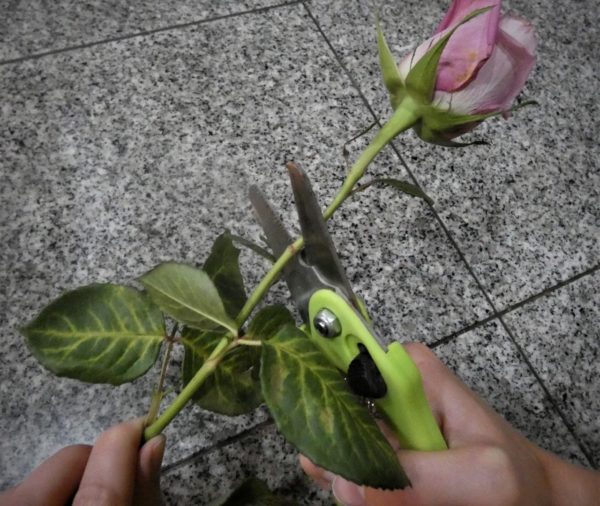
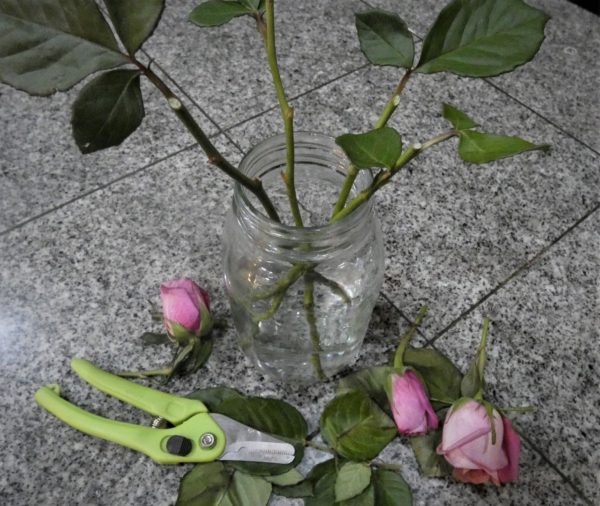
Next, cut off the main flower. I know this can be hard to do, but trust me… the cutting won’t have enough energy to continue to bloom and to grow a root system.
Also, try to cut just above a node on the stem. (A node is where there is a growing point… usually where a set of leaves connect to the stem…)

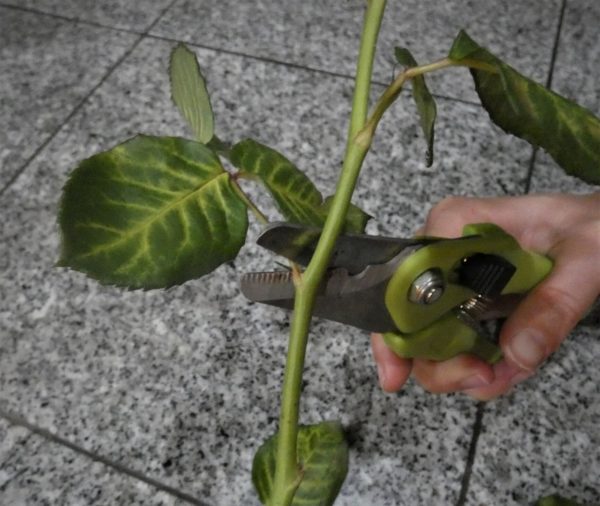
Once you’ve cut off the flower, find the section of the stem that is the older, more woody section. The section of young growth that connects to the actual flower WILL NOT root. So make sure that you use the older base of the stem and not the young, flexible stem at the top.
Remove the majority of the leaves from your stem. I like to leave 1-2 branches of leaves, but this should only contain about 2-3 leaves in total. If there are any large leaves, cut them off, or trim them to be smaller.
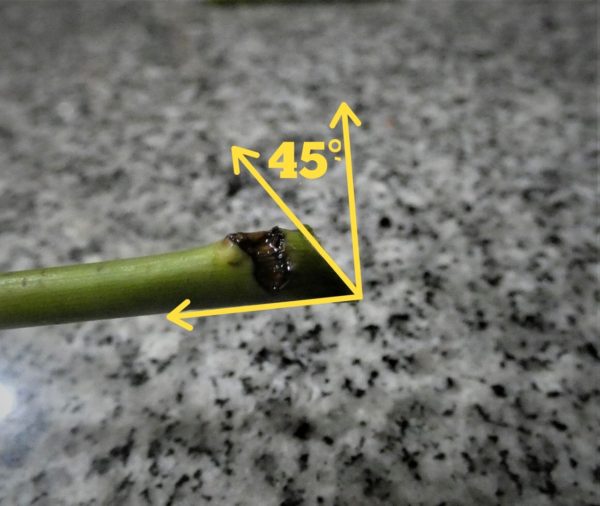
Then, cut the bottom of your stem at a 45 degree angle. This angle will maximize the area of stem that is in contact with your water and will maximize the area that is available to root!
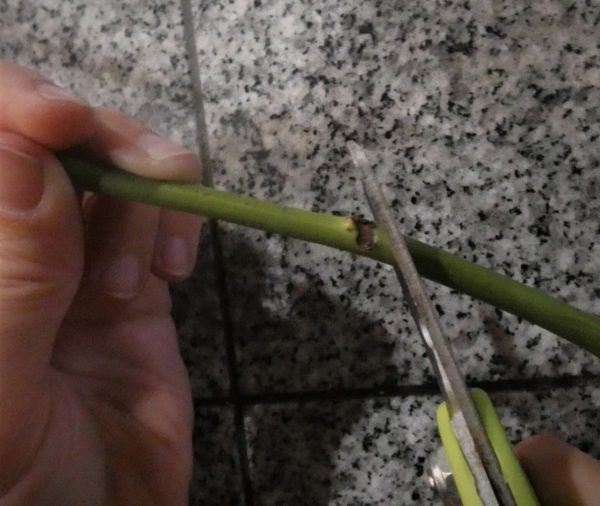
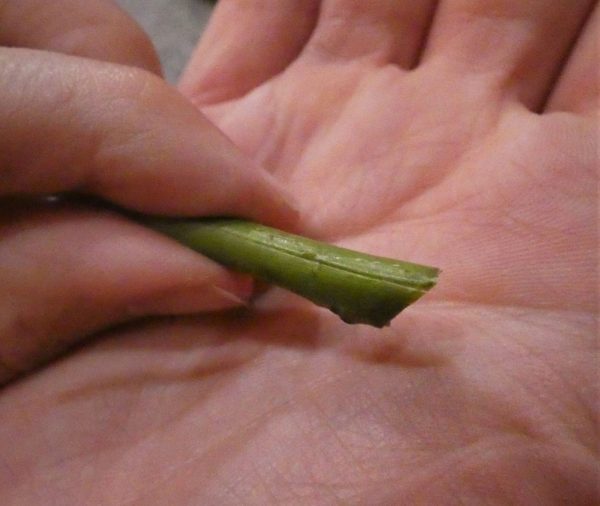
Last, cut light, superficial slits (just a scratch) up the sides of your stem. This will also increase the area that is available for more water to enter the plant and for more roots to form!
Step 2: Root the Cutting
Over the past year or so, I’ve experimented with several different types of rooting methods: in soil, in straight water, and in a hydroponic-style system. Rooting stems in soil proved to be difficult to keep the soil moisture levels evenly and lightly moist, so the BEST way to root stems was definitely in straight water or using a hydroponic system.
To root your cuttings in water, simply place it in a thin, tall container of water and make sure that all of your leaves stay dry. Switch out the water every few days to keep it aerated and free from bacterial growth. Then simply wait several weeks for either roots or scar tissue to form.
A hydroponic system also works well for rooting our cuttings. Watch the video below for an easy, effective way to root your cuttings using a plastic pot, perlite, and a large plastic bag. Just be sure to change out your water every few days with this system as well.
Step #3: Transplant in Soil
Once your cutting has rooted, transplant it into a pot with soil. To have a successful transition, keep the soil from completely drying out in between watering for the first few weeks. The longer it has been in the soil, the more dry it can stand to be between watering. Your final transition should be to let your soil dry down to the top 1 inch in between watering, but this should only be done once the cutting has fully rooted (from several weeks to months depending on how many roots your cutting had when it was placed in soil).
If you are planning on planting your cutting outdoors, then make sure that it has fully rooted and has some new growth before you move it outdoors. Then, place it outdoors for only a short period of time. Then slowly increase the time it is outdoors until it is used to being outdoors 24/7.
One more thing to consider is that your variety of rose might not do well in your particular climate. Try to keep it out of hot, direct sunlight if you live in hot climates. On the flip side, bring your plant indoors or wrap it to give it additional protection from freezing temperatures. If you want to know which rose varieties will do well in your area, check out this map that shows which roses do best in different regions of the USA! (For all my readers outside the USA, you can still compare the USA hardiness zone and climate to your own local conditions!)
That’s it! And remember, the success rate is going to be low because of the anti-rooting chemicals they use on roses before they are shipped. This is why rooting your cut roses will take a lot longer and will be less successful than if you were to simply root a cutting from a bush. If you’re lucky enough to have a cutting though, check out my post on the Easiest Method to Grow Rose Bushes from Cuttings! Good luck, and let me know in the comments how it goes! Then feel free to subscribe to my email list to receive even more awesome tips and instructions for your plants!
Happy Digging!
