How to Water Houseplants the RIGHT way! (+Watering Tips)

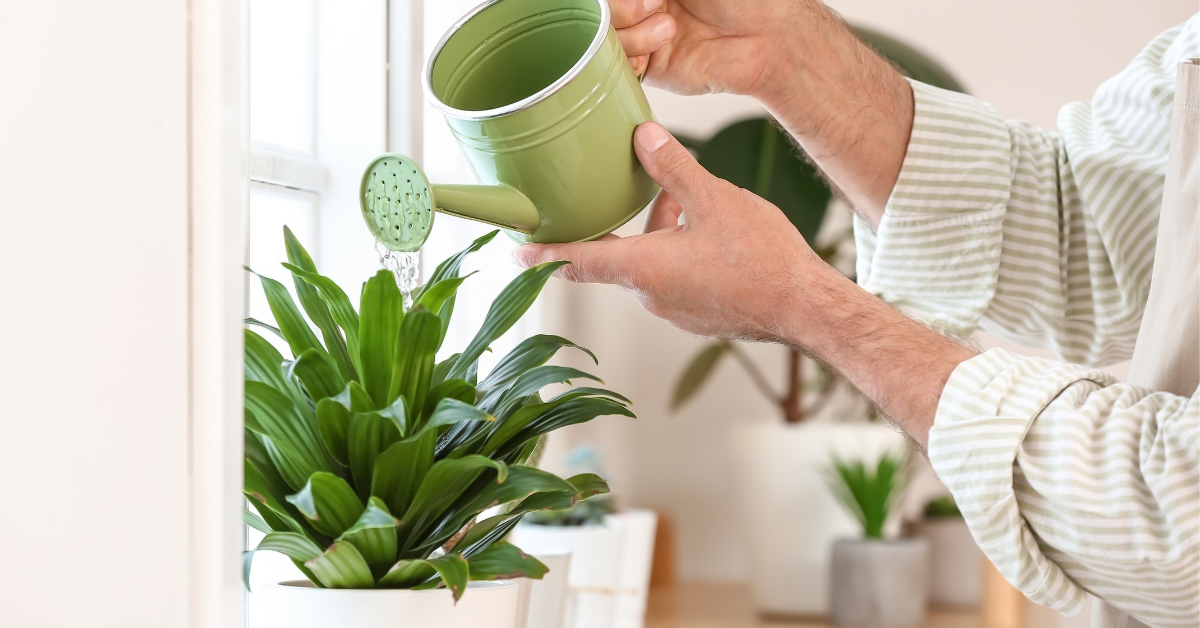
person's arms lifting a green watering can and watering a dracaena on a window ledge

Picture this: you’re standing in your living room, admiring your beloved collection of houseplants. Some are thriving, their leaves a vibrant green, while others look a bit droopy and sad. You wonder, “Am I watering them too much? Or not enough?”

As someone who’s been there, I know how frustrating it can be to watch your plants wilt despite your best efforts. But here’s the good news: with a little knowledge and some practical tips, you can become a watering pro and keep your indoor jungle looking lush and healthy.

In this article, we’ll dive deep into the world of watering houseplants. We’ll explore the factors that affect your plants’ water needs, learn how to recognize the signs of overwatering and underwatering, and discover the best techniques for giving your plants the hydration they crave.

So, here’s everything you need to know to become a watering expert!

Understanding Your Houseplants’ Water Needs

Before we dive into the nitty-gritty of watering techniques, let’s take a step back and understand what factors influence your houseplants’ water requirements. After all, you wouldn’t give a cactus the same amount of water as a fern, right?

Here’s the rewritten section with more explanation for each bullet point:

Factors Affecting Water Requirements

Several key factors come into play when determining how much water your houseplants need:

  • Plant type: Different plant species have varying water needs. Succulents and cacti are adapted to arid environments, storing water in their fleshy leaves and stems, so they require less frequent watering. On the other hand, tropical plants such as ferns and calatheas originate from humid, wet regions of the world and prefer consistently moist soil to thrive.

If you want the shortcut on looking up your plants’ watering needs, I have a special deal for my readers for the Indoor Plant Guide A-Z. This is a comprehensive care guide to over 130+ popular houseplants. So you can cut the endless google searches and have everything you need to know for your houseplants all in one spot.

  • Pot size and material: The size of the pot affects how quickly the soil dries out. Smaller pots have less soil volume, causing them to dry out faster than a larger pot. Additionally, the pot material plays a role. Porous materials like terracotta allow for better air circulation and faster water evaporation, requiring more frequent watering compared to non-porous materials like plastic or glazed ceramic.
  • Root-to-soil ratio: Root-to-soil ratio, or basically the size of your pot can have an effect on your frequency of watering as well. Small plants in small pots use a typical amount of water, but large plants (with lots of roots) in small pots will dry out much faster than the average houseplant. This is why if your plant’s soil starts to dry out quickly, it is a sign that you need to repot your plant into a larger pot. (aka, increase the amount of soil, so you have a more balanced root-to-soil ratio.
  • Soil type: Well-draining potting soil is essential for most houseplants to prevent waterlogging and root rot. A good potting mix should contain ingredients like perlite, vermiculite, or bark chips to improve drainage and aeration.
  • Light and temperature: Plants in brighter, warmer environments tend to dry out faster due to increased transpiration (water loss through leaves) and evaporation from the soil surface. Those in cooler, lower-light conditions will require less frequent watering.
  • Humidity: High humidity levels in the air can slow down water evaporation from the soil, reducing the need for frequent watering. Conversely, low humidity environments may cause the soil to dry out more quickly.

By considering these factors, you can start to develop a better understanding of your houseplants’ unique water needs.

Signs of Underwatering and Overwatering

Even with the best intentions, it’s easy to miss the mark when it comes to watering. Here are some telltale signs that your indoor plants are crying out for help:

Underwatering:

  • Drooping or wilting leaves
  • Crispy, brown leaf edges
  • Dry, hard soil that pulls away from the pot’s edges
  • Slow growth or leaf drop

Overwatering:

  • Yellow, mushy, or falling leaves
  • Moldy or smelly soil
  • Fungus gnats flying around the plant
  • Brown, soft, or rotting roots

Signs of overwatering and underwatering can sometimes look similar, but a telltale sign to look at is if the yellowing leaf is fat and mushy, like it has water inside, or if it is becoming dry and crinkly like all the water in the leaf is gone.

If you spot any of these signs, don’t panic! In most cases, adjusting your watering routine and letting the soil dry out a bit can help your plants bounce back.

Now that you have a better grasp on the factors affecting your houseplants’ water needs and the signs of watering woes, let’s explore when and how to water your green friends for optimal health and happiness.

When to Water Your Houseplants

Picture this: it’s a sunny Saturday morning, and you’re standing in front of your beloved houseplants, watering can in hand. But wait! Before you start dousing your leafy friends, let’s talk about when to water them.

Checking Soil Moisture Levels

The most foolproof way to determine if your plants need water is to check the soil moisture levels. Sometimes you can tell by simply looking at the top of the soil, but more often than not, the top of the soil is going to be deceiving. This is because with gravity, water will naturally sink to the bottom of your pot. So, instead of just looking at the soil, here are a few methods you can use to determine if your soil is wet or dry:

The Finger Test

Stick your finger into the soil. Now, I don’t mean just feel the top of the soil. I mean stick your finger as deep as you can down into the soil. This will allow you to usually feel a few inches down into the soil (depending on the size of your pot), and you should be able to feel if there is still moisture. Then you will be able to tell if your plant’s soil is dry all the way through, or if there is still moisture down below the surface of the soil. If it feels dry, it’s time to water. If it’s still damp, hold off for a day or two. This method works great for any medium or small plant you have, but it isn’t as effective when you are trying to guage the moisture level in large pots.

placing finger into houseplant soil.

The Weight Test

The weight test: The second way to tell how moist or dry your plant’s soil has become is to pick up your plant and weigh it in your hands. After lifting your plant a few times, you will begin to be able to feel if your plant is heavier than usual, or if it is lighter than usual. A light pot means that your soil is dry. A heavy pot, on the other hand, means that there is still some water in your soil that is weighing it down. This method also works best for medium to small pots, but it can be difficult to constantly be lifting one of your larger houseplants.

hand lifting scindapsus plant in macrame hanger

The Chopstick Method

Insert a wooden chopstick or skewer into the soil, then remove it. If it comes out clean and dry, your plant is thirsty. If it’s covered in damp soil, wait a bit longer.

Moisture Meters

These handy tools measure soil moisture levels with a simple probe, taking the guesswork out of watering. Soil moisture meters are pretty cheap and can be purchased at any major garden center, or here’s my personal favorite soil moisture meter!

To use a soil moisture meter, you simply place the probe into the soil (making sure that you push it down enough that it gets an accurate reading of the bottom of the pot), wait a few minutes for it to take an accurate reading,then, just like magic, it will tell you how dry, moist, or wet your soil is! That’s all there is to it!

soil moisture meter reading "moist" in houseplant soil

And now, to state this once again as the ULTIMATE GAME-CHANGER for all plant parents…

This moisture meter is the #1 tool that I recommend to all plant parents. Why? Because it works! (And I also love that it doesn’t cost an arm and a leg to purchase, either!)

Remember, the goal is to keep the soil consistently moist but not soggy. Overwatering can be just as harmful as underwatering!

Establishing a Watering Schedule

Once you’ve got a handle on your plants’ moisture needs, it’s time to create a watering schedule. Here are some tips to keep in mind:

  • Water in the morning: This gives your plants plenty of time to absorb the water before the heat of the day sets in.
  • Be consistent: Try to water your plants on the same days each week, adjusting as needed based on soil moisture levels.
  • Group plants with similar needs: Place plants with comparable watering requirements together to make your watering routine more efficient.

I like to keep a simple calendar reminder on my phone to help me stay on track with my watering schedule. It’s a small step that makes a big difference in keeping my plants happy and healthy!

When to Adjust Your Watering Schedule

As the seasons change and your plants grow, their watering needs may shift. Here are a few scenarios where you might need to adjust your watering routine:

  • Seasonal changes: Plants typically require less water in the cooler months (in the fall and winter months) when they’re not actively growing. Conversely, they may need more frequent watering during the hot, bright summer months.
  • Changes in light: If you move your plants to a brighter or dimmer spot, their water needs may change accordingly.
  • Plant growth: As your plants grow larger, they’ll likely require more water to sustain their increased size.

It’s a good idea to test your plants’ moisture levels each time you water. By staying attuned to your plants’ needs and making small adjustments to your watering schedule as necessary, you’ll be able to keep your plants watered correctly.

Click here to subscribe

How to Water Houseplants Properly

Alright, you’ve figured out when to water your plants, but now you might be wondering, “How do I actually do it?” Don’t worry, I’ve got you covered! Let’s explore the best ways to keep your plants perfectly hydrated.

Are you a visual learner? Want to watch different watering techniques? Check out my youtube video below!

Choosing the Right Water Source

Not all water is created equal when it comes to your houseplants. Here are some tips for selecting the best water source:

  • Rain water or filtered water: These are the ideal choices, as they’re free from harmful chemicals and minerals that can build up in the soil over time.
  • Tap water: If you must use tap water, let it sit out for 24 hours before watering to allow any chlorine to evaporate.
  • Avoid softened water: Softened water contains salt, which can harm your plants in the long run.
  • Room temperature is best: Avoid giving your indoor plants water that is too hot or too cold. Room temperature (or around there) is best.

I typically water my plants with filtered water just because with all the kids I have around the house, if I leave a jug of tap water out to evaporate, it WILL get knocked over within 24 hours! Haha! So I have my plants’ water filter under my sink, ready to go whenever it’s watering time. So make sure that you find the type of water source that works for you and your plants!

You can check out my post on 5 Signs your Plants need Filtered Water if you’re unsure if you need to upgrade your tap water.

You can also check out my video where I tested my own water filter to see if it really removed the chemicals or not…

What is the Best Method to Water Houseplants?

But now it’s time for knowing exactly HOW to water. Here are the two best methods of watering:

  1. The Soak and Drain Method (also known as Bottom-Watering): Place your plant’s pot on a tray or basin and slowly pour water into the tray, allowing the soil to absorb the water from the bottom up. Stop adding water once the soil surface is moist. Let the plant sit and soak for twenty minutes to a few hours, depending on the size of the pot, then discard any remaining water in the tray.
  2. The Top Watering Method: Use a watering can with a narrow spout to slowly pour water over the top of the soil, starting around the edge of the pot and working your way inward. Keep watering until you see water beginning to drain from the bottom of the pot.

A lot of plant parents ask if they should be top watering or bottom watering their plants. And I know that bottom watering does have its benefits, but top watering is also very convenient. And top watering is how we water all of our outdoor plants, right?! So let me just say, the best way to water your houseplants is to simply make sure that you water your plant evenly, you add enough water to thoroughly soak the root ball, and you drain off any excess water (so you don’t have root rot issues!). As long as you follow these general rules, than either top or bottom watering can work for you. If you are still unsure, though, check out my video on Should you Top or Bottom Water your Plants?

two snake plants in pots sitting in tupperware full of water. hand lifting one snake plant out to drain excess water.

Whichever method you choose, be sure to water slowly and evenly, giving the soil time to absorb the moisture. And don’t forget to empty any excess water from the saucer or tray to prevent root rot!

Avoiding Common Watering Mistakes

Even with the best intentions, it’s easy to make mistakes when watering your houseplants. Here are a few common pitfalls to avoid:

  • Overwatering: As tempting as it may be to give your plants a little extra love, resist the urge to water too frequently. Stick to your watering schedule and always check the soil moisture levels before watering.
  • Underwatering: On the flip side, don’t let your plants go too long without water (Or avoid only giving them little water sips at a time). If you notice drooping leaves or dry soil, it’s time to give them a good drink.
  • Watering at night: Avoid watering your plants in the evening, as the cooler temperatures and lack of evaporation can lead to fungal growth and root rot.

By choosing the right water source, avoiding improper watering techniques, and steering clear of common mistakes, you’ll be well on your way to becoming an indoor plant expert!

Caring for Houseplants After Watering

Congratulations, you’ve successfully watered your houseplants! But wait, there’s more! Proper post-watering care is just as crucial as the watering itself. Let’s dive into how to keep your plants thriving after they’ve had a good drink.

Allowing Proper Drainage

Picture this: you’ve just given your beloved fiddle leaf fig a thorough watering, but you notice water pooling in the saucer beneath the pot. What do you do?

The answer is simple: remove the extra water. Allowing your plants to sit in standing water can lead to a host of problems, including root rot and fungal growth. Here’s what you can do:

  • Use pots with drainage holes to allow excess water to escape.
  • Empty saucers or trays beneath your pots after watering.
  • If your pot doesn’t have drainage holes, use a moisture meter to avoid overwatering, or consider repotting your plant into a container with proper drainage.

I once had a beautiful dracaena that I didn’t notice the water pooling between the nursery pot (with drainage holes) and the designer pot (with no drainage holes). By the time I noticed, the roots had started to rot, and I had to perform some serious plant surgery to save it. Learn from my mistake and always prioritize proper drainage!

Monitoring for Pests and Diseases

While proper watering is essential for healthy houseplants, it can also create an ideal environment for pests and diseases to thrive (especially if you tend to keep your plants on the moist side). So after watering, take a moment to inspect your plants for any signs of trouble:

  • Fungus gnats: These tiny flying insects love damp soil. If you notice them buzzing around your plants, let the soil dry out a bit more between waterings and consider only bottom-watering your plants for a time. This is the best method to keeping your plants clear of this annoying pest.
  • Mildew or mold: White, powdery spots on leaves or fuzzy growth on the soil surface can indicate a fungal problem. Ensure proper air circulation around your plants and avoid getting water on the leaves when watering.
  • Yellowing or wilting leaves: While these can be signs of overwatering, they can also indicate pest infestations or nutrient deficiencies. Inspect your plants closely and consider treating with a natural insecticide or fertilizer as needed.

By keeping a watchful eye on your plants after watering, you can catch any potential issues early and take action to keep your leafy friends healthy and happy.

Well, there you have it, folks! You’re now equipped with the knowledge and skills to become a true houseplant watering pro. From understanding your plants’ unique needs to mastering the art of the perfect pour, you’ve got this!

Remember, the key to success is to pay attention to your plants. They’ll tell you when they’re thirsty, and they’ll show you when they’re thriving. Trust your instincts, and don’t be afraid to make adjustments as needed.

hand holding dry soil above houseplant in pot

Watering your houseplants may seem like a simple task, but it’s one of the most important aspects of plant care. By taking the time to understand your plants’ needs and develop a consistent watering routine, you’ll be rewarded with a lush, vibrant indoor jungle that brings you joy and tranquility.

Conclusion

So to wrap everything up… if you know what type of plant you own and you know what kind of watering it likes, and then you follow these general guidelines to water the correct way, and if your plant is still dying… Well then you at least know that it isn’t because of water. Try something else. And check out my post on 10 quick tips to keep your indoor plants alive! Or join the Facebook group, Houseplants for Plant Killers and let me know what’s going on! I absolutely love helping people with their plant questions!

Happy digging!

P.S. – For more watering specifics, check out my posts below!

How to Water Air Plants the RIGHT way!

How Often should I water my Succulents?

FAQs

Alright, you’ve made it through the article, and you’re feeling pretty confident about your houseplant watering skills. But wait, what’s that? You still have a few lingering questions? Don’t worry, I’ve got you covered! Let’s dive into some of the most common queries about watering houseplants.

How often should I water my houseplants?

As a general rule of thumb, most houseplants prefer to be watered when the top inch of soil feels dry to the touch. This can range from once a week to once every few weeks, depending on the plant and the conditions in your home.

The best way to determine when to water is to check the soil moisture levels regularly and get to know your specific plants’ individual needs to know if you’re giving them enough water. With time and practice, you’ll develop a sixth sense for when your leafy friends are ready for a drink!

Is tap water safe for watering houseplants?

In most cases, tap water is perfectly fine for watering your houseplants. However, there are a few things to keep in mind:

  • If your tap water is heavily chlorinated, let it sit out for 24 hours before watering to allow the chlorine to evaporate.
  • If you have a water softener, the added salts can build up in the soil over time and harm your plants. Consider using rainwater or filtered water instead.
  • Some plants, like carnivorous plants and certain orchids, are more sensitive to the minerals in tap water. For these picky plants, it’s best to use distilled or rainwater.

And I wanted to point out last that if you’re unsure about the quality of your tap water, you can always have it tested or opt for a safer alternative like filtered or rainwater.

What are the signs of overwatering and underwatering?

Overwatering and underwatering are the two most common culprits behind houseplant woes. Here’s how to spot the signs:

Overwatering:

  • Yellow, mushy, or falling leaves
  • Moldy or smelly soil
  • Fungus gnats flying around the plant
  • Brown, soft, or rotting roots

Underwatering:

  • Drooping or wilting leaves
  • Crispy, brown leaf edges
  • Dry, hard soil that pulls away from the pot’s edges
  • Slow growth or leaf drop

What does it mean to water thoroughly?

This is a phrase that plant people LOVE to throw around and it can make beginner plant parents confused… What does it mean to water a plant thoroughly?! But all we are saying is to water around all sides of the pot, with a large enough amount of water to soak into the entire rootball (from top to bottom). Then as long as you have good drainage, your house plants should drain off any extra water and you will be left with the perfectly watered plant!

watering can spout adding water to ivy plant sitting in sink

If you notice any of these signs, don’t panic! Adjust your watering routine accordingly and give your plant some time to recover. With a little TLC, most houseplants are remarkably resilient and can bounce back from the brink of disaster.

Click here to subscribe

How to Repot a Boston Fern in 5 Simple Steps!

Is it time for you to repot your boston fern? I get it. This can be a daunting job…. Especially if this is your first time repotting a fern. But no worries! Just follow these 5 easy steps and you’ll be a fern-potting pro in no time! 

Just FYI…. these repotting steps will work for many different types of ferns, including sword fern, Kangaroo palm fern, rabbit foot fern, Maidenhair fern, etc. This particular post will focus on Nephrolepis exaltata, or the boston fern. But these methods can also be used for all other similar fern types!

Click here to subscribe

Step 1: Soak the Root Ball

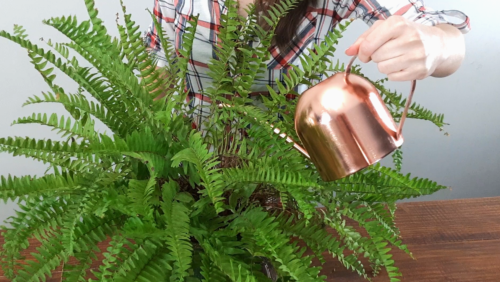
To repot your fern, you’ll first want to soak the root ball. You are trying to get the soil lightly moist. This will make the soil and the roots a lot easier to work with during the repotting process. To do this, I recommend you water it thoroughly (until the water has penetrated the soil and is running out the bottom). Then let it sit for about 15 minutes to let any excess water run off. Now you’re ready to got your hands dirty!

Boston Fern Plant with copper watering can - watering plant

Step 2: Remove from the Pot and Loosen the Roots

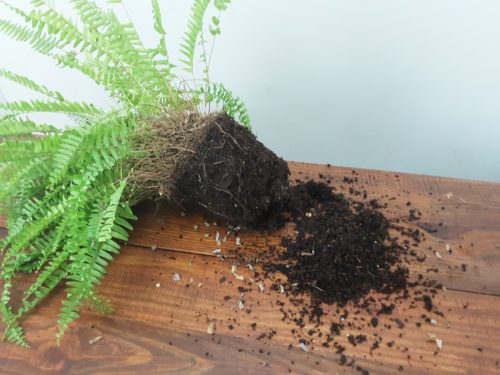
Now that your soil is moist, it should come out of your pot fairly easy. Any difficult plants can be soaked for longer, or turned upside down to let gravity help you out. It is NOT a good idea to pull on the fronds, as this can damage your plant. If all else fails, just soak it for longer!

Once it’s out of the pot, you will need to loosen up the soil and “massage” the roots. This can be done by running your hands up and down the sides of the root ball, loosening the soil and the roots that are on the outside. You’ll also need to rub your hands along the bottom of the root ball to loosen any circling roots at the base. Any large circling roots will need to be either de-tangled or clipped.

A picture of loosened up and massaged roots of a boston fern plant

If your roots are especially root bound, you dono’t need to spend hours massaging your soil. Instead, take a sharp knife (or I sometimes use my pruning shears!) and “score” the sides of your rootball.

If you don’t know what scoring is, it’s just a fancy word for running your knife up and down the sides of your root ball. This cuts up any roots that might be circling the pot and its the lazy-man’s way to quickly repot a fern, while still getting great results!

Step 3: Divide if Necessary

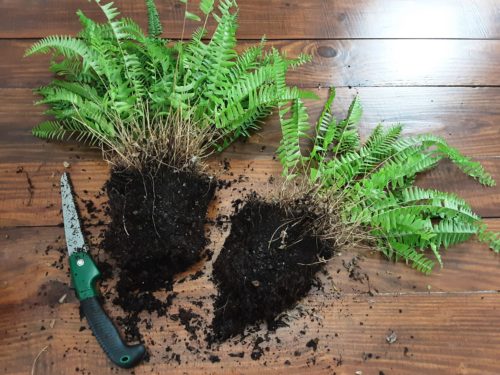
 If your fern looks like it has more roots than soil then you should divide your plant into two smaller plants.

To divide your plant, you can either massage the soil loose enough that you can pull sections apart, or you can simply cut it. Then to cut it, youll need a large sharp knife or a small, serrated saw. Use caution at all times and please wear gloves! To divide your fern, simply cut the root ball into the pieces you want. Just be careful that you dont damage the fronds in the process. Then place each new plant into a different pot. The new ferns might look slightly bare on one side, but don’t worry… in time there will be new growth that fills in the rough side. 

A picture of a boston fern plant being divided into 2 sections

Step 4: Repot in a Slightly Larger Pot

When you repot your plant, (or possibly both boston fern plants), the new pot should only be a few inches deeper and wider than your current pot (or if dividing, your pot should be a few inches deeper and wider than your current rootball.)

If you place it in a pot that is too big, you could run into problems with root rot. Also, make sure that your pot always has drainage holes at the bottom. If you prefer the decorator pots, you can place your fern in a standard nursery pot that has good drainage, and then place this pot inside your decorator pot. I actually prefer this method because it reduces any water damage to my tabletops and windowsills.

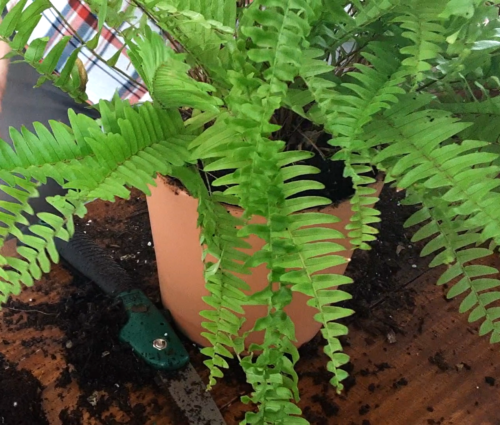
Then simply place your fern into its new home and firmly press some fresh potting mix around it.

boston fern plant in new terracotta pot that is slightly larger than rootball

Step 5: Give Special Care for a few Days

When you’re done repotting your fern, you will need to water it again. You should do a thorough watering by placing it in a sink, tub, or outdoors, then add water until there is water dripping out the bottom of the pot. Then, once it has stopped dripping, place it in a location where it will stay out of direct sunlight for the next few days. This gives your plant a few days to recover and to seal over any damaged roots. 

Boston Fern Care

Boston ferns grow best with indirect sunlight and a humid climate. They also prefer an east or west facing window, where they can get a good amount of light but where they will also stay out of the hot afternoon sunlight. You need to be aware that the more light your fern receives, the more it will grow, but the more humidity and moisture the little guy will also need. 

Humidity

The best way to provide the high humidity that your fern needs is to use a room humidifier. These work great if you live in a dry climate or you have multiple humid loving plants. However, they can also be a bit expensive and will add humidity to your entire room.

Another way to increase humidity levels is to place your boston fern on the pebble tray, a.k.a. on a tray filled with pebbles and water. The relative humidity will increase as the water evaporates. This can also be simulated through regular misting of your fern. 

The final way to increase humidity levels for ferns is to place it in a group of other houseplants. While not as effective as the pebble method or adding a humidifier, grouping house plants together will add a small amount of extra moisture in the air. 

Fertilizer

You can use any liquid fertilizer that is recommended for houseplants, as long as you follow the instructions and apply the fertilizer at the recommended rates. Only use fertilizer in the spring and summer months, or during the plant’s growing season. I don’t recommend fertilizing your fern in the winter months, as this can cause a chemical burn to the root system. Instead, wait for early spring when you start seeing new fronds emerging from the root ball.

Yellow Leaves

Yellowing leaves is a common problem among indoor ferns and it can be caused by several things. I would suggest you first check your watering habits. Is the plant often dry? If so, then you might be having issues with too little water, too little humidity, and possibly even spider mites (they thrive in dry conditions!). If your fern is not dry, but is kept consistently moist, then I would recommend checking the plant’s roots for any fungal diseases or root rot. These are the most common reasons why fern leaves turn yellow.

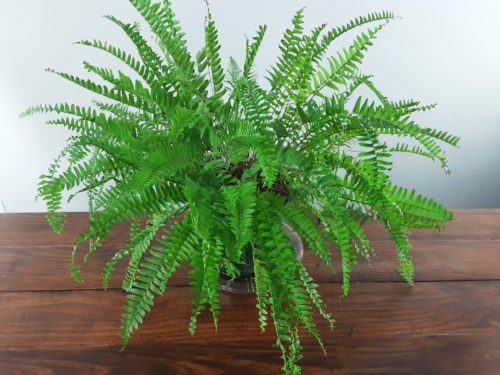
image of boston fern plant on wood table

Frequently Asked Questions

Q1 What kind of soil do boston ferns like?

Boston ferns need moist soil that also drains well. I would recommend avoiding soil mixes for cacti and succulents and instead go with a regular indoor plant mix. You can also mix your own soil with perlite and either peat moss or coconut coir. Mix 2 parts potting soil to 1 part perlite and 1 part peat or coconut coir. Then if your plant is drying out too quickly, increase the amount of peat/ coconut coir.

Q2. Do Boston ferns need deep pots?

Boston ferns do not need unusually deep pots. Their depth should approximately match the fern’s height. If your pot is too deep, it could potentially cause a build-up of excess water at the bottom of the pot. This could cause root rot. 

Q3. How do you know when to repot a fern?

Ferns usually need to be repotted every year or two depending on its rate of growth. Your first sign it needs to be repotted is if it is drying out quickly. You shouldn’t need to water it more than once a day. Also, if you can see lots of roots protruding from the top of the soil, then it is definitely time to get him into a new pot and maybe even consider dividing it. 

Q4. What kind of pots do ferns like?

The first type of pot that ferns love is self-watering pots. These give them lots of consistent water, (ferns are heavy drinkers). These are the best for small ferns. However, for a fern that needs a larger container, plastic or ceramic glazed pots are best for indoor ferns. If growing outdoors, clay pots are usually your best bet. Then, if you plan on placing your fern in a hanging basket, I would recommend you use a ceramic pot. This is because plastic pots will heat up more than ceramic or clay pots, and this may cause stress on your plant. You will also need to increase the amount of water you give to your fern in a plastic pot. But either way, make sure your pot has good drainage holes and that the size of pot fits the size of your plant! 

That’s it for my tips on how to repot a Boston fern in 5 easy steps. For more awesome tips and personalized help, join my facebook group “Houseplants for Plant Killers”! And if you liked this post, please share it in your favorite social media group. You never know which of your friends are secretly struggling with a fern! 

Happy Digging!

3 Simple Steps to Grow Roses from Cut Flowers

Grow Roses from Cut Flowers Featured Image

Hey everyone! And welcome again to another awesome post! Today I wanted to talk about how you can actually grow roses from cut flowers! Like actual rose bushes from your bouquets! Let’s get started!

So first, I have to admit, when I heard about this cut flower-to-plant idea, I was pretty skeptical. I did some research and saw that yes, some people were actually having success growing their roses into plants, and after several months of testing, I finally did as well. But you have to do it right, or you’ll just end up with a bunch of dead stems…

Here are the 3 steps:

  1. Prepare your Cutting
  2. Root in Water
  3. Transplant in Soil
Click here to subscribe

Step 1: Prepare your Cutting

In order to be successful, you NEED to have a good, healthy cutting. Select a cut flower that hasn’t begun to wilt yet. Also, make sure that the stem doesn’t have any brown portions in the middle.

For this post, my cutting’s leaves had a bit of yellow in the veins. I normally prefer them to not have any yellow in the leaves, but they were the only cut flowers I had at the time… that being said, I only kept the best leaves on each stem…

How to Grow Roses from Cut Flowers - Step 1: Prepare your Cutting

Next, cut off the main flower. I know this can be hard to do, but trust me… the cutting won’t have enough energy to continue to bloom and to grow a root system.

Also, try to cut just above a node on the stem. (A node is where there is a growing point… usually where a set of leaves connect to the stem…)

Cut off the flower
Nodes

Once you’ve cut off the flower, find the section of the stem that is the older, more woody section. The section of young growth that connects to the actual flower WILL NOT root. So make sure that you use the older base of the stem and not the young, flexible stem at the top.

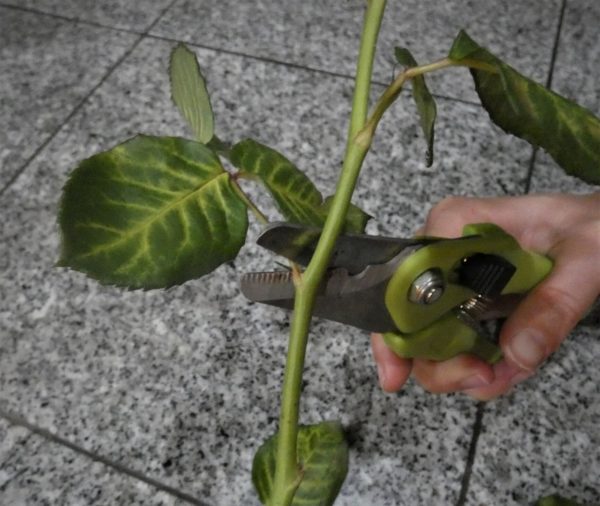
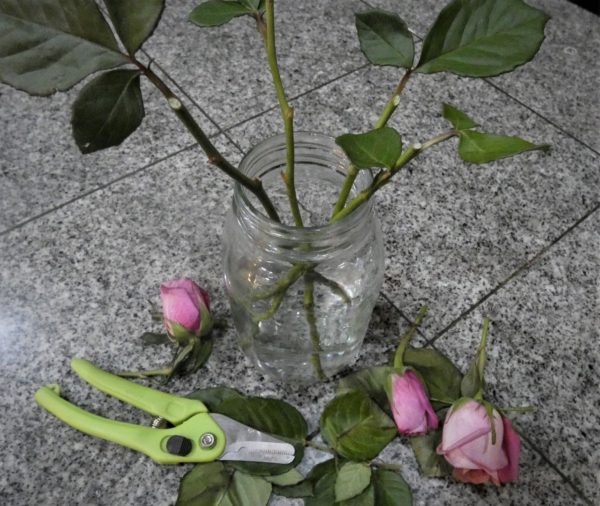
Remove the majority of the leaves from your stem. I like to leave 1-2 branches of leaves, but this should only contain about 2-3 leaves in total. If there are any large leaves, cut them off, or trim them to be smaller.
Cut off leaves

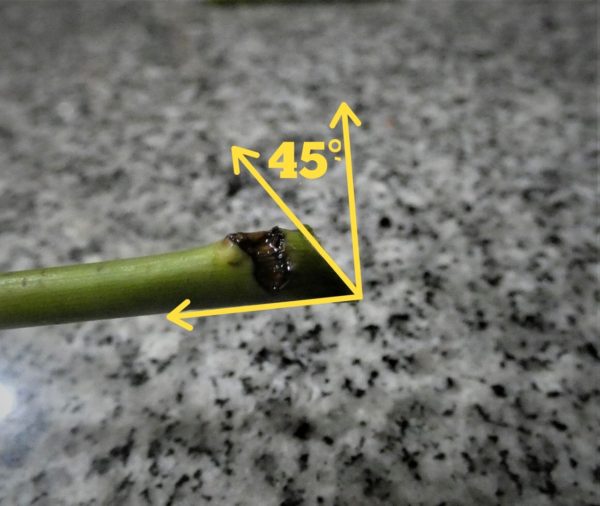
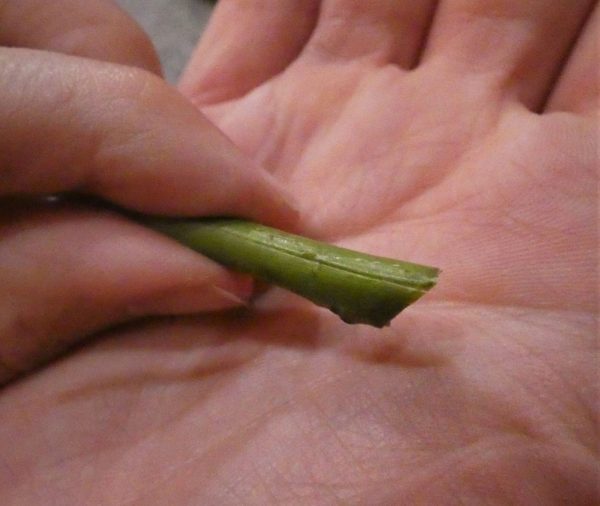
Then, cut the bottom of your stem at a 45 degree angle. This angle will maximize the area of stem that is in contact with your water and will maximize the area that is available to root!
Cut end of stem
How to Grow Roses from Cut Flowers Step 1: Cut base at 45 degree angle

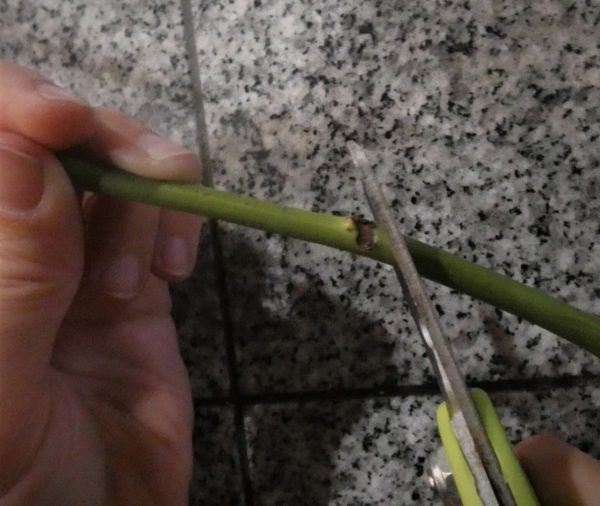
Last, cut light, superficial slits (just a scratch) up the sides of your stem. This will also increase the area that is available for more water to enter the plant and for more roots to form!

Cut superficial slits into base

Step 2: Root the Cutting

Over the past year or so, I’ve experimented with several different types of rooting methods: in soil, in straight water, and in a hydroponic-style system. Rooting stems in soil proved to be difficult to keep the soil moisture levels evenly and lightly moist, so the BEST way to root stems was definitely in straight water or using a hydroponic system.

To root your cuttings in water, simply place it in a thin, tall container of water and make sure that all of your leaves stay dry. Switch out the water every few days to keep it aerated and free from bacterial growth. Then simply wait several weeks for either roots or scar tissue to form.

Grow Roses from Cut Flowers Step 2: Root in Water

A hydroponic system also works well for rooting our cuttings. Watch the video below for an easy, effective way to root your cuttings using a plastic pot, perlite, and a large plastic bag. Just be sure to change out your water every few days with this system as well.

Step #3: Transplant in Soil

Once your cutting has rooted, transplant it into a pot with soil. To have a successful transition, keep the soil from completely drying out in between watering for the first few weeks. The longer it has been in the soil, the more dry it can stand to be between watering. Your final transition should be to let your soil dry down to the top 1 inch in between watering, but this should only be done once the cutting has fully rooted (from several weeks to months depending on how many roots your cutting had when it was placed in soil).

If you are planning on planting your cutting outdoors, then make sure that it has fully rooted and has some new growth before you move it outdoors. Then, place it outdoors for only a short period of time. Then slowly increase the time it is outdoors until it is used to being outdoors 24/7.

One more thing to consider is that your variety of rose might not do well in your particular climate. Try to keep it out of hot, direct sunlight if you live in hot climates. On the flip side, bring your plant indoors or wrap it to give it additional protection from freezing temperatures. If you want to know which rose varieties will do well in your area, check out this map that shows which roses do best in different regions of the USA! (For all my readers outside the USA, you can still compare the USA hardiness zone and climate to your own local conditions!)

That’s it! And remember, the success rate is going to be low because of the anti-rooting chemicals they use on roses before they are shipped. This is why rooting your cut roses will take a lot longer and will be less successful than if you were to simply root a cutting from a bush. If you’re lucky enough to have a cutting though, check out my post on the Easiest Method to Grow Rose Bushes from Cuttings! Good luck, and let me know in the comments how it goes! Then feel free to subscribe to my email list to receive even more awesome tips and instructions for your plants!

Happy Digging!

Click here to subscribe
How to Grow Roses from Cut Flowers Pinterest Image

3 Easy Ways to Propagate Christmas Cactus

Hey everyone! Welcome back to The Girl with a Shovel! Today I wanted to tell you all about Christmas Cactus propagation: when and how to successfully propagate your Christmas cactus!

Note: This post is written for Christmas cactus, however, everything discussed can also be used for a Thanksgiving cactus as well. Propagation methods are the same for both.

The springtime is usually the best time to propagate your Christmas cactus! You want to make sure that it is several weeks after the bloom time and at least a month before the fall dormancy period (this is when you should be giving it light treatment to stimulate Christmas blooms).

There are 3 different ways to propagate a Christmas cactus. These are: upright in soil, flat in soil, and in water. But first I wanted to cover how to get a healthy cutting, and then we will get into these three different rooting methods.

Click here to subscribe

Getting a Healthy Cutting

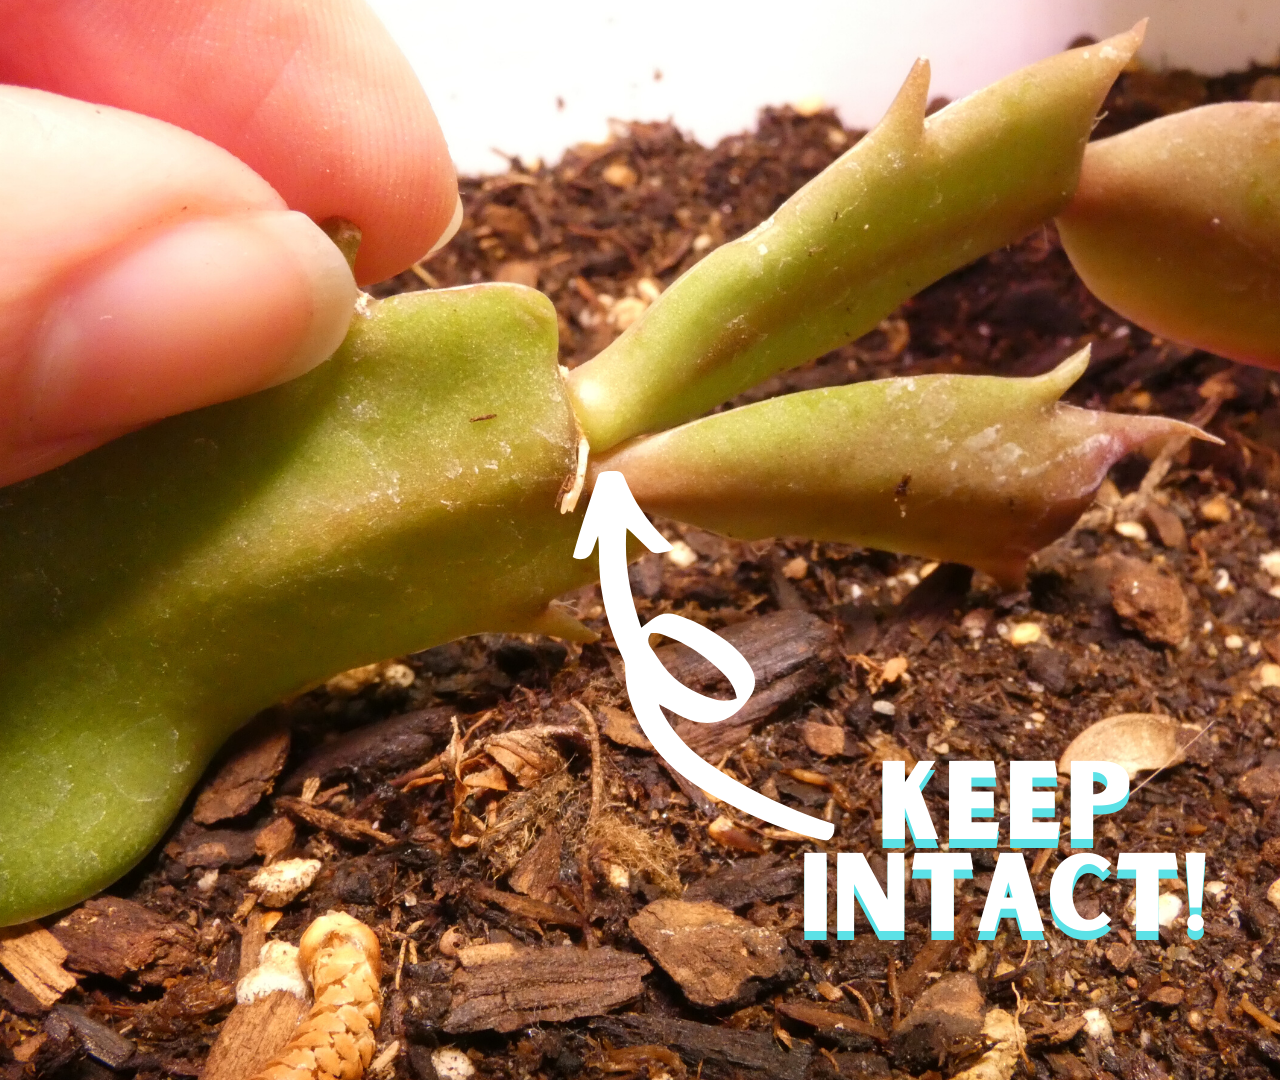
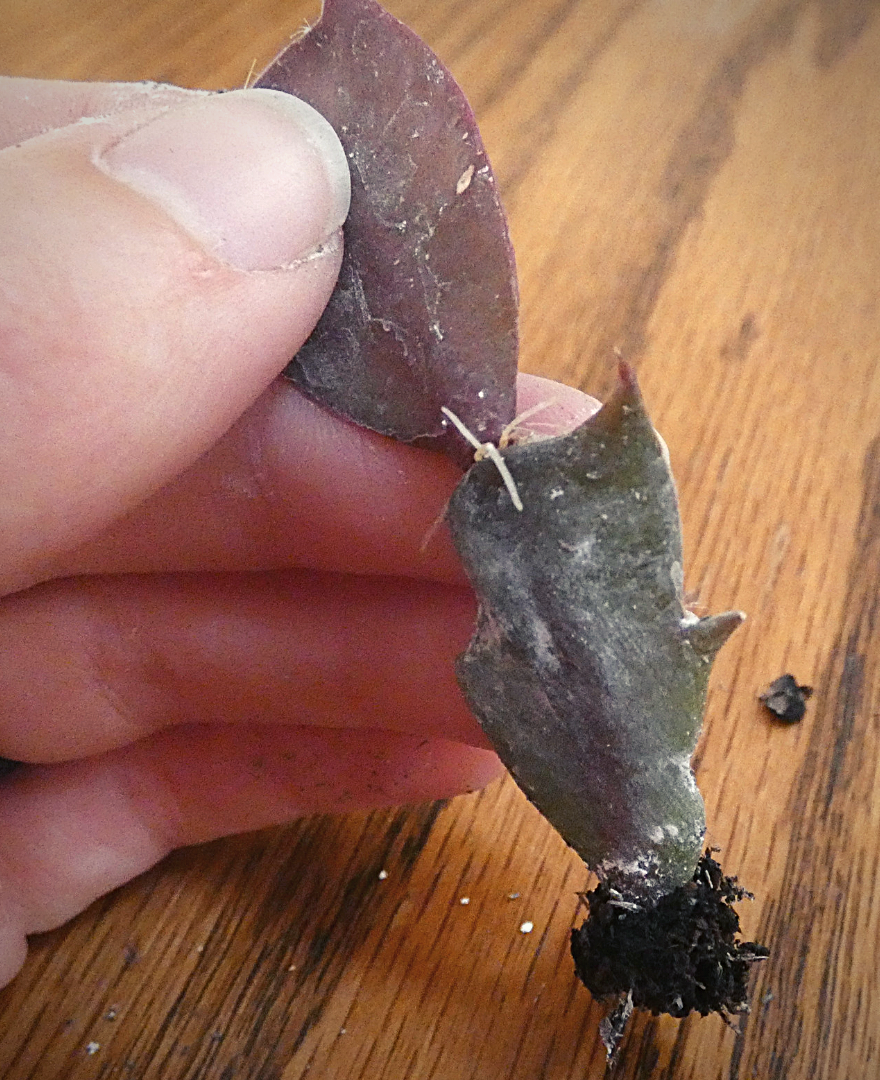
Each Christmas cactus branch is made up of several sections (or pads) linked together. At the very bottom of the pad (where it connects to another pad) is where you can get roots to grow. But the tricky part is that you need to separate the pads without tearing the bottom of the pad. If the bottom of the pad is damaged in any way, then the cutting will most likely fail.

If you’ve ever propagated succulent leaves, then you’ll notice the process of pulling off the leaves is very similar to pulling off the cactus pads. For a visual of good versus bad leaf cuttings, refer to my post Propagating Succulents.

The easiest way to ensure you get the complete, undamaged cactus pad is to gently twist it away from the bottom pad. By gently twisting the top pad, your cactus pads should easily come apart – no tearing involved. Got it?! Now let’s work on planting your cutting…

How to take a successful cutting for Christmas Cactus propagation.

Method #1: Propagating Upright in Soil

This method is the best if you’ve got some large cuttings (around 4 pads each) and if you have good, whole ends on your cutting (aka you took good cuttings without tearing the bottom of the pad).

Take your cutting and lay it in dry location for 1-2 days. Be sure to keep them out of direct sunlight as well. This resting period is important as it helps the plant transition from growing shoots to thinking about growing roots.

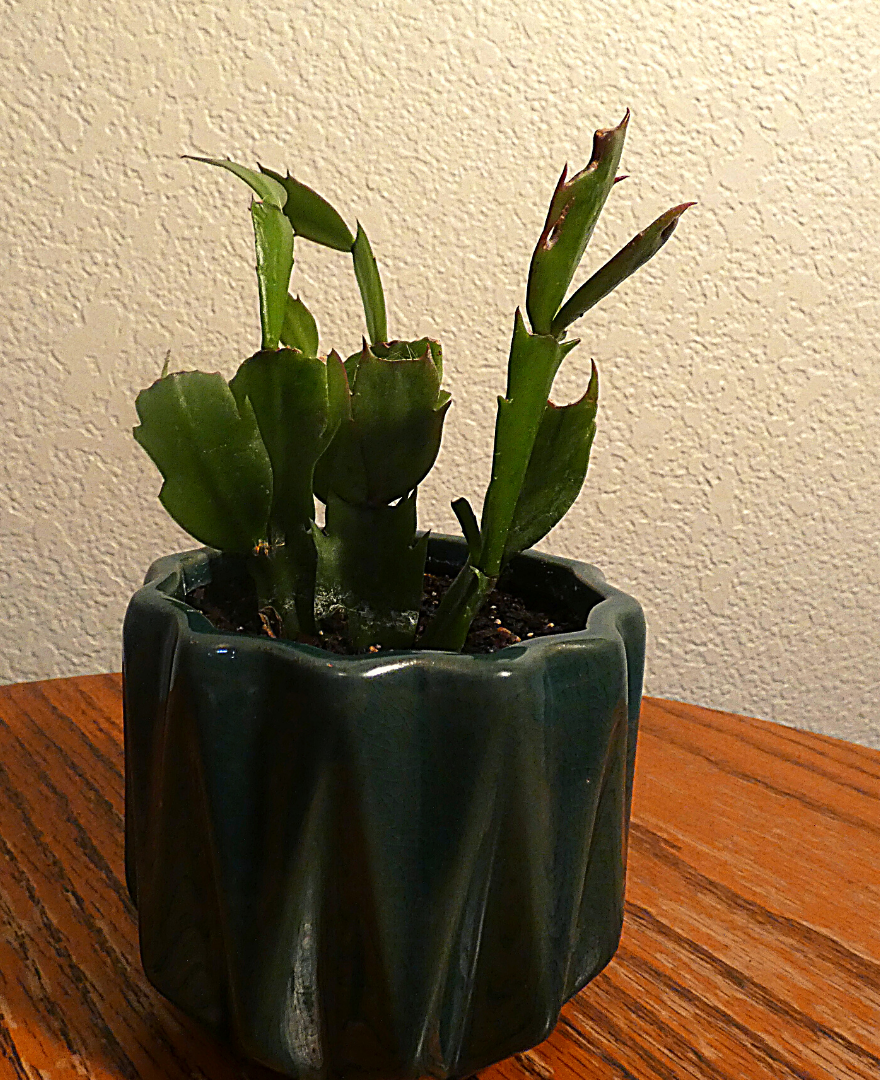
After 1-2 days, place your cutting into fresh potting soil (cactus & succulent soil mix is best), and place the end far enough down that the soil covers the bottom pad. Then water it lightly, letting it just barely dry in between watering. Give it 2-3 weeks for roots to form.

Low on cactus and succulent soil? Here’s how to mix your own! DIY SUCCULENT SOIL RECIPE!

Method #1 Summary

  • Used for large cuttings (4 pads each)
  • Dry for 1-2 days
  • NO direct sunlight
  • Use light, well-draining soil
  • Keep LIGHTLY moist
Christmas Cactus Propagation Method #!: Upright in Soil

Method #2: Propagating Flat (On Top of Soil)

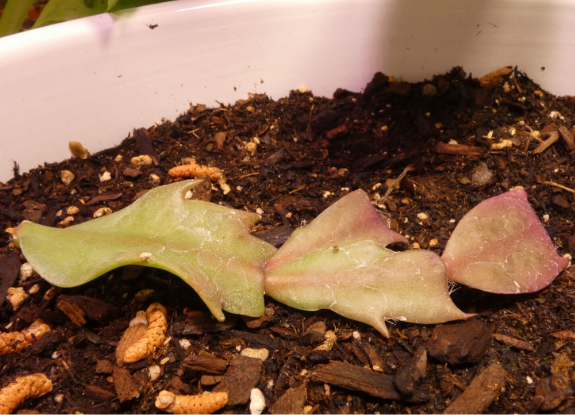
This method is best for you if you want to do soil propagation, but you have smaller cuttings (2-3 pads), or if your cutting’s bottom pad has been damaged in any way. I personally used this method for a section of 2 pads that were cut off my parent plant and was missing the bottom section of the lower pad. (I wasn’t the one who took the cutting, I swear! Haha!)

Simply dry out the cutting for 1-2 days (again avoiding direct sunlight). Then, instead of planting in the soil, you will place the cutting horizontally on top of the soil. This also needs a light soil, such as a cactus & succulent soil mix. Make sure that there is good contact between the soil and the point where the 2 cactus pads meet. This is where the new roots are going to come from. Then keep it lightly moist and your cutting should root within 2-3 weeks.

A special precaution for this type of rooting… because the cactus pads are laid horizontally against the soil, it increases the chances that your cactus pad gets too wet and begins to rot. To avoid this, try to only get the soil wet when you water your succulent. Try to keep the actual cutting dry. If you find this difficult, then I would suggest you use one of the other two propagation methods.

Method #2 Summary

  • Use with shorter cuttings (2-3 pads)
  • Let dry for 1-2 days
  • NO direct sunlight
  • Lay horizontally on top of the soil
  • Use light, well-draining soil
  • Keep LIGHTLY moist
  • Get soil wet, but keep cutting relatively dry
Shorter cuttings with no direct sunlight laying horizontally on top of the soil

Method #3: Christmas Cactus Propagation in Water

Christmas cactus propagation in water has been proven to be the fastest way to propagate cuttings. Watching the video below, you’ll see how Christmas cactus cuttings in water grow roots weeks before the Christmas cactus in soil. However, when you root your cuttings in water, you will still have the extra step of transferring your cuttings to soil, which can be a delicate process. So be aware of the advantages and disadvantages of each method and choose your propagation method accordingly.

The key to having success with water propagation is to have a good callus. To do this, first, get a good cutting by following the instructions above. Then, make sure that you leave it out to dry. Keep it out of direct sunlight and let it dry to the point that the leaf gets thinner, but put it in water before it gets any wrinkles. If it starts to get wrinkle lines, then you’ve left your cutting out a bit too long.

Once your cutting has dried enough (but not too much!), it will have formed a good enough callus that you can put it in water without the risk of it rotting. If your cutting does rot, then this is a sign that it didn’t form a good enough callus and it should be left out to dry longer next time.

Leave your cutting in water for several weeks, or until it has roots that are about an inch or two in length. While your cutting is in water, make sure that you change out its water every few days. This keeps the water fresh and cuts down on the chances that you will have problems with bacterial rot on your cuttings or on your roots.

Once your cuttings are ready to pot, use a well-draining soil (such as cactus & succulent soil mix, or regular soil mixed with perlite), as well as a well-draining pot. This will be extremely important in successfully transitioning your plant from water to soil.

Transitioning from Water to Soil

As you transition your cuttings, plant them in soil just like you would with any other cutting, then water it thoroughly. Keep it in a warm location with a fair amount of indirect light. At this point it can also withstand some direct morning or evening sunlight as long as temperatures don’t get too hot.

Let your plant’s soil only get slightly dry before watering it again. This means that you will be watering these cuttings a lot more than your regular Christmas cactus. Slowly decrease your watering until your plant can withstand the soil becoming almost dry between watering. This transition should be over the course of a few months and will slowly transition your plant from being in water to being in soil.

Method#3 Summary

  • Let cuttings form a callous
  • Switch out water frequently
  • Use well-draining soil
  • Keep moist when potted in soil
  • Slowly transition from water to soil
Letting cuttings form a callous and kept moist in a pot in soil

So that’s how to have successful Christmas cactus propagation! Remember to choose the method that is best for your situation. And let me know how it goes! Leave any additional questions or comments below. And feel free to join my email list for more awesome tips on how to keep your plants alive and healthy!

Happy Digging!

Click here to subscribe
Christmas Cactus Propagation Pinterest Image

9 Things to Avoid when Planting Strawberries

How to Plant Strawberries Cover Photo

Are you looking to plant strawberries this year? Maybe you’ve tried before and for some reason you didn’t get the great harvest you wanted. Or maybe you’re simply new to this and want a few extra tips. Either way, I understand how sometimes we don’t need people telling us how to plant strawberries. Instead, we need to know what you could be doing wrong, and how to avoid it! So here are the 9 things to avoid when planting strawberries. Because by avoiding these things, you are sure to have an amazing harvest!

Click here to subscribe

#1: Avoid Planting Strawberries from Seed

It can be a lot cheaper to plant your strawberries from seed, but if you want to actually harvest strawberries, then you will be better off purchasing bare-root or potted plants. This is because it will take at least 2 years of nurturing your seedling before it will finally give you strawberries. I don’t know about you, but this is a long time when compared to your potted plants producing strawberries in as little as 2 months…

Also, if you use seed from a store-bought strawberry, then you won’t know your strawberry variety. I’ll explain a bit more about why this is important in #4. So go ahead and just pay the extra couple of dollars for an established plant. You will be extremely glad that you did.

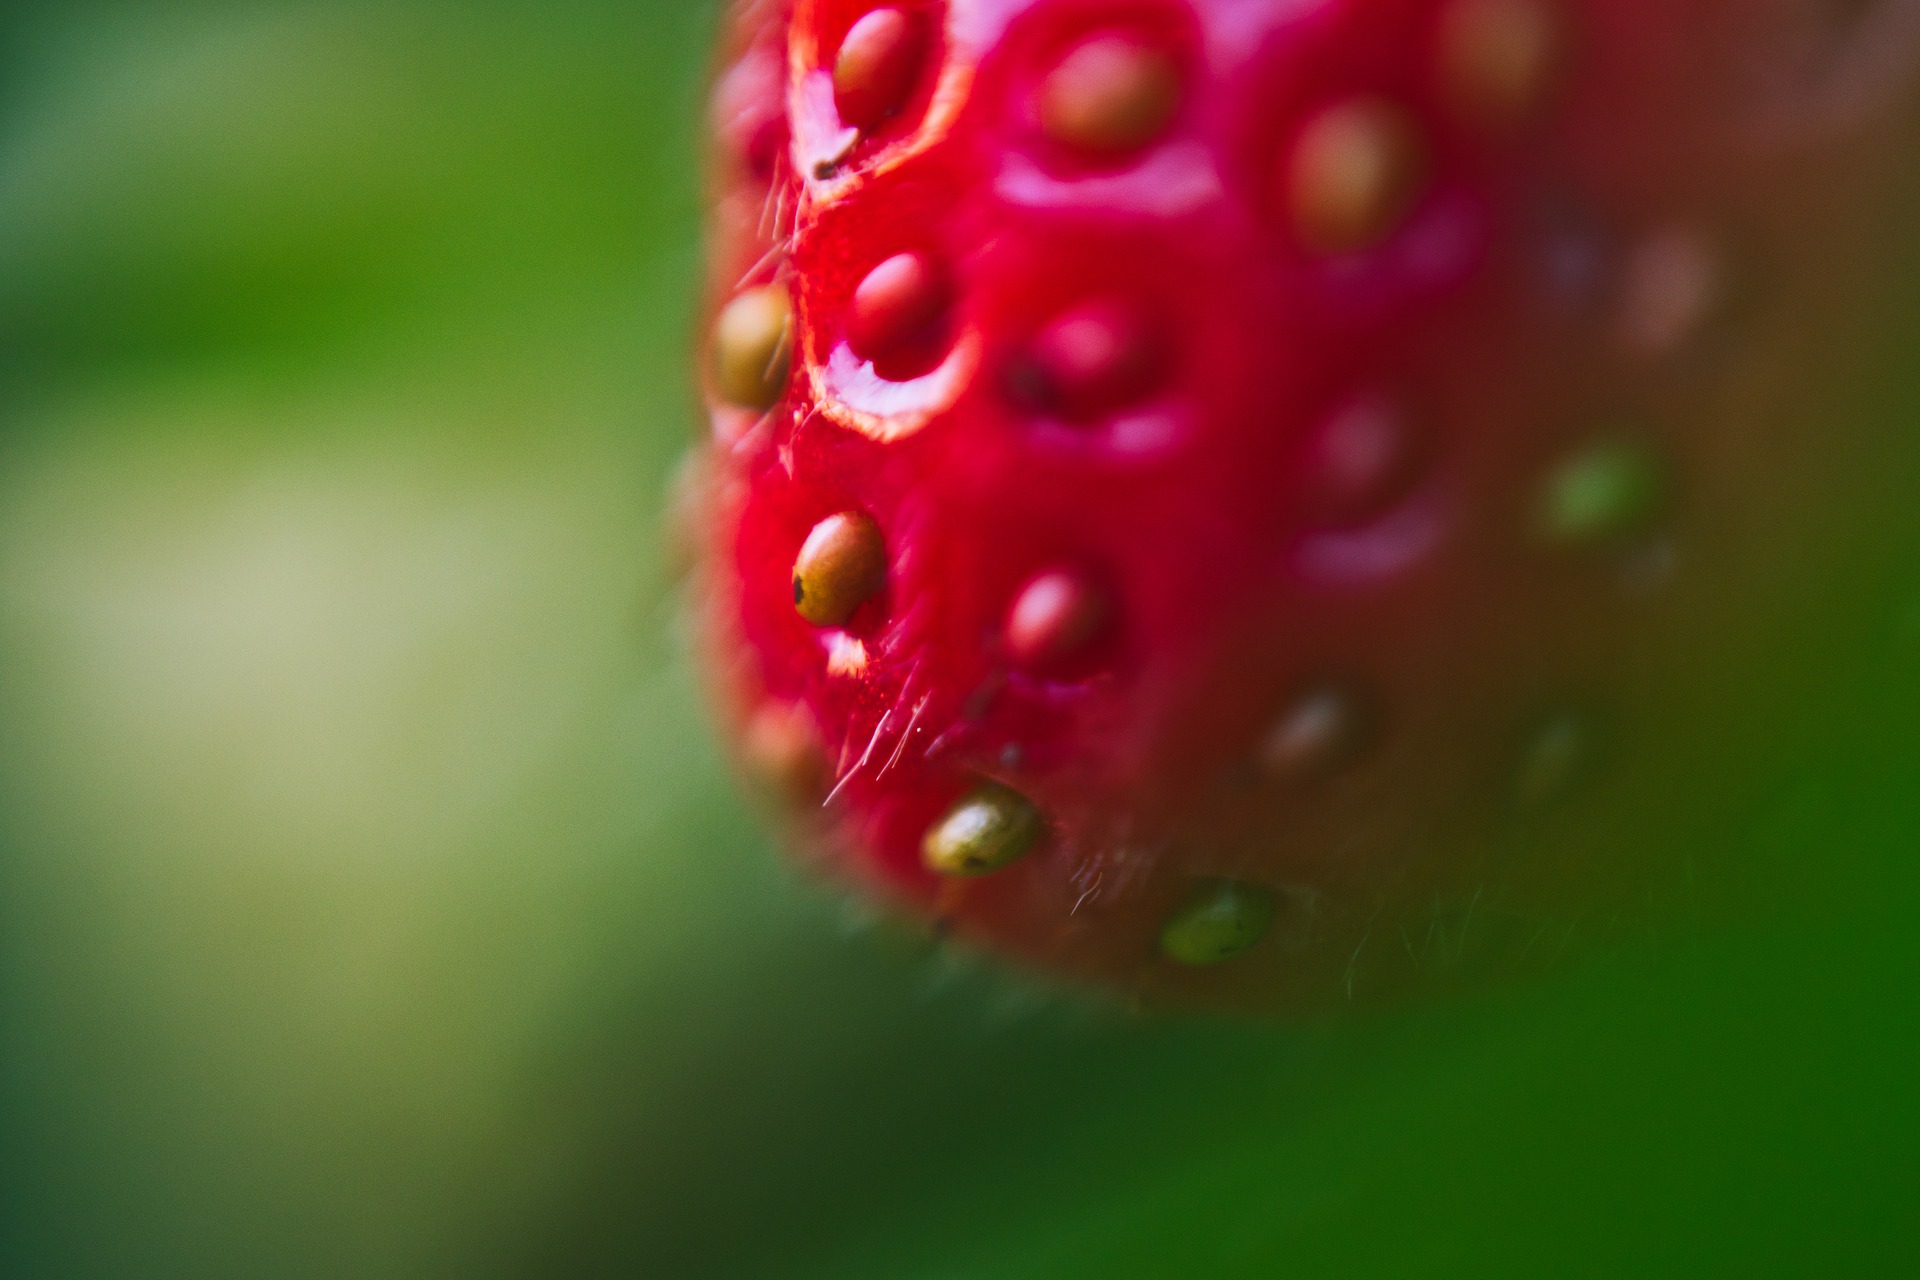
Close up picture of strawberry seeds

#2: Avoid Planting Strawberries in Pots

If pots are your only option, then go for it. However, if you live in a climate that gets below freezing, then any unprotected potted plants will freeze. This means that they will not come back in the winter. Because of this, it is much smarter to plant them in the soil where they have extra protection from the cold. This will ensure that they come back year after year.

If you HAVE to grow in pots, then once temperatures begin to drop and your plant is done producing, place it somewhere it will be protected from extremely cold temperatures. A lot of people choose to place their pots in an unheated garage. Also try to insulate it from the cold using straw, mulch, old blankets, etc. This will keep your strawberries’ roots from freezing and will ensure that they come back the next year.

Strawberry planted in a pot

#3: Avoid Poor Soil

Strawberry plants need a lot of nutrients in the soil in order to maintain high production of strawberries. If you plant in poor soil, then you won’t get as many strawberries. To improve your soil, mix in some compost before planting and consider adding a vegetable fertilizer halfway through the growing season.

Strawberry planted in soil

#4: Avoid Unknown Varieties

You need to know what type of strawberries you have because it will ultimately determine the size of berry and the size and time of harvest. These are your three main options:

June-bearing Strawberries

These plants produce one large harvest of strawberries (usually in the early spring). Then, they produce runners for the rest of the season. This variety is best if you need a large harvest of strawberries all at once. These strawberries are usually used to make jams, pies, etc.

Ever-bearing Strawberries

These varieties will usually give you two harvests: one in the early spring, and one in the early fall. They can also produce a few strawberries in between these two larger harvests. One downside to ever-bearing, however, is that they don’t produce as many runners because they are busy producing fruit. These varieties are best for people wanting some larger harvests, but also want some continuous fruit throughout the season.

Day-neutral Strawberries

These strawberry varieties are technically in the ever-bearing group, but they produce a more even, continuous supply of strawberries throughout the growing season. These are also a great choice for people who want a lighter, but continuous supply of strawberries.

Flowering Strawberries

#5: Avoid Planting Strawberries Too Deep or Too Shallow

These plants are extremely picky when it comes to rooting depth. If you plant it too deep (covering the crown of the plant), then it is likely to rot. On the other hand, if it is planted too shallow, the roots are likely to dry up (and strawberry plants do not like dry roots). I try to plant my strawberries at the depth that they are already growing in their pot.

If you are planting bare-root plants, then find the little skirt where the leaf stems are attached to the base of the plant. This little skirt of plant material is the crown. Plant it at a depth where the soil will cover about half of the crown. Make sure to watch the video below to see the correct depth to plant your bare-root strawberries.

Someone holding bare root strawberry

#6: Avoid Planting Too Close Together

Each variety has a specific spacing recommendation. Follow this recommendation. If you place your plants too close together, it decreases the air flow around your plant’s base and lower leaves. This can increase your chances of having a disease problem.

You also want to keep in mind any runners that might develop. If your plants are too close together, then you will need to remove the runners in order to keep your plants from crowding your space.

A little unsure of plant spacing? Check out this awesome video that explains your optimal plant spacing, as well as shows you how to plant your bare-root strawberries at the correct depth!

Strawberry plant spacing

#7: Avoid Planting Near These…

Avoid growing your strawberries next to any plants in the Brassica family. These include cabbage, broccoli, Brussels sprouts, cauliflower, kohlrabi, and kale. These plants will have stunted growth when grown next to each other.

You should also avoid planting your strawberry plants next to tomatoes, potatoes, peppers, melons, mint, or eggplants. These plants are all susceptible to the same diseases as your strawberry plants. So by planting near these other plants, or in a bed that has been growing these plants in the past several years, it will increase your chances of having diseases in your strawberry plants.

For a list of plants that would be good to place near your strawberries, check out Balcony Garden Web’s post, 13 Best Strawberry Companion Plants.

broccoli bearing plant

#8: Avoid Letting your Plant Dry Out

Strawberry plants like to stay a bit on the moist side. If your plants get too dry (especially in the hot summer temperatures), then it will stop any fruit production. This is especially harmful to the ever-bearing varieties, as it will stop your harvest. So make sure to keep your plants lightly moist and avoid letting it dry out.

Moist strawberry leaves

#9: Avoid Letting Fruit Sit on the Ground

Strawberries will hang down to the ground as they get larger and heavier. Because of this, most strawberries end up laying directly on the soil. However, strawberries laying directly on the soil are much more likely to have diseases and pests claim them before you do. So make sure that you lay down something like straw, gravel, or black plastic to keep your strawberries from sitting directly on the soil.

Strawberry laying on the ground

Those are the 9 things to avoid when planting strawberries! Let me know if you have any other questions or comments by leaving them below. And for more awesome tips, subscribe to my email list! Every new subscriber gets a free welcome guide full of expert tips to help you become a master grower! Then make sure that you share this post on your favorite social media channel! You never know how many of your friends are also wanting to enjoy harvesting their own delicious, home-grown strawberries!

Happy Digging!

Click here to subscribe
How to Plant Strawberries Pinterest Image

7 Things You Should Never Do when Planting Tomatoes

How to Plant Tomatoes Cover Photo

Do you want to do things right when planting your tomatoes? Do you want to grow lots of large, tasty tomatoes? If you do these 7 things, then you will probably still get a tomato harvest. However, if you don’t do these 7 things when you plant your tomatoes, then your harvest has the potential to be HUGE!!! So, if you want to be the envy of all your gardening friends, then make sure you never do these 7 things…

Click here to subscribe

#1: Never Plant your Tomatoes in the Same Place

Now, I know this is a pretty heated topic that gets tossed around a lot between home gardeners. Some will tell you that rotating your vegetable’s location is a must, while others will say they’ve never rotated their plants and they’ve have had great results for over 20 years. But here’s the deal…

Tomatoes will use different nutrients than other vegetables. They also have specific pests that enjoy eating them. Ideally, you can supplement the nutrients by adding compost and fertilizer year after year. So that problem is solved. And some would say that if you have a small garden, then your pests are going to find your tomatoes eventually.

However, for the new gardener, I would say don’t worry about making a huge spreadsheet tracking plant families and religiously rotating. Instead, if you don’t want to add a lot of nutrients to your soil year after year, then just plant your tomatoes somewhere they haven’t been for a couple of years. So for all of you beginners, NEVER plant your tomatoes in the same place, and your plants will stay healthy!

Never Plant in Same Location

#2: Never Plant in Cold Soil

Tomato plants like to stay warm. If you plant your tomatoes too early, it will actually stunt your tomato plant’s growth. Don’t plant it until night temperatures are consistently around 50 F (10 C). At this point your soil should be warm enough for your plants.

Never Plant in Cold Soil

#3: Never Place at Original Planting Depth

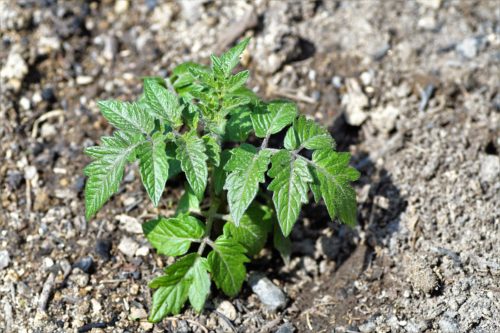
When you plant your tomatoes, cut off any lower branches. Leave the top branches intact (more or less depending on the size of your plant). Then place it low enough in the soil that all of the bare stem is buried. Roots will grow from the exposed stem and will give your plant a much larger and established root system. And more roots will give you a healthier plant, which will in turn give you a bigger, better harvest.

Confused by this step? Watch the YouTube video at the bottom of this post to see it in action!

How to Plant Tomatoes: Never Plant at Original Depth

#4: Never Cut the Edges of your Stem

Some people ‘nick’ the sides of their tomato plant stem before planting it beneath the soil. In theory, this will stimulate more locations of root growth. however, this also opens up more locations for bacteria to enter your plant. This can also severely damage your plant if you aren’t experienced with this method. Because of these two reasons, I suggest that you should never cut your stem. The only marks it should have is the pruning cuts where you removed the lower branches.

How to Plant Tomatoes: Never Cut the Sides

#5: Never Wait to Add Support

You should add your support system (tomato cage, poles, trellis, etc.) at the time you are planting. If you wait to install a support system until the plant is large enough to need it, you will most likely damage your plant’s root system during installation. And if you damage the root system, then your harvest will definitely take a hit as well. So don’t wait to add support! Instead, make it a habit to install it when you plant.

How to Plant Tomatoes: Never Wait to Add Support

#6: Never Plant in an Empty Hole

When you dig a hole for your tomato plant, don’t just refill it with soil and be done with it. Instead, you should fill your hole with things your plant will use over the course of the summer. The most common items added to the bottom of the hole includes egg shells, coffee grounds, worm castings, and small amounts of compost. If you nourish your plants from the start, then they will reward you with a great harvest!

How to Plant Tomatoes: Never Plant in an Empty Hole

#7: Never Plant Next to These…

There are several types of plants that will fight with your tomatoes. You should never plant your tomatoes next to these:

  1. Fennel, Walnut, or Dill – all inhibit growth of tomato plants
  2. Corn, Potatoes, Eggplant, or Peppers – all share the same pests and diseases, so grouping causes an increase of pests or diseases
  3. The Entire Brassica Family – broccoli, cabbage, kale, kohlrabi, Brussels sprouts, turnips, collards, and rutabaga… these guys just don’t get along
Never Plant Tomatoes Next to These...

So those are the 7 things you should never do when planting tomatoes. I hope this list gave you some ideas of what not to do, as well as some ideas of what you should be doing instead! If you have any questions or comments, feel free to leave them below.

I’ve also included an awesome YouTube video from The Rusted Garden showing exactly how to plant your tomatoes. He also includes a few great tips on how to care for them as they grow, so make sure to hit the play button below!

Happy Digging!

Click here to subscribe

How to Plant Potatoes at Home: 11 Things You Should Know

How to plant potatoes cover photo

Are you wanting to grow potatoes at home? Do you want a huge, delicious harvest, but aren’t sure how to plant potatoes in a way that will achieve amazing results? No worries. I’ve got you covered! By following these 11 tips, you’ll be sure to have the best harvest possible! So here are the 11 things you should know before planting your potatoes at home…

Click here to subscribe

#1: Do NOT use Store-Bought Potatoes

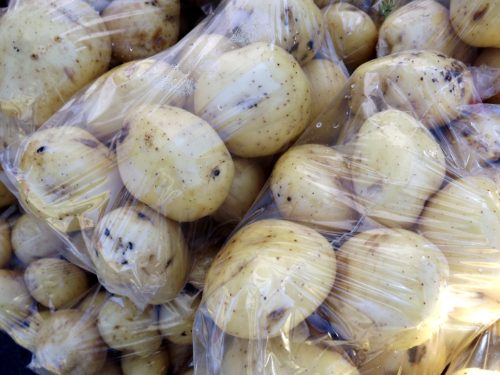
I know it’s tempting to grab that bag of potatoes out of your cupboard and get planting. However, some of these potatoes have been chemically treated to keep them from sprouting (keeping them good to eat for longer). So to be sure that your potato is going to grow well (and to ensure that it’s disease-free), then make sure you purchase seed potatoes or potato slips to grow your potatoes. Or, as another option, you can also purchase potatoes from your local farmer’s market. These will be chemical-free!

How to Plant Potatoes: Don't Use Store-Bought Potatoes

#2: You Don’t Need to Sprout your Potatoes

Sprouting your potatoes before planting isn’t necessary. If you plant your potatoes before they sprout, then they might take a few extra days before emerging from the soil. So, letting them sprout first or not, you’ll get a great potato harvest either way.

How to Plant Potatoes: Sprouting not Necessary

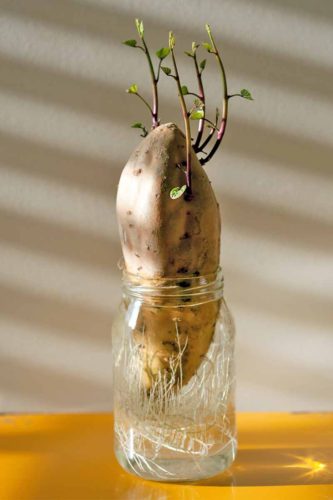
#3: You Can Start your Potatoes in Water

If you still choose to sprout your potatoes before planting (no judging here!), then you can place it straight into a sunny window to sprout. However, if you want to start sprouting and rooting your potato, then put it in water! Simply use toothpicks to hold it up in a cup, then fill it with enough water to cover half of the potato. Wait about a week and you should see signs of your potato growing! (Only be sure that if you cut your potato, give it several days to seal the cut before placing it in water.)

How to Plant Potatoes: Root in Water

#4: Don’t Plant the Entire Potato

If you’re growing large potatoes, then you don’t need to plant the entire potato. Instead, use a sharp, clean knife to cut it into sections that have 2-3 eyes each. (The eyes are the little knots in the potato.) After cutting it, leave the pieces out to dry for 48 hours before planting. This will give you many more plants, so keep this in mind when you are purchasing your seed potatoes!

How to Plant Potatoes: Cut into Smaller Sections

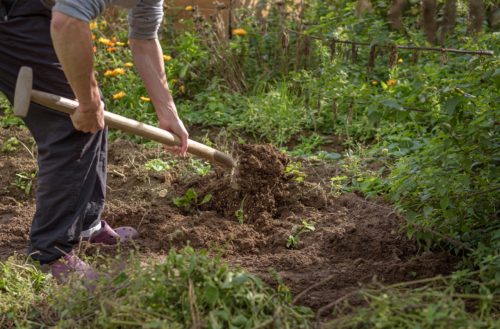
#5: You NEED Loose Soil

If you have hard, clay soil, then you will need to amend it, or bring in new soil to plant your potatoes. This is because potatoes are specialized roots that grow to store the plant’s nutrients. If your roots have a hard time pushing against hard, compact soil, then your potatoes will also have a hard time growing. This means that in hard soil, your overall harvest will be smaller. This is why it’s essential that you have loose soil.

For tips on how to loosen up any hard soil, watch the video below!

How to Plant Potatoes: You Need Loose Soil

#6: Plant Eyes Up

When placing your potato cuttings in the soil, place them so the eyes (or sprouts) are facing up. This gives your stems a straight shot up and out of the soil. If you place them down, this will make it harder for your potato’s shoots to emerge.

How to Plant Potatoes: Plant Eyes Up

#7: Mound the Plants

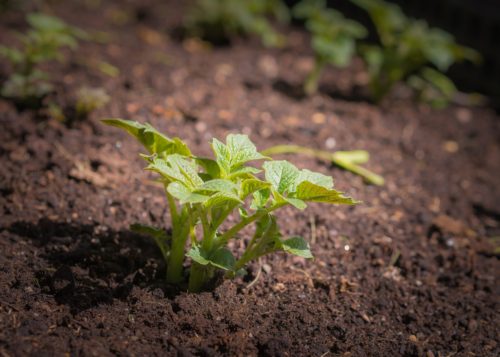
When your plant sprouts and grows around 6 inches (15 cm) tall, add more soil around the base of it to cover all but the top leaves. Then once it has grown to be about 6 inches (15 cm) above the soil once more, push up the soil around it again. This is called ‘mounding’. Mounding your potato plants will increase the amount of roots your plant grows, which in turn, will increase the amount of potatoes that your plant produces.

How to Plant Potatoes: Mound Plants

#8: Fertilize with a High P & K Fertilizer

P & K stand for Phosphorous and Potassium (or Potash on your fertilizer label). Make sure that your fertilizer has a good ratio of P and K, but has a lower N value. This will be something like 5-20-12, with a lower 1st number and a higher 2nd and 3rd number. Phosphorous encourages more root growth, while Potassium is good for the overall health of the plant. Do not fertilizer with a high Nitrogen fertilizer, or you might end up with a big, lush potato plants that have very few actual potatoes.

How to Plant Potatoes: Fertilize

#9: Harvest at the Right Time

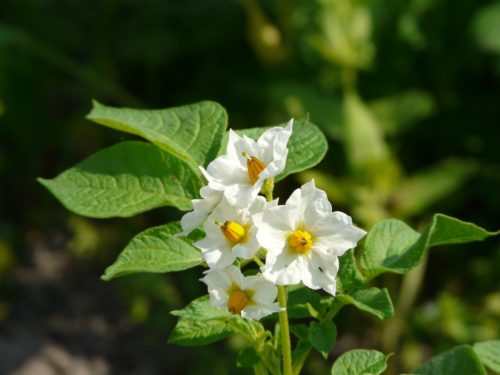
The time to harvest your potatoes is around 2-3 weeks after it starts flowering. At this time the plant will also start falling over and looking wilted. Once this starts to happen, you know that your potatoes are ready to harvest!

How to Plant Potatoes: Harvesting

#10: Soft-skinned Potatoes Don’t Store

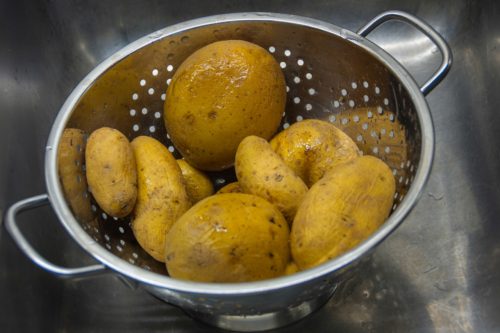
If your potato’s skin is soft and can be brushed off with your finger, then you know that the potato hasn’t fully matured. Most likely you will have a harvest where some of them have matured, but some of them haven’t. Make sure that the soft-skinned potatoes don’t go into storage. They will need to be cooked and eaten within the next several days.

How to Plant Potatoes: Do Not Store Soft Potatoes

#11: Let Dry Before Storing

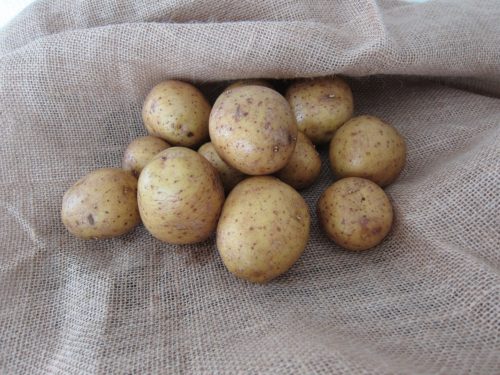
For all of your hard-skinned potatoes, you will need to let them air-dry in a cool, shaded location for several days. If stored too quickly, your potatoes might rot. Air-drying gets rid of any excess moisture that might still be in the plant.

How to Plant Potatoes: Let Dry

Those are the 11 things you should know before planting potatoes at home! I wish you the best of luck and a happy harvest! And make sure you share this post with your other gardening friends.

Not sure where to plant your potatoes? Find out your potato plant’s light requirements in my post How Much Sun do my Plants Need?!

Happy Digging!

Click here to subscribe

How to Get Rid of Powdery Mildew

How to get of powder mildew

This summer my house was hit BAD with powdery mildew!!! And it wasn’t even really my fault! I didn’t buy any plants with it… it simply spread from the neighbor’s yard! But wherever it comes from, powdery mildew can damage a wide range of plants, spotting the leaves, then eventually causing the infected leaves to die back and drop. This can eventually kill your entire plant. So basically, it’s no fun at all! That’s why I did some experimenting, and found out how to get rid of it fast!

**Note: This post contains affiliate links, which if purchased, I will receive a portion of the profits. This helps me to keep providing awesome information to all of you!**

Click here to subscribe

What to Do…

Here’s the secret… as soon as you see it, spray your plants with fungicide!!! This is the fungicide that I purchased because it is safe to use on edible plants. Just make sure that you don’t harvest anything for 30 days, and then you either wash off the plant, or you wash off the produce before you eat anything that has been sprayed.

powdery mildew fungicide from amazon

So the best tips I can give you from my experience are…

First…

First, make sure that you spray your plant at the earliest sign of powdery mildew! If you can help it, don’t wait until the black spots have formed (this is a sign that the fungus has already reached a mature stage of growth)!

If you spray the leaves where the powdery mildew has already formed the black spots, then plan on losing those leaves. The fungicide will kill the fungus, but the leaf won’t be healthy enough to recover, and will most likely die either way.

Second…

The second piece of advice I can give you is to dilute the solution according to the instructions! The first time I sprayed, I was so anxious to get rid of the powdery mildew, that I added a bit more fungicide than I should have… (I mean they only have you add about a teaspoon per gallon! Surely that won’t be strong enough?!?!)

Anyways, long story short, I about tripled my teaspoon and ended up killing some of my seedlings because the dosage was too strong. 

So basically, follow the dosage, and if you still have some powdery mildew a few weeks later, then spray a second time. Don’t go all fungicide-happy and try to up the dosage to kill it all at once… or you might end up killing some of your plants as well!

Third…

The third and last note that I have for y’all is that I sprayed this fungicide on my indoor plants. Yeah, they got the powdery mildew from outside, but I brought them indoors for the upcoming winter, so I had to spray them indoors. 

With two toddlers and two pets, I was worried about safety, but this fungicide was safe as long as it dried before anyone decided to taste the leaves (I’m thinking mainly of my plant-chewing cat!) But by spraying at night, I knew that it would have dried completely by the next morning, and sure enough that’s what happened. Safe for everyone!

So if you’re still on the fence, I would highly recommend you take the leap and purchase this fungicide! Like I said, it worked great, was safe for the kids and pets, and worked for my edibles! And at only a measly teaspoon per use, it’s going to last me for years! (Which is also great, because the powdery mildew will sadly keep spreading year after year from my neighbor’s yard until they decide to do something about it, which is out of my control… ) 

So stop the battle, save yourself the worry, and get this fungicide before your powdery mildew has formed its black spots! Good luck, and feel free to leave any additional questions or comments below! And for some indoor plant inspiration, check out this list of easy, low-maintenance houseplants!

Happy Digging!

Click here to subscribe

How to Water your Air Plants the RIGHT Way!

How to water air plants cover

Hey everyone! I know that we all LOVE air plants, but how the heck do you water something without any roots or any soil?!?! Well today I’m going to tell you exactly how to water your air plants so they stay happy and thriving!

Now there are two different methods. First is if your air plant is mounted/hot glued/fixed in any way to it’s stand. The second method (which is the preferred method) is for if your air plant is separate and can be removed from its mount, or if the mount is waterproof. So keep reading and use whichever method applies to you! But first, before you learn HOW to water your air plants, you need to make sure you’re using the correct TYPE of water…

If you want overall care tips for your air plant, check out my post here on air plant care!

Want to boost your air plant collection?! You can get some awesome air plants here!

**Note: This post contains affiliate links, which if purchased, I will receive a portion of the profits at no extra cost to you. This helps me to keep providing you with such awesome information!**

Click here to subscribe

What Kind of Water to Use for Air Plants

Unlike most other houseplants, air plants DON’T like distilled water! If it’s a choice between distilled or tap water, go with tap water every time! The main harm with tap water is its chlorine. But for this, you can simply leave your water out for about 30 minutes to allow the chlorine to dissipate. This should be your easiest choice of water.

To go to the next level with your watering, choose a natural source, such as rain water, pond water, or lake water. While the rain water is what your plant is used to in its natural habitat, spring water, pond water, or lake water can also be extremely good for your air plants because it is usually rich in nutrients. Another alternative to these is if you have an aquarium. Aquarium water can also be highly beneficial to air plants as your air plant can get added nutrients from this water as well.

The only recommendation that I have, however, is if you use one of these water sources that already contains nutrients, then hold off on the fertilizer. If you use both, then it could potentially be too much for your little guy!

Now… on to the exact methods!

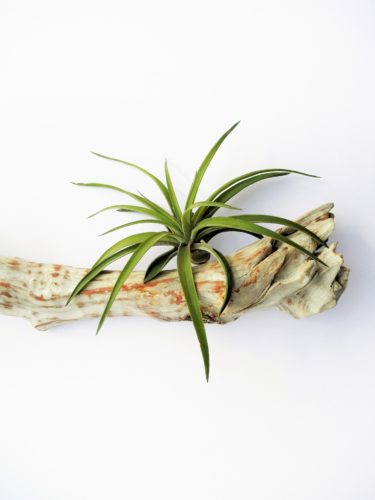
How to Water Air Plants Method 1: Fixed to a Mount

If your air plant is fixed to a mount or a stand, then the best way to water your plant will be through misting. This can be tricky though as most people who mist their air plants end up with rotted, dead plants. (Trust me! I know from personal experience!!!)

To correctly mist your air plant, the important thing is to think of it more like a shower than a misting. Spray it with a spray bottle or a misting bottle until the leaves are dripping with water. (I would recommend placing it in a sink or on a towel while you do this).

The next two tips are vital to avoid rotting your plant! These two tips are: turn your plant upside down, and give it good air circulation.

After you mist your plant you should place it upside down for 10-15 minutes to allow any excess water drain out of the plant. This is vital! Air plants aren’t like bromeliads that can keep water cupped in their leaves. If you do this to your air plant, it will most likely die on you. Instead, give it a good shake and place it in a position where all of the excess water can drain out.

How to Water Air Plants Method 1: Fixed to a Mount

This was my first big lesson with air plants. My first tillandsia was glued into a hanging glass globe. Little did I know that while I was spraying it down, all of the excess water was collecting in the bottom of those glued-in rocks, which was cradling the very center of my air plant… And let’s just say, it didn’t appreciate the long-term bath! So please remember to drain any excess water off of your air plant!!!

Next, make sure that your plant has good air circulation while it is drying. Normal indoor air circulation is fine, but if your plants are in glass terrariums, or in some of those glass globes (like my first air plant), then you’ll need to help it out a bit with a light fan. This will help to avoid any rotting from excess moisture.

Once it has finished soaking up all of the water and has completely dried, then you will be good to go! Simply follow this spray, shake, and circulate a couple times each week dependent on the temperature and the amount of indirect sunlight. Then watch your beautiful plant thrive!

How to Water Air Plants Method 2: Removable Air Plant

The soaking method, or the water bath method, is the preferred method of watering and I recommend purchasing your air plants separately from their container for this reason. It will be a lot easier for you and your plant in the long run. However, note that the xeric air plants, (most air plants with fuzzy leaves, such as the tillandsia tectorum, or the tillandsia xerographica) don’t like as much water and will do best with the misting method mentioned above.

How to Water Air Plants Method 2: Removable Air Plant

So what you do for this situation is… once every 7-10 days, fill up a large bowl (or your sink or tub depending on how many air plants you own) with lukewarm water and place your air plants inside. Leave them to soak for several hours. Your goal here is to give your plants a good soak. Let them absorb as much water as they possibly can. I’ve heard of some people leaving their air plants to soak for up to twelve hours!

After they are done soaking, then you NEED to place them upside down on a towel or dish cloth to drain. Let them drain for about 4 hours, or until they are completely dry. If you live in a humid climate, you can also speed up the drying process by placing a fan nearby to increase air circulation.

After the plant is completely dry, then it is ready to place back on its stand and wait anther 7-10 days to water it again. If the tips begin to turn brown, lightly mist your plant a few times during the week, or increase your watering frequency.

How Often Do I Water my Air Plant?

To know how often to water your air plant, you will need to consider several different factors. First, it will help if you know the genus tillandsia that you have. This will help you know if it comes from a humid environment, like south america, or if it comes from a more arid climate, like found in central america. Then, factoring in how much indirect light it is receiving, you can start off with an estimate of whether it would like more frequent or less frequent waterings. A good rule of thumb is to give your air plant small amounts of water. Then, if the tips of the leaves begin to brown, you will know to slightly increase your watering.

I hope this helps! Let’s keep our air plants happy and well-watered (but not rotting!!!) And if you have any questions or comments, feel free to join the Facebook group, Houseplants for Plant Killers or follow me on Youtube! I love hearing from you!

Happy Digging!

Frequently Asked Questions:

How Often do Air Plants Need to be Watered?

The frequency of water will change with both the time of year, the indoor humidity levels, and how much light your plant is getting. As a general rule of thumb, however, you should expect to give your air plant a good soak every 7 to 10 days.

Can you Soak Air Plants in Tap Water?

Yes. You can use tap water to soak your air plants. The best practice, though is to fill your bucket of water, then leave it out for at least 15-30 minutes to let the chlorine evaporate out. This will be much healthier for your plant without you sacrificing too much of your time.

Do Air Plants Need Sun?

Yes. They need sunlight. But not all tillandsia species do well with DIRECT sunlight. Instead, they do much better with lots of indirect, bright light. In general, if your plant has a lighter, pale color, then it will do better with more sun. If your plant is more vibrant in color, then it will most likely be fine in lower light or fluorescent light conditions.

How do you Water an Air Plant without Soaking It?

To water an air plant without soaking it, you can use the spray/misting method mentioned above. This will require more frequent watering, but is necessary for plants that are secured to a non-waterproof base. If the spraying is still getting too much water on the plant stand, however, it would be better off to gently remove the air plant and soak once per week as recommended.

Click here to subscribe

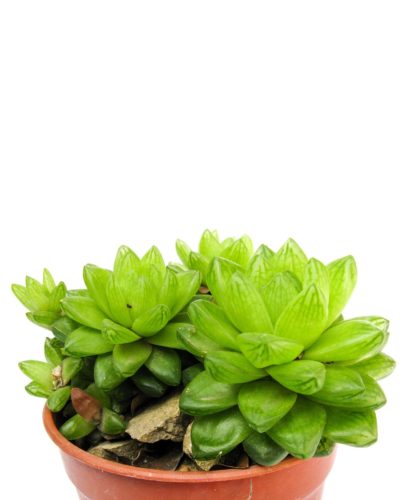
Haworthia Propagation

Haworthia Propagation Cover

Welcome back everyone! Today I’m going to show you how to propagate your favorite Haworthia plant! There are two different ways that Haworthias can grow… either from seed or from separation of plant material. I’m not fortunate enough to have some Haworthia seed on hand to show you, but I will talk about the two most common types of propagation through plant material: propagation through leaf cuttings, and separation of offsets.

**Note: This post contains affiliate links, which if purchased, I will receive a portion of the profits. This helps me to keep providing awesome information to all of you!**

Click here to subscribe

Haworthia Propagation through Leaf Cuttings

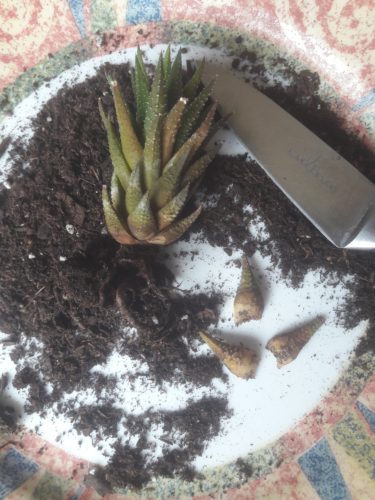
Haworthias can be propagated through leaf cuttings just like many other succulents. But beware because this plant is difficult to get the entire leaf off without ripping off the tip of the leaf. Because of this, most people choose to cut the leaves off with a small precision knife, cutting off a bit of the stem in the process to ensure that it will propagate. Others choose to propagate their entire plant at once and cut apart the inner stem as they separate all of the leaves.

Haworthia Propagation through Leaf Cuttings

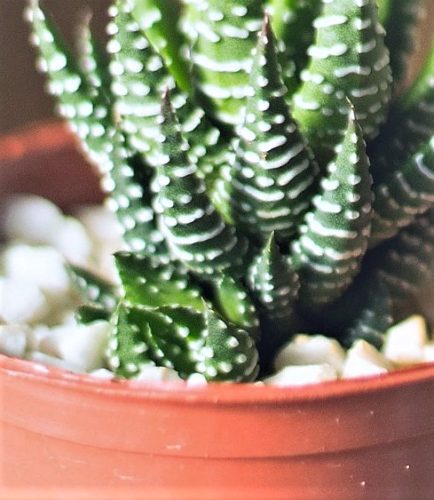
Either way, this method is tricky and success rates are low for the zebra-type haworthias. Leaf cuttings are more successful in the round, thicker-leaf haworthias. That being said, if you don’t have any offshoots (or pups) on your zebra haworthia, then carefully remove a few leaves at the base of the plant. Then if the leaves aren’t successful, the plant should give you some new pups where the leaves were removed!

Just make sure that the entire leaf tip is removed and undamaged for this process to work. For step-by-step instructions, refer to my post on succulent propagation here!

Haworthia Propagation

Haworthia Propagation through Division of Offsets

In time, most Haworthia species produce offsets (little baby clones of the parent plant). This method of propagation is much easier and has much higher success rates than the leaf cutting propagation. These can be separated and potted in the following steps…

  • #1: Wait until the offset has at least four leaves to ensure that it is big enough to have formed its own roots and to survive the separation.
  • #2: Loosen the soil with water, then gently remove. We want to get as many of the roots out as possible so loosening up the soil first will be very helpful in saving those little guys.
  • #3: Gently brush the soil from the roots and separate the offset’s roots from the parent plant’s roots.
  • #4: Find where the offset is connected to the parent plant and gently cut them apart.
  • #5: Replant your Haworthias, making sure they are in well-draining soil and in small pots. Ignoring either of these will cause your plants to rot (and no one wants that!)
Haworthia Propagation through Division of Offsets

I hope you’ve enjoyed this post! Please leave any questions or comments below! I love hearing from you! Have a great day and good luck with your Haworthia propagation! And for Haworthia care information, check out my post on zebra plant succulent care!

Happy Digging!

Click here to subscribe