Hey everyone! Welcome back to The Girl with a Shovel! Today I wanted to tell you all about Christmas Cactus propagation: when and how to successfully propagate your Christmas cactus!
Note: This post is written for Christmas cactus, however, everything discussed can also be used for a Thanksgiving cactus as well. Propagation methods are the same for both.
The springtime is usually the best time to propagate your Christmas cactus! You want to make sure that it is several weeks after the bloom time and at least a month before the fall dormancy period (this is when you should be giving it light treatment to stimulate Christmas blooms).
There are 3 different ways to propagate a Christmas cactus. These are: upright in soil, flat in soil, and in water. But first I wanted to cover how to get a healthy cutting, and then we will get into these three different rooting methods.

Getting a Healthy Cutting
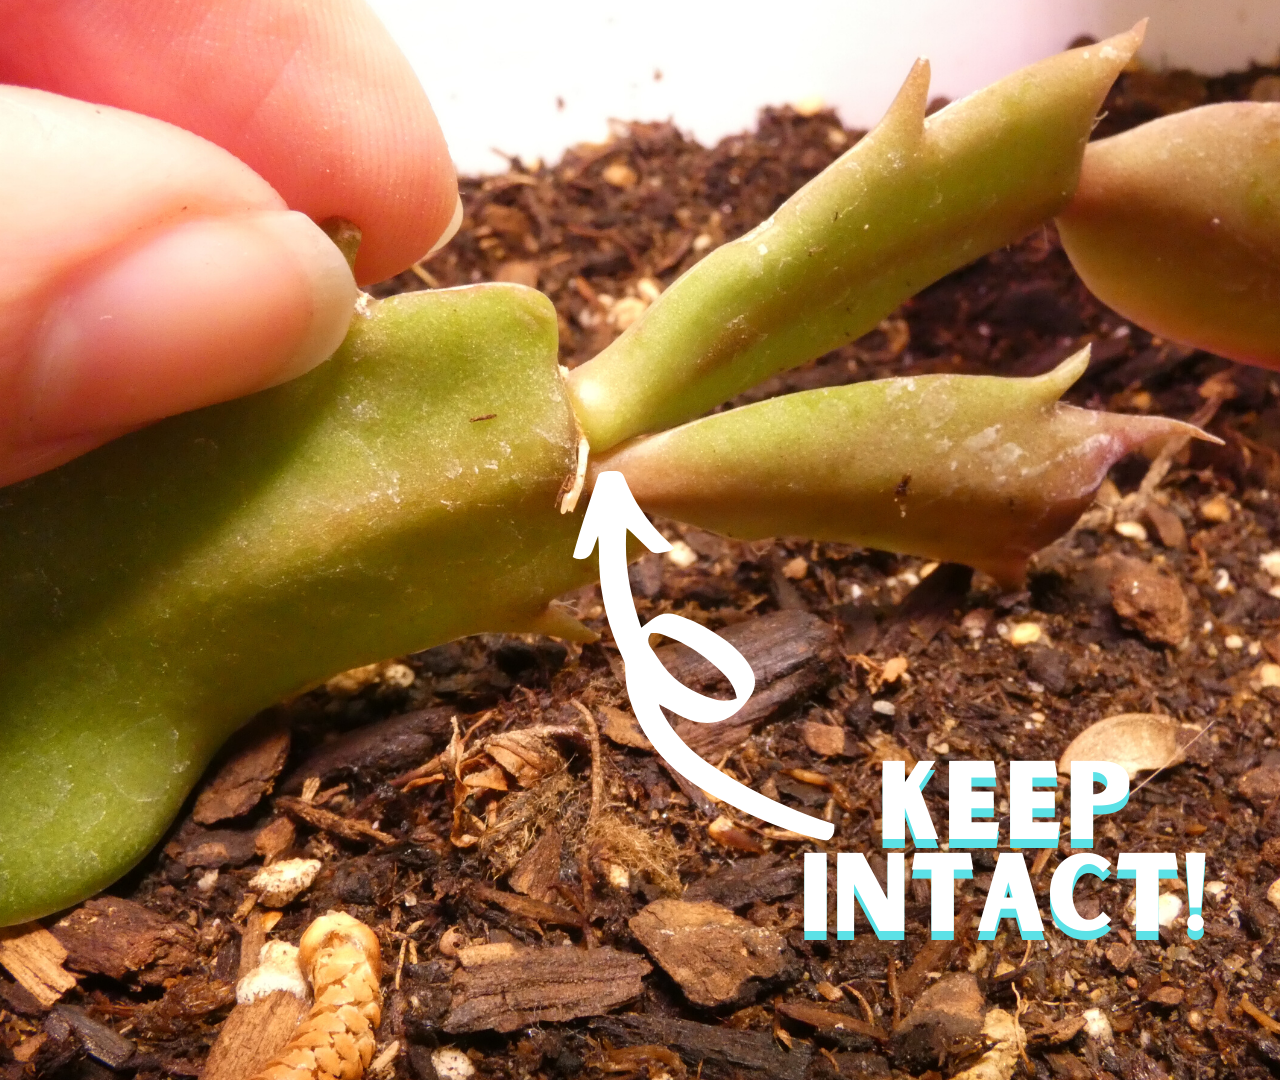
Each Christmas cactus branch is made up of several sections (or pads) linked together. At the very bottom of the pad (where it connects to another pad) is where you can get roots to grow. But the tricky part is that you need to separate the pads without tearing the bottom of the pad. If the bottom of the pad is damaged in any way, then the cutting will most likely fail.
If you’ve ever propagated succulent leaves, then you’ll notice the process of pulling off the leaves is very similar to pulling off the cactus pads. For a visual of good versus bad leaf cuttings, refer to my post Propagating Succulents.
The easiest way to ensure you get the complete, undamaged cactus pad is to gently twist it away from the bottom pad. By gently twisting the top pad, your cactus pads should easily come apart – no tearing involved. Got it?! Now let’s work on planting your cutting…
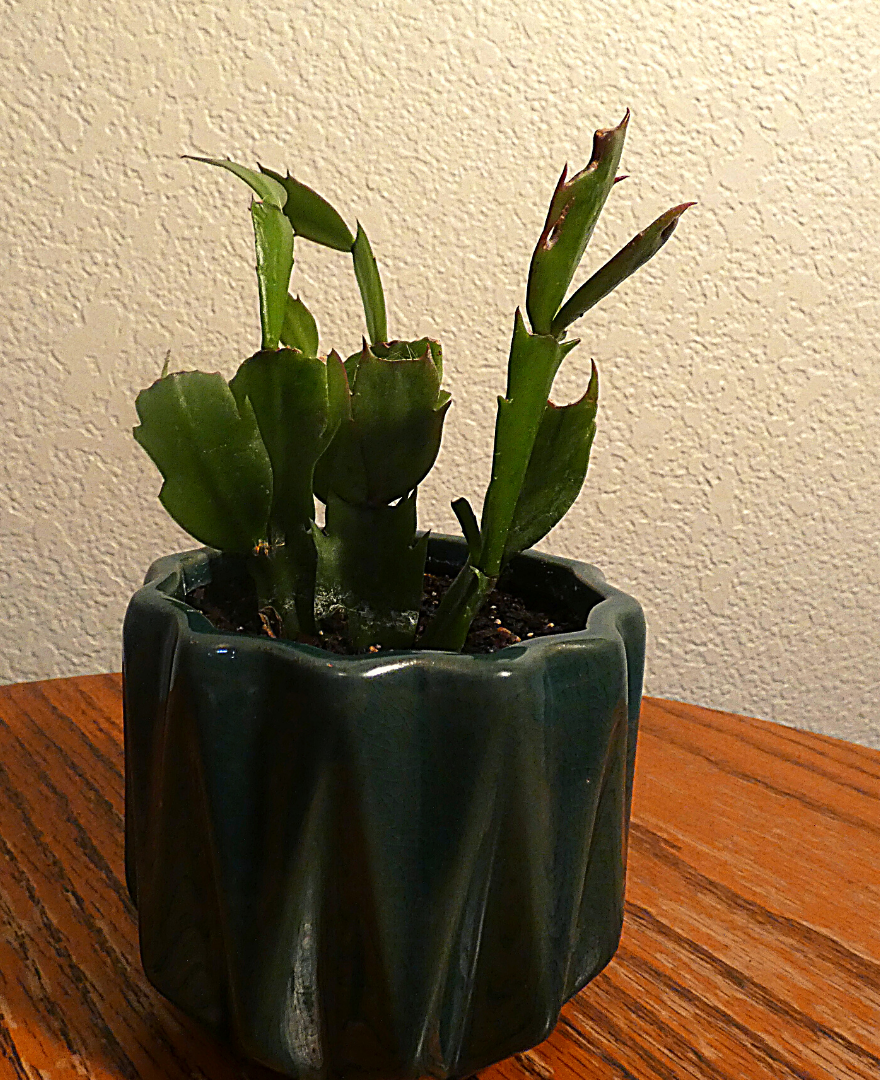
Method #1: Propagating Upright in Soil
This method is the best if you’ve got some large cuttings (around 4 pads each) and if you have good, whole ends on your cutting (aka you took good cuttings without tearing the bottom of the pad).
Take your cutting and lay it in dry location for 1-2 days. Be sure to keep them out of direct sunlight as well. This resting period is important as it helps the plant transition from growing shoots to thinking about growing roots.
After 1-2 days, place your cutting into fresh potting soil (cactus & succulent soil mix is best), and place the end far enough down that the soil covers the bottom pad. Then water it lightly, letting it just barely dry in between watering. Give it 2-3 weeks for roots to form.
Low on cactus and succulent soil? Here’s how to mix your own! DIY SUCCULENT SOIL RECIPE!
Method #1 Summary
- Used for large cuttings (4 pads each)
- Dry for 1-2 days
- NO direct sunlight
- Use light, well-draining soil
- Keep LIGHTLY moist
Method #2: Propagating Flat (On Top of Soil)
This method is best for you if you want to do soil propagation, but you have smaller cuttings (2-3 pads), or if your cutting’s bottom pad has been damaged in any way. I personally used this method for a section of 2 pads that were cut off my parent plant and was missing the bottom section of the lower pad. (I wasn’t the one who took the cutting, I swear! Haha!)
Simply dry out the cutting for 1-2 days (again avoiding direct sunlight). Then, instead of planting in the soil, you will place the cutting horizontally on top of the soil. This also needs a light soil, such as a cactus & succulent soil mix. Make sure that there is good contact between the soil and the point where the 2 cactus pads meet. This is where the new roots are going to come from. Then keep it lightly moist and your cutting should root within 2-3 weeks.
A special precaution for this type of rooting… because the cactus pads are laid horizontally against the soil, it increases the chances that your cactus pad gets too wet and begins to rot. To avoid this, try to only get the soil wet when you water your succulent. Try to keep the actual cutting dry. If you find this difficult, then I would suggest you use one of the other two propagation methods.
Method #2 Summary
- Use with shorter cuttings (2-3 pads)
- Let dry for 1-2 days
- NO direct sunlight
- Lay horizontally on top of the soil
- Use light, well-draining soil
- Keep LIGHTLY moist
- Get soil wet, but keep cutting relatively dry

Method #3: Christmas Cactus Propagation in Water
Christmas cactus propagation in water has been proven to be the fastest way to propagate cuttings. Watching the video below, you’ll see how Christmas cactus cuttings in water grow roots weeks before the Christmas cactus in soil. However, when you root your cuttings in water, you will still have the extra step of transferring your cuttings to soil, which can be a delicate process. So be aware of the advantages and disadvantages of each method and choose your propagation method accordingly.
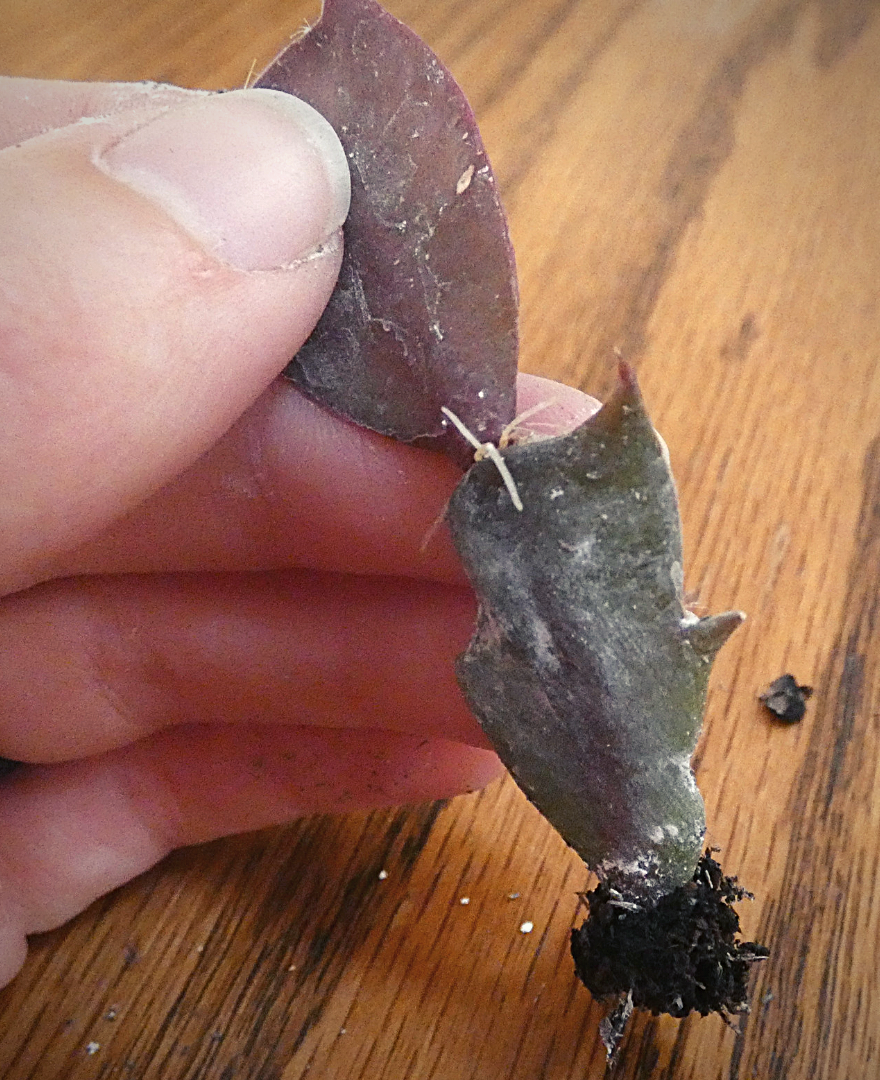
The key to having success with water propagation is to have a good callus. To do this, first, get a good cutting by following the instructions above. Then, make sure that you leave it out to dry. Keep it out of direct sunlight and let it dry to the point that the leaf gets thinner, but put it in water before it gets any wrinkles. If it starts to get wrinkle lines, then you’ve left your cutting out a bit too long.
Once your cutting has dried enough (but not too much!), it will have formed a good enough callus that you can put it in water without the risk of it rotting. If your cutting does rot, then this is a sign that it didn’t form a good enough callus and it should be left out to dry longer next time.
Leave your cutting in water for several weeks, or until it has roots that are about an inch or two in length. While your cutting is in water, make sure that you change out its water every few days. This keeps the water fresh and cuts down on the chances that you will have problems with bacterial rot on your cuttings or on your roots.
Once your cuttings are ready to pot, use a well-draining soil (such as cactus & succulent soil mix, or regular soil mixed with perlite), as well as a well-draining pot. This will be extremely important in successfully transitioning your plant from water to soil.
Transitioning from Water to Soil
As you transition your cuttings, plant them in soil just like you would with any other cutting, then water it thoroughly. Keep it in a warm location with a fair amount of indirect light. At this point it can also withstand some direct morning or evening sunlight as long as temperatures don’t get too hot.
Let your plant’s soil only get slightly dry before watering it again. This means that you will be watering these cuttings a lot more than your regular Christmas cactus. Slowly decrease your watering until your plant can withstand the soil becoming almost dry between watering. This transition should be over the course of a few months and will slowly transition your plant from being in water to being in soil.
Method#3 Summary
- Let cuttings form a callous
- Switch out water frequently
- Use well-draining soil
- Keep moist when potted in soil
- Slowly transition from water to soil
So that’s how to have successful Christmas cactus propagation! Remember to choose the method that is best for your situation. And let me know how it goes! Leave any additional questions or comments below. And feel free to join my email list for more awesome tips on how to keep your plants alive and healthy!
Happy Digging!