Areca Palm Benefits: Unveiling the Health-Promoting and Air-Purifying Plant

A picture of an areca palm in a white pot as a featured photo

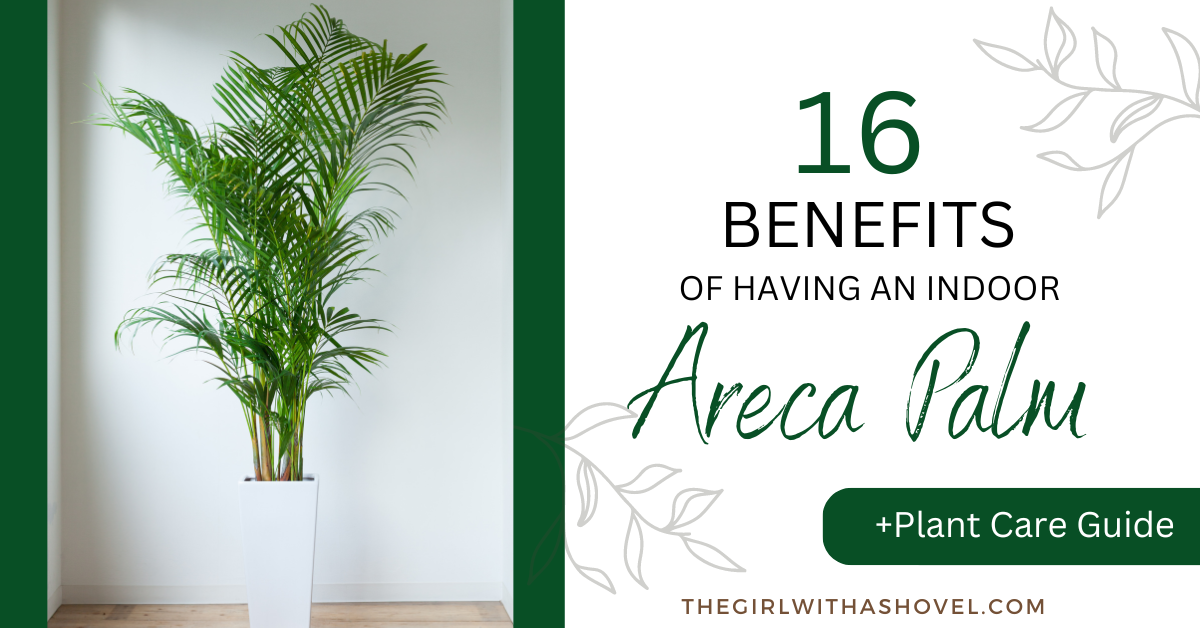
Imagine stepping into a room and being greeted by the lush, vibrant foliage of an areca palm. This tropical beauty not only adds a touch of elegance to your living space but also offers a myriad of benefits that can enhance your health and well-being.

In this article, we’ll delve into the 16 incredible benefits of having an areca palm as a houseplant. From its remarkable air-purifying abilities to its potential medicinal properties and cultural significance, you’ll discover why this beloved plant deserves a prominent place in your home or office. Additionally, we’ll provide expert guidance on how to properly care for your areca palm, ensuring it thrives and continues to bestow its numerous advantages for years to come.

Health Benefits of Areca Palm

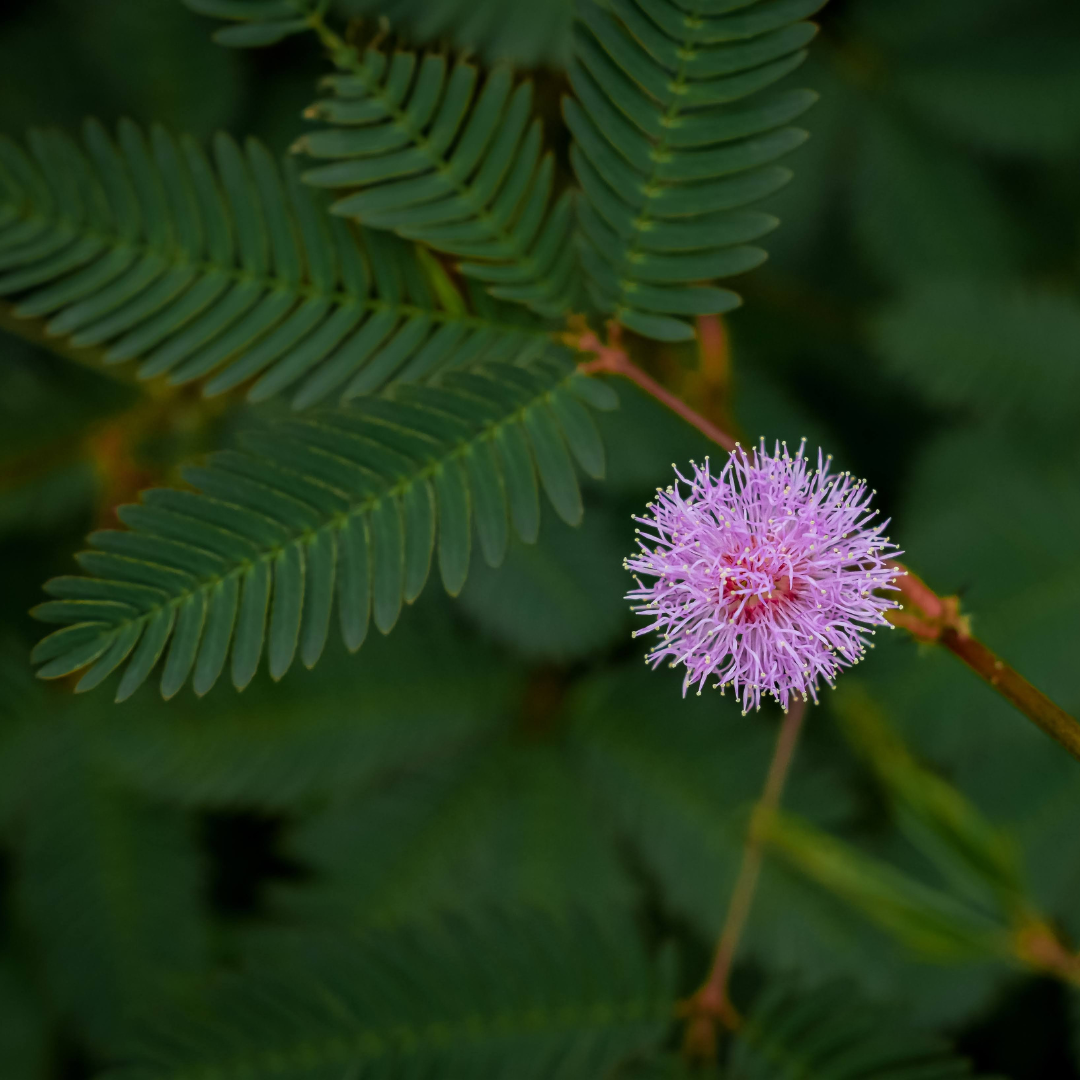
The areca palm, also called the golden cane palm or the butterfly palm, is more than just a beautiful addition to your home; it’s also a powerful ally in promoting your health and well-being. From improving the air quality in your living space to offering medicinal properties, this tropical plant is packed with benefits that can transform your daily life.

1. Air Purification

One of the most significant advantages of having an areca palm in your home is its ability to purify the air. This natural air filter was identified by NASA’s Clean Air Study as an effective remover of toxins, such as formaldehyde, xylene, and toluene, which are commonly found in household items like furniture, carpets, and cleaning products. By absorbing these harmful substances, the areca palm helps create a cleaner, healthier environment for you and your family.

Someone breathing in fresh air outside

2. Increased Oxygen

Not only does the areca palm remove toxins from the air, but it also increases oxygen levels in your living space. Through the process of photosynthesis, this plant converts carbon dioxide into fresh, clean oxygen, making it easier for you to breathe and feel more energized. Studies have shown that an increase in oxygen levels by just 1% can lead to a 5% boost in energy and productivity levels.

an oxygen reader

3. Humidity Regulation

Dry indoor air can lead to various health issues, such as respiratory problems, dry skin, and irritated eyes. Fortunately, the areca palm acts as a natural humidifier, releasing moisture into the air through its leaves. By maintaining optimal humidity levels, this plant helps create a more comfortable and healthier living environment.

Someone reading the temperature and humidity

4. Decreasing Allergens

The areca palm has a special ability to clean the air around it. Its large, feathery leaves act like a natural filter, trapping tiny particles like dust and pollen from the air. This process is called phytostabilization. Additionally, the soil around the plant’s roots contains tiny microorganisms that can break down and remove allergens from the air. This dual action of leaf filtration and microbial breakdown helps reduce the amount of allergens in the air indoors, which can be helpful for people who suffer from allergies caused by airborne irritants.

Someone blowing their nose in a tissue

5. Stress Reduction and Improved Well-being

Studies have shown that having plants in your living or working space can significantly reduce stress levels and improve overall well-being. The areca palm, with its lush, green foliage, creates a calming and soothing atmosphere that can help you feel more relaxed and at ease. Simply being in the presence of this beautiful plant can promote a sense of tranquility and happiness.

Someone using yoga breathing techniques

6. Productivity Boost

In addition to reducing stress, the areca palm can also help increase your productivity. Research has demonstrated that having plants in the workplace can lead to improved concentration, creativity, and overall job satisfaction. By incorporating an areca palm into your office or home workspace, you may find yourself feeling more motivated and focused on your tasks.

Someone writing in a notebook

7. Improved Memory

Surprisingly, the areca palm may even have a positive impact on your memory and cognitive function. Studies suggest that being around plants can enhance memory retention and recall, making it easier for you to learn and remember new information. Keep an areca palm nearby while studying or working on important projects to give your brain a natural boost.

An image of a brain and the word memory

8. Better Sleep

Creating a peaceful and relaxing environment in your bedroom is essential for getting a good night’s sleep. The areca palm can contribute to a more restful slumber by purifying the air, regulating humidity, and promoting a sense of calm. Notably, this plant undergoes a process called photosynthetic respiration, which involves the release of oxygen at night. This natural oxygen replenishment can enhance the quality of air in your bedroom, facilitating deeper and more rejuvenating sleep. Place this plant in your bedroom to enjoy its natural benefits and wake up feeling refreshed and energized.

Someone sleeping with a sleep mask

Non-Toxic and Pet-Friendly

The areca palm is a delightful addition to any home, especially for pet owners. This beautiful plant is non-toxic and safe for cats and dogs, allowing you to enjoy its lush foliage without worrying about the well-being of your furry companions. Unlike some houseplants that can pose a risk if ingested, the areca palm offers a worry-free experience, making it an ideal choice for households with curious pets.

A cat laying next to an areca

My own feline friend, Cinnamon, has developed a particular fondness for the areca palm’s leaves. I’ve caught her on numerous occasions indulging in the plant’s foliage, leaving behind a trail of chewed-up leaves. Despite her voracious appetite for the plant, it’s reassuring to know that the areca palm poses no threat to her health. Cinnamon seems to relish the taste, and I can rest easy knowing that her indulgence won’t lead to any adverse effects.

10. Medicinal Uses – Digestion

Beyond its air-purifying and stress-reducing properties, the areca palm, or dypsis lutescens, also has medicinal uses. In traditional medicine, the fruit and seeds of the areca palm have been used to aid digestion and relieve gastrointestinal issues like bloating and constipation.

Someone holding up an ok sign with their hand on their  digestive organs

11. Medicinal Uses – Anti-inflammatory Properties

The areca palm has also been recognized for its anti-inflammatory properties. Extracts from the plant have been used to alleviate pain and inflammation associated with conditions like arthritis and gout. While more research is needed to fully understand these benefits, the potential of the areca palm in natural medicine is promising.

Someone in a doctors outfit with the sign anti inflammatory

12. Natural Health Products that use Areca Palm

Given its various health benefits, it’s no surprise that the areca palm plant has found its way into natural health products. From digestive supplements to skincare items, the extract of this plant is used to promote wellness and address specific health concerns. As always, consult with a healthcare professional before using any new natural health products.

Someone rubbing cream on their hands

Aesthetic Benefits of Areca Palm

While the health benefits of the areca palm are undeniably impressive, this tropical plant also offers a range of aesthetic advantages that can transform your living space. From its ability to promote positive energy to its versatile and elegant appearance, the areca palm is a must-have for anyone looking to enhance their home’s decor.

13. Positive Energy in Feng Shui

In the ancient Chinese practice of feng shui, the areca palm is believed to bring positive energy and good fortune to any space it inhabits. Its upward-growing leaves are thought to symbolize growth, prosperity, and success, making it an ideal addition to your home or office. By placing areca palm trees in the right location, you can encourage the flow of positive chi and create a more harmonious environment.

An areca palm in a living room setting

14. Elegant and Tropical Appearance

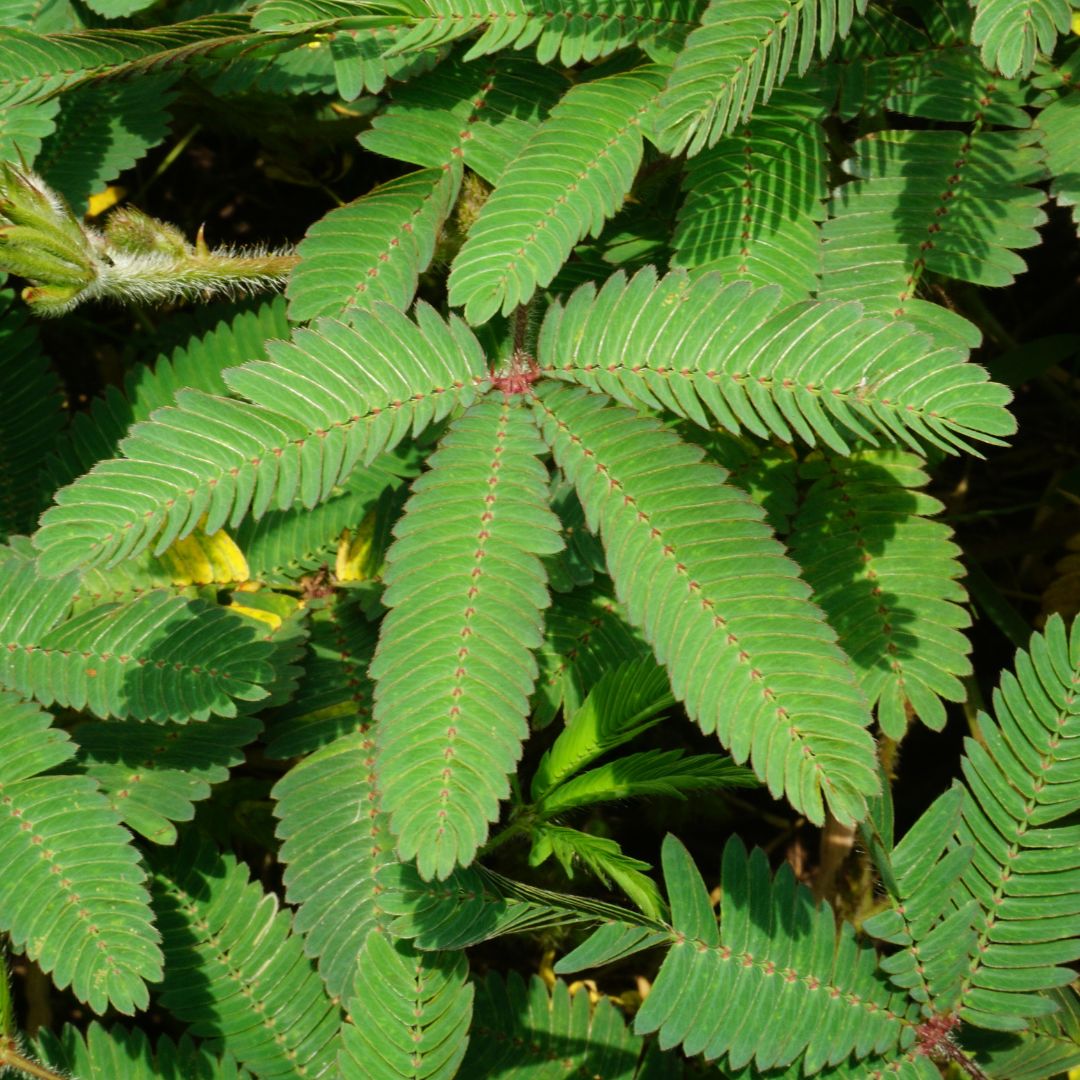
One of the most striking features of the areca palm is its elegant and tropical appearance. Its slender, graceful stems and lush, feathery fronds create a captivating display that can instantly transport you to a serene, beachside paradise. Whether you’re looking to add a touch of sophistication to your living room or create a relaxing, spa-like atmosphere in your bathroom, the areca palm is the perfect choice.

an areca in a rustic pot with rocks

15. Versatility in Interior Design

Another significant advantage of the areca palm is its versatility in interior design. This adaptable plant can complement a wide range of decor styles, from modern and minimalist to bohemian and eclectic. Its neutral green color palette allows it to blend seamlessly with any existing color scheme, while its height and fullness can help fill empty spaces and create a sense of balance in your room.

an areca palm placed in low light next to a wicker chair

16. Low Maintenance, Low Cost to Maintain

Despite its luxurious appearance, the areca palm is surprisingly low maintenance and affordable to care for. Unlike some other houseplants that require constant attention and specialized care, the areca palm is relatively easy to maintain. With proper watering, adequate light, and occasional pruning, this plant can thrive in most indoor environments without breaking the bank. Its cost-effectiveness makes it an accessible option for anyone looking to add a touch of natural beauty to their home.

An areca palm against a yellow backdrop

Versatile Placement Options

The areca palm’s versatility is truly remarkable, allowing you to incorporate its lush foliage into various settings. In the following sections, we’ll explore some of the ideal placement options for your areca palm, showcasing how this adaptable plant can enhance both indoor and outdoor spaces with its tropical charm.

Areca Palm as Office Greenery

In today’s fast-paced work environment, incorporating office greenery has become increasingly popular. The areca palm is an excellent choice for adding a touch of nature to your workspace. Its air-purifying properties and stress-reducing qualities can help create a more pleasant and productive atmosphere, while its elegant appearance can impress clients and colleagues alike. Place an areca palm near your desk or in a common area to enjoy its benefits throughout the workday.

Office desk with a areca palm next to it

Enhancing Living Spaces with Areca Palm

The areca palm is a remarkable addition to any living space, from the living room and bedroom to the bathroom and kitchen. In the living room, a tall areca palm can serve as a captivating focal point, drawing the eye and creating a sense of depth. In the bedroom, this plant’s air-purifying and sleep-promoting properties can help you create a restful and rejuvenating environment. And in the bathroom or kitchen, the areca palm can thrive in the higher humidity levels while adding a spa-like touch to your decor.

A living room with an areca palm placed next to a yellow couch

Outdoor Placement Considerations

While the areca palm is primarily known as an indoor plant, it can also thrive in outdoor settings under the right conditions. If you live in a warm, humid climate (USDA zones 10-11), you can grow your areca palm outdoors year-round. Choose a spot that receives partial to full shade, as direct sunlight can scorch the delicate fronds. In cooler climates, you can place your areca palm outdoors during the summer months, but be sure to bring it back inside before temperatures drop below 50°F (10°C).

an areca palm next to a brick wall in a wicker basket

When placing your areca palm outdoors, consider using it to create a tropical retreat on your patio or balcony. Pair it with other lush, tropical plants and comfortable seating to design a relaxing space where you can unwind and enjoy the beauty of nature. Just remember to keep an eye on your plant’s moisture levels, as outdoor environments can be more drying than indoor spaces.

Cultural Significance and Symbolism

The areca palm’s influence extends far beyond its aesthetic and health benefits. This remarkable plant holds a special place in various cultures, religions, and economies around the world. From its role in ancient traditions to its modern-day ecological importance, the areca palm’s significance is deeply rooted in history and symbolism.

Areca Palm in Feng Shui

In the Chinese practice of feng shui, the areca palm is revered for its ability to attract positive energy and fortune. According to feng shui principles, placing an areca palm in the southeast corner of a room, known as the “money area,” can help attract wealth and abundance.

An areca plant in a living room corner with a couch and rug

Religious and Spiritual Symbolism

The areca palm holds significant religious and spiritual meaning in many cultures. In Hinduism, the areca nut, which is harvested from the areca palm, is considered sacred and is often used in religious ceremonies and offerings. The nut is also a key ingredient in the traditional Indian practice of chewing betel leaves, which is believed to have medicinal properties and is used as a symbol of hospitality and friendship.

an overhead picture of an areca palm

In Buddhism, the areca palm is associated with the Bodhi tree, under which the Buddha is said to have attained enlightenment. The leaves of the areca palm are sometimes used to create intricate offerings and decorations for Buddhist altars and ceremonies.

Economic and Ecological Importance

Beyond its cultural and spiritual significance, the areca palm also plays a crucial role in the economies and ecosystems of many countries. The areca nut is a major cash crop in regions such as India, Bangladesh, and Southeast Asia, providing a livelihood for millions of farmers and workers. The global trade in areca nuts is estimated to be worth billions of dollars annually.

However, the cultivation of areca palms has also raised ecological concerns. The widespread planting of areca palms for commercial purposes has led to the displacement of native plant species and the loss of biodiversity in some areas. Additionally, the heavy use of pesticides and fertilizers in areca palm plantations has contributed to environmental degradation and health risks for workers and nearby communities.

An areca palm next to plant bowls

As consumers become more aware of these issues, there is a growing movement to promote sustainable and ethical practices in the areca palm industry. By supporting eco-friendly and socially responsible growers and products, we can help ensure that the cultural and economic benefits of the areca palm are balanced with the need to protect our planet’s precious resources.
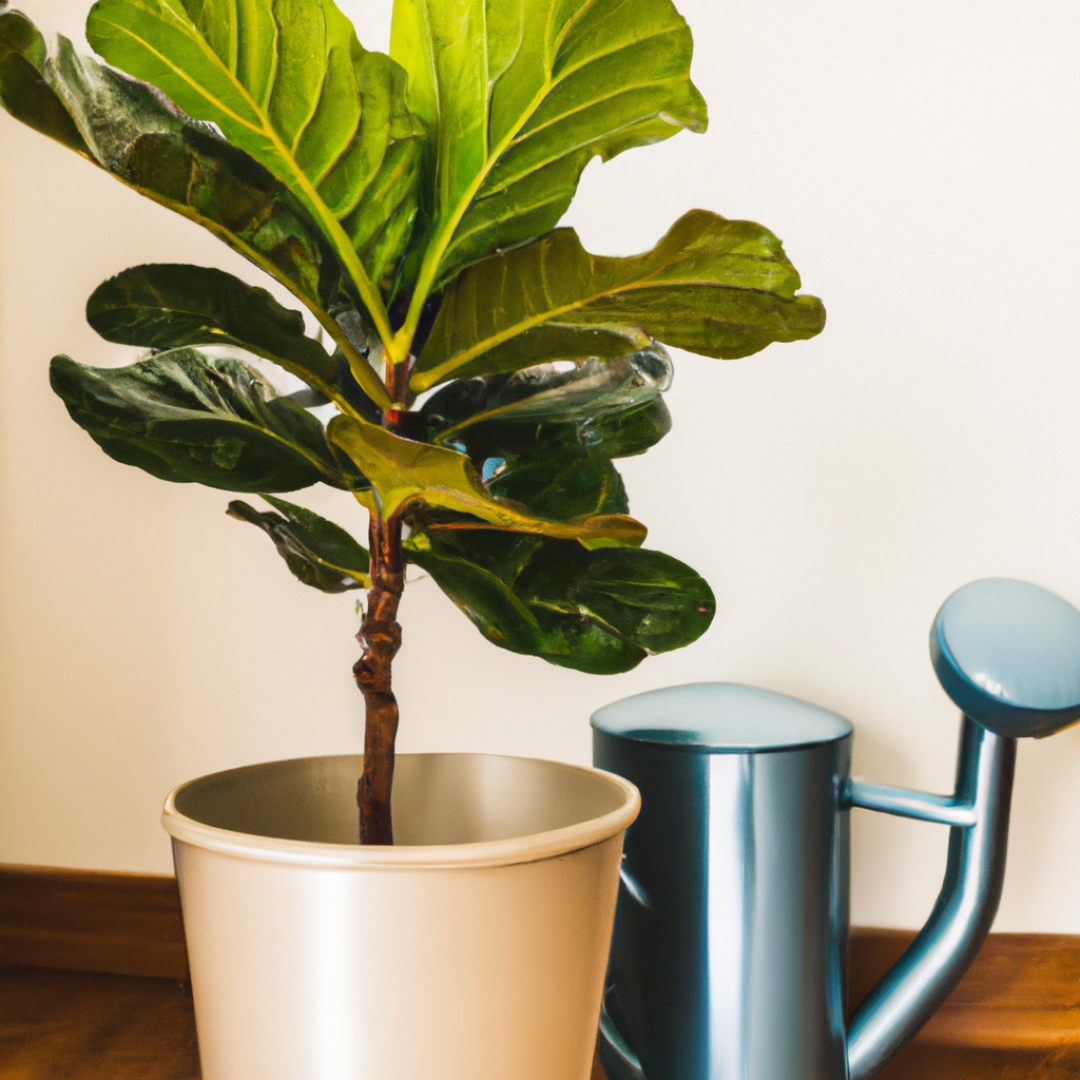
Areca Palm Care

Now that you’re familiar with the numerous benefits and cultural significance of the areca palm, it’s time to learn how to properly care for this beautiful plant. With proper care, your areca palm plant can look beautiful and thrive in your home for years to come.

Light and Placement Requirements

One of the most crucial aspects of areca palm care is providing the right amount of light. This plant prefers bright, indirect light but can also tolerate low to medium light conditions. Avoid placing your areca palm in direct sunlight, as this can scorch its delicate fronds. A good rule of thumb is to keep your plant within 5-8 feet of a window that receives filtered or diffused light.

Areca palm recieving light

When choosing a location for your areca palm, consider its size and growth potential. This plant can grow up to 6-8 feet tall indoors, so make sure to select a spot that can accommodate its mature size. Additionally, keep your areca palm away from air conditioning vents or drafty areas, as it prefers stable temperatures between 60-75°F (15-24°C).

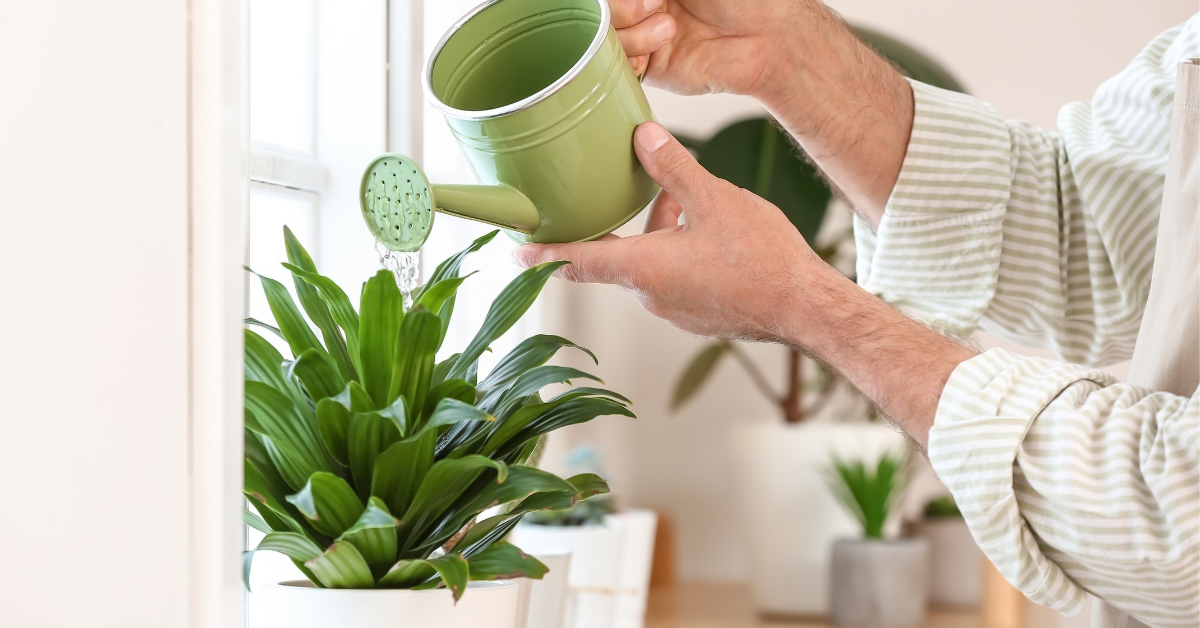
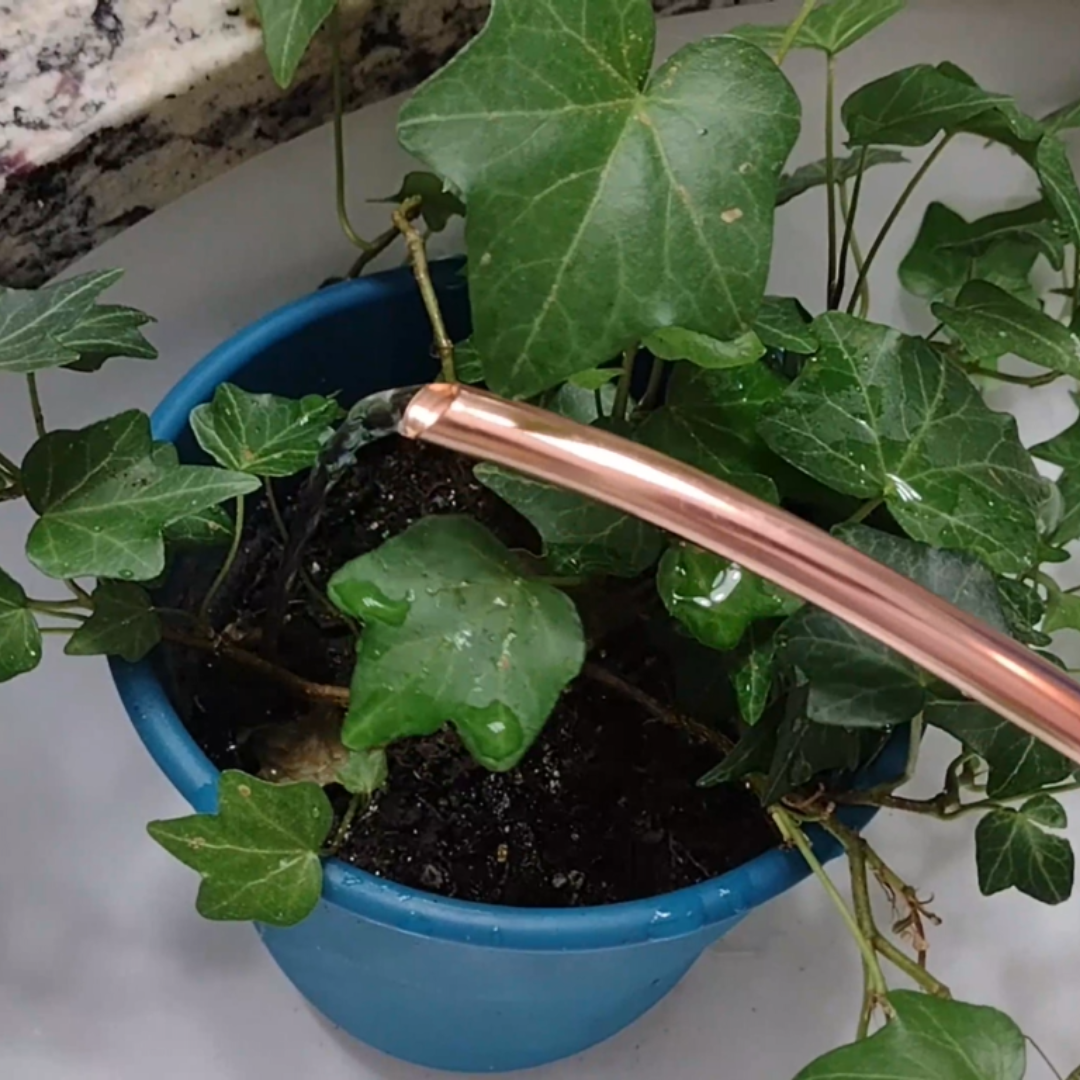
Watering and Humidity Needs

Proper watering is essential for maintaining a healthy areca palm. This plant prefers consistently moist soil but can be sensitive to overwatering. Allow the top inch of soil to dry out between waterings, and then water your plant thoroughly until the excess drains from the bottom of the pot. Be sure to empty any standing water from the saucer to prevent root rot.

An areca palm in a watering can

In addition to regular watering, the areca palm thrives in high humidity environments. To increase the humidity around your plant, you can place a tray of water nearby, mist the leaves regularly, or use a humidifier. Alternatively, you can group your areca palm with other humidity-loving indoor plants to create a lush, moisture-rich environment in your home.

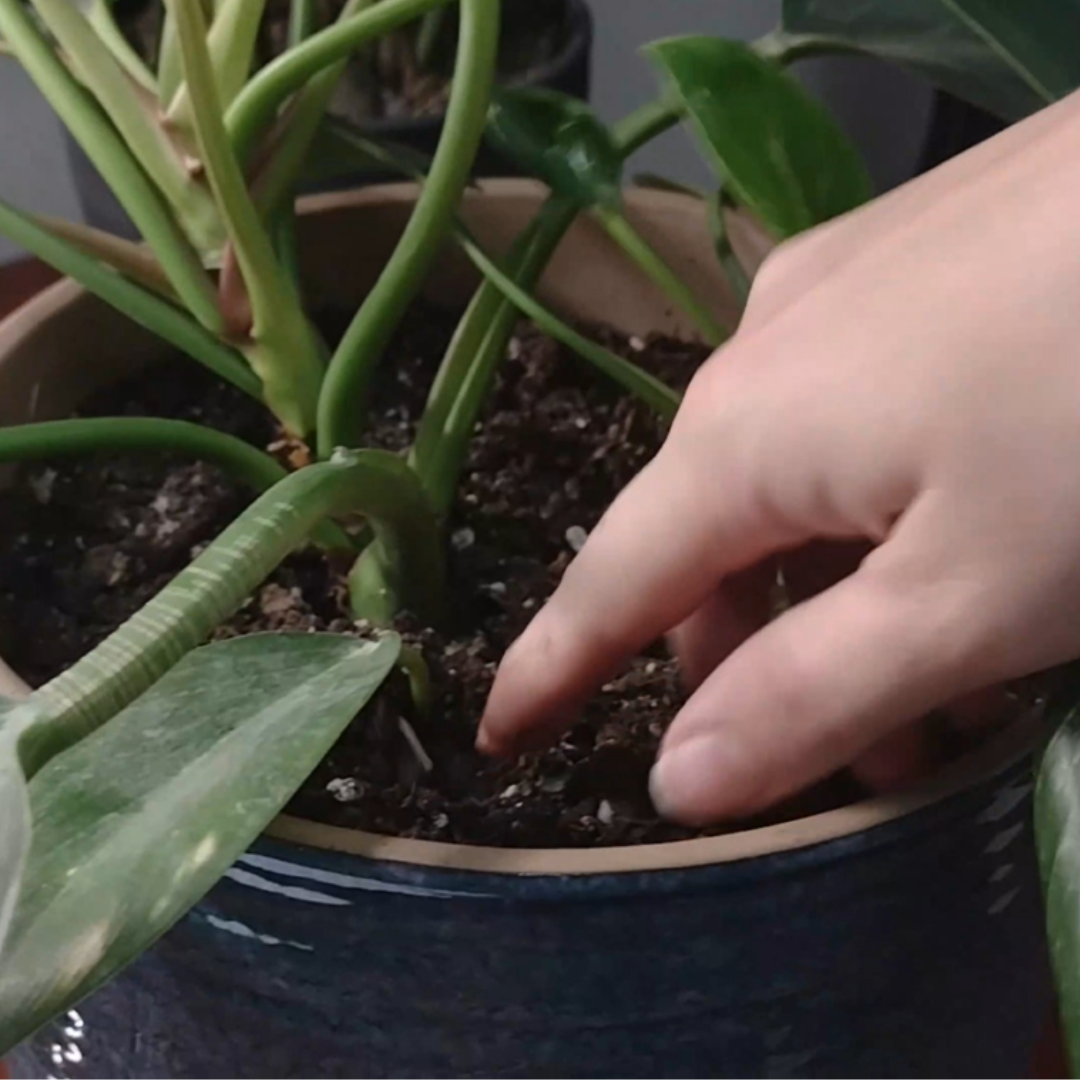
Soil, Fertilizing, and Repotting

To ensure your areca palm has the best growing conditions, use a well-draining potting mix that contains perlite, vermiculite, or sand to improve aeration and prevent waterlogging. You can also add a layer of activated charcoal at the bottom of the pot to help filter impurities and maintain soil freshness.

An areca palm in a white pot

During the growing season (spring through summer), fertilize your areca palm once a month with a balanced, water-soluble fertilizer diluted to half-strength. Avoid fertilizing during the winter months when growth slows down.

As your areca palm grows, it may need repotting every 2-3 years to accommodate its expanding root system. Choose a pot that is 1-2 inches larger in diameter than the current one, and make sure it has proper drainage holes. Gently remove your plant from its old pot, loosen any tangled roots, and place it in the new pot with fresh potting mix.

Pruning and Maintenance

To keep your areca palm looking its best, regularly remove any yellow, brown, or damaged fronds at the base of the plant. This not only improves its appearance but also helps prevent the spread of disease and encourages healthy growth. Use clean, sharp scissors or pruning shears to avoid damaging the plant.

An Areca Palm with browning tips

Occasionally, you may notice your areca palm developing brown tips on its fronds. This can be caused by various factors, such as low humidity, overwatering, or exposure to cold drafts. To prevent brown tips, maintain proper watering and humidity levels, and keep your plant away from sources of cold air.

Pest and Disease Prevention

While the areca palm is relatively resistant to pests and diseases, it can still be susceptible to certain issues. Common pests include spider mites, mealybugs, and scale insects, which can cause yellowing or stippling of the leaves. Regularly inspect your plant for signs of infestation, and if necessary, treat it with a natural insecticidal soap or neem oil solution.

An areca palm leaf that has yellowed with some brown spotting

To prevent fungal diseases like leaf spot or root rot, avoid overwatering your areca palm and ensure proper air circulation around the plant. If you notice any discolored or mushy areas on the leaves or stems, promptly remove the affected parts and adjust your watering habits accordingly.

By following these care guidelines and staying attentive to your areca palm’s needs, you can enjoy a thriving, beautiful plant that enhances your space and well-being for years to come.

Conclusion

The areca palm is a remarkable houseplant that offers a unique blend of beauty, health benefits, and cultural significance. Its air-purifying abilities, stress-reducing effects, and elegant appearance make it an excellent choice for enhancing any living space.

With its low-maintenance nature and adaptability, the areca palm is suitable for both experienced plant enthusiasts and beginners. By providing the right care, you can enjoy its benefits for years to come while connecting with a rich cultural tradition.

Invite the beauty, health, and symbolism of the areca palm into your life today. This remarkable plant is sure to bring joy, vitality, and a touch of nature to any space it inhabits.

an areca palm next to a chair and a lamp

FAQs

As you embark on your journey with the areca palm, you may have some questions about its care and maintenance. In this section, we’ll address some of the most common inquiries to help you provide the best possible care for your plant.

How often should I water my areca palm?

The key to watering your areca palm is to maintain a balance between moisture and drainage. As a general rule, you should water your plant when the top inch of soil feels dry to the touch. This typically translates to watering once or twice a week, depending on factors such as light, humidity, and room temperature.

When you do water your areca palm, it’s recommended to use filtered water to avoid exposing the plant to harmful chemicals or minerals that may be present in tap water. Be sure to water thoroughly, allowing the water to run through the soil and out of the drainage holes. This helps prevent salt and mineral buildup in the soil, which can harm your plant over time. Remember to empty any excess water from the saucer to avoid root rot.

Can areca palms tolerate low light conditions?

While areca palms prefer bright, indirect light, they can adapt to low to medium light conditions. However, it’s important to note that in lower light environments, your plant may grow more slowly and produce fewer fronds. If you notice your areca palm becoming leggy or stretching towards the light source, it may be a sign that it needs more light.

If you’re unsure whether your areca palm is receiving enough light, observe its growth and appearance. Healthy plants will have vibrant green fronds and steady growth, while those lacking in light may appear pale or yellowed. Adjust your plant’s placement accordingly, and consider using a grow light if necessary to supplement its light intake.

Are areca palms pet-friendly?

One of the great advantages of the areca palm is that it is non-toxic and safe for pets. Unlike some other houseplants that can cause harm if ingested by curious cats or dogs, the areca palm poses no known risk to your furry friends.

However, it’s still a good idea to keep an eye on your pets around your areca palm, especially if they have a tendency to chew on plants. While the plant itself is not toxic, consuming large amounts of any plant material can cause digestive upset in some animals. If you notice your pet showing an unusual interest in your areca palm, consider placing the plant in a spot that is out of reach or using a pet-safe deterrent spray to discourage chewing

.

By understanding your areca palm’s watering needs, light requirements, and pet-friendly nature, you’ll be well-equipped to provide the best possible care for this beautiful and beneficial plant. As with any living thing, observing your areca palm’s response to its environment and making adjustments as needed will help ensure its long-term health and vitality.

Read more

Calla Lily Care Indoors: Preventing and Fixing Drooping in Your Indoor Plants

Hey there, plant pals! Have you ever noticed your beautiful indoor calla lily drooping like a sad puppy? It’s happened to me more times than I’d like to admit, and let me tell you, it’s a real bummer. But fret not, because I’ve been there, done that, and learned a thing or two about why our precious lilies might be feeling a little down in the dumps. So, if you’re wondering why your calla lily is drooping, stick around because I’m about to tell you exactly what might be causing those droopy leaves. Let’s troubleshoot together, shall we?

Here’s what we’re covering today…

  • Reasons why calla lilies droop when kept indoors
  • Identification and problem-fixing
  • Basic care for your indoor calla lilies
  • The pros and cons of keeping calla lilies indoors

Read on to figure out why your calla lily is drooping and how to keep your plant looking beautiful and happy indoors!

Calla Lily in a vase by a window sill

Understanding Why Calla Lilies Droop Indoors

So let’s figure out exactly why your calla lily is drooping. First, let’s keep in mind that calla lilies, or zantedeschia aethiopica, are mostly perennials that originate from areas with a temperate climate, mainly the lush areas of South Africa. This is why they do best with warm temperatures, adequate humidity, and lots of bright, indirect light – a condition that can sometimes be hard to replicate indoors. When these conditions are not met, you may notice your calla lilies starting to droop.

Common reasons behind their drooping indoors include:

  • overwatering
  • underwatering
  • inadequate light
  • sudden temperature changes
  • stress from transplanting
  • inadequate nutrients

Any one of these many different reasons can cause your calla lily to droop. So how in the world are your supposed to know which of these things is causing your exact droopiness? In the next sections I’m going to address the additional signs you can look for to determine the true culprit of your sad-looking calla lily…

Identifying and Fixing the Problems

Identifying Signs of Distress

Aside from the obvious drooping, there are several signs your calla lily might show if it’s distressed. Yellow leaves, slow growth, brown leaf tips, and a lack of new flowers are all clear indications something might be off with your calla lily. Each one of these signs can help you determine which is the cause of your drooping.

Calla Lily leaf showing signs of distress

Overwatering & Underwatering

Watering is the most common problem when it comes to drooping calla lilies. These plants prefer a moist, but not soggy environment. If the leaves are yellow and drooping, the plant may be overwatered. If the leaves are brown and wrinkly and the soil is dry, the plant is likely underwatered. So the easiest way to check this is to feel your soil. If the soil is wet and your plant is drooping, then this is most likely caused from overwatering. But if your soil is dry, then your drooping is most likely caused by underwatering.

three vases of calla lily on a white table

To correct these issues, adjust your watering routine. Allow the top inch or so of the soil to dry out before watering again. If your soil is too moist, then you should consider repotting it or taking it out of the pot to try to dry out the soil more quickly. Then stop adding so much water to your plant at each watering, or add more perlite or sand to your plant’s soil to increase drainage.

Insufficient Light

Calla lilies love bright, indirect light. If your plant is not getting enough light it may start to droop. One of the signs that you can see from insufficient light is if your plant’s leaves are still green but are drooping, and any new growth is looking thin. If this is your plant, then you know that your plant is not receiving enough light. Consider moving it closer to a bright window, but keep it out of direct sunlight as this can scorch the leaves. You can also consider moving it outdoors in partial shade if the temperature is above 60 degrees F.

Calla Lily in direct sunlight

Temperature Stress

Calla lilies prefer room temperatures between 65 and 75 degrees Fahrenheit. If your home is too hot or too cold, this can cause the lily to droop and show other signs of distress, such as slower growth.

Look for any black sections on your plant, which is a sign of cold stress. Also check to see if your plant is near any exterior doors or heating or cooling vents. These can all cause hot or cold drafts and can cause your plant’s leaves to start drooping.

A drooping calla lily

Stress from Transplanting

If your calla lily is drooping, but you’ve recently transplanted it, then this is about the best situation you could be in! That’s because this drooping is just due to transplant shock. This usually happens when the plant’s roots have been cut or damaged during the transplanting process and so the leaves are drooping because your plant isn’t able to get enough water through the damaged roots, so it can’t maintain the same level of water turgidity in the cells that is required to keep your plant upright. Make sense? (Sorry, that’s me nerding out for a second!)

What to look for here is first, if you’ve recently transplanted your plant. Second, the leaves should still be green, no yellowing.

If it’s yellowing, then you’ve given it too much water. Especially if you’ve cut a few roots, then these roots are open to bacterial and fungal diseases. I would suggest you let your soil dry out a bit before your next watering. This can help those cuts in the roots seal.

But if it’s still green, just drooping, then simply keep an eye on it. Be careful to not overwater during this time, and look for it to recover in about a week. If it doesn’t recover, then check out one of the other causes to see if there are multiple things going on with your lily…

Inadequate Nutrients

The final reason of why your calla lily indoors could be drooping is because of a lack of nutrients. I will say that this is not super common though. It is mostly seen when the plant has been in the same pot for a long time and it has been flowering a lot while in this same pot. The calla lily flowers take a large amount of nutrients to grow.

Drooping calla lilies in a vase

To fix this, simply wait for the plant’s growing season (from spring through fall), and give your plant some indoor plant fertilizer. Follow the instructions on the back of the container for proper dosage. Also, make sure that you use a flowering houseplant fertilizer. This usually has a lower concentration of nitrogen. This is because too much nitrogen can cause plenty of leaf growth, but little to no flowering! (And I’m sure you keep this plant because of it’s beautiful flower!)

I did want to note, though, if your lily continues to droop after making these adjustments, you may want to look into possible diseases, such as powdery mildew, or pest issues, such as spider mites. But, these causes of plant drooping are much more rare for indoor calla lilies and each have unique signs and symptoms (such as little webbing on your plant, or white mold growing on your plant).

To wrap up this section, in most cases, your calla lily plants are drooping because of one of the above reasons. But by simply adjusting the plant’s environment and care routine, you can usually fix these problems. In the next section I’ll be explaining a bit about what calla lilies love indoors, as well as some pros and cons to enjoying these plants in your indoor garden.

Proper Care for Calla Lilies Indoors

Proper care of calla lilies indoors is essential for ensuring their health and preventing drooping. This beautiful houseplant requires certain conditions to thrive indoors, and this includes appropriate watering, adequate lighting, fertilizer, and optimal temperature conditions.

Watering

Balance is key when it comes to watering your calla lilies. They like their soil to be consistently moist, but not waterlogged. Overwatering can lead to root rot (bacterial soft rot), which is a common cause of drooping. On the flip side, a lack of water can cause the plant to dehydrate and wilt.

As a general guide, water your calla lilies when the top inch of soil feels dry to the touch. If it comes to watering day and you still have moist soil, then don’t water your plant! Instead, wait longer until your plant’s soil has begun to dry out. But if it’s been over a week and your plant’s soil still has excess moisture, then this is a sign that either your soil or your pot has poor drainage. Consider repotting it into a pot with drainage holes and with fresh, well-draining potting mix.

Lighting

Calla lilies prefer bright, indirect light. Being understory plants, they are accustomed to strong sunlight filtered through higher vegetation. Too much sunlight can scorch their leaves, while too little light can lead to leggy growth and reduced flowering. A north or east-facing window is typically a suitable location for an indoor calla lily. Full sun can be tolerated in the mornings, but then your plant should be sheltered from hot afternoon and evening sunlight.

Calla lily in the sun

Temperature and Humidity

Calla lilies are a tropical plant. Because of this, they are used to warm, humid environments. Indoors, they do best in temperatures between 65-75ºF. They can tolerate lower temperatures, but anything below 55ºF could harm them and cause drooping. As for humidity, moderate levels (aka, higher than the typical indoor humidity levels) are ideal. However, they can adapt to average indoor humidity. Use a tray of water or a humidifier to increase humidity levels if needed.

Calla lily in a pink vase with a pink back drop

Fertilizer

Calla lily plants use a lot of energy and nutrients to produce their beautiful flowers. This is why fertilizing these plants to replenish these nutrients is essential. Use an indoor plant fertilizer that is specific for flowering houseplants. This will give them the right ratio of nitrogen to potassium that is needed to produce more flowers (not just leaves). Make sure that you only fertilize your plant in the spring through the late summer/early fall. Do not fertilize your plant in the winter months. This can cause there to be too much fertilizer in your soil, which can cause a chemical burn on your plant.

In summary, to keep your calla lilies from drooping indoors, you need to provide them with the right amount of water, proper lighting, fertilizer, and a suitable temperature. These important care steps will ensure that your indoor calla lilies are healthy, vibrant, and thriving.

Calla Lilies in a pot on a desk

Pros and Cons of Keeping Calla Lilies Indoors

Like any indoor plant, keeping calla lilies indoors has its pros and cons. Understanding these can help you decide whether this plant is the right fit for your home and lifestyle.

Pros

  • Beautifies your space: With their large, heart-shaped leaves and trumpet-shaped flowers, calla lilies can add a touch of elegance to any room.
  • Purifies the air: Like many indoor plants, calla lilies help cleanse the air, contributing to a healthier living environment.
  • Relatively easy to care for: Despite their exotic appearance, calla lilies are fairly easy to maintain once their basic care needs are met.

Cons

  • Sensitive to poor care: Calla lilies can wilt or droop if not watered properly or exposed to unsuitable light and temperature conditions.
  • Potentially toxic: Keep in mind that all parts of the calla lily plant are toxic if ingested. So, they should be kept out of reach of children and pets.
  • Requires maintenance: To keep them healthy and blooming, calla lilies need to be maintained through fertilizing and annual repotting. This can be a chore for people used to buying cut flowers and simply discarding them when they are spent.

In the end, the decision to grow calla lilies indoors will depend on weighing these pros and cons. Most people find that the beauty and air-purification benefits of indoor calla lilies are worth the extra care they require. (I personally love the look that the leaves add to the space… they look just like a peace lily when potted!)

Conclusion

To wrap things up, we’ve talked a bit about why your calla lily might be drooping indoors, how you can identify and fix the root cause of your drooping, and what is the best way to properly care for your calla lily indoors. We’ve also talked about the pros and cons of keeping your plant indoors. Overall, if you live in one of the warm environments that can support calla lilies outdoors, I’d say why not just simplify your life and grow it outdoors? Then you can bring the cut flowers indoors when they are blooming! And you could get an easier houseplant (the peace lily) to achieve a similar look. But that’s just me. I do love houseplants, but there comes a time when some plants just grow better outdoors.

Unless you live in the cold north. Then definitely keep it inside!

And now that you’ve read this article, you’re fully equipped to keep your indoor calla lily alive and thriving! So good luck getting your plant back up to optimal health and enjoy the beautiful elegance this plant can bring to your indoor space.

Happy Digging!

Indoor Calla Lily Care FAQs

Why are my indoor calla lilies drooping?

Drooping in indoor calla lilies may be due to a few causes. The most common are overwatering, insufficient light, or temperature extremes. Check out my article to help see the additional cues to determine which of these reasons are causing your calla lily to droop.

How can I fix drooping in my calla lilies?

You can fix drooping in calla lilies by identifying the source of stress. Check your watering routine, the lighting conditions, and the temperature of the room. Typically, by adjusting these factors, it will help your plant revive and will prevent further drooping.

What is the basic care for indoor calla lilies?

Basic care for indoor calla lilies involves proper watering, which usually means keeping the soil consistently damp but never soggy, providing bright, indirect light, and maintaining a room temperature above 55°F. Regular feeding during the blooming season and adequate humidity will also add to their healthy growth.

What are the challenges of keeping calla lilies indoors?

The main challenges of growing calla lilies indoors include managing their lighting needs, providing the right amount of water, and maintaining the correct temperature. Calla lilies need plenty of light, regular watering without being waterlogged, and a room temperature above 55°F.

26 Best Types of Vanda Orchids + Beginner’s Care Guide

Pink Vanda Orchids and the featured title

Picture this: a stunning, vibrant orchid with cascading blooms that seem to defy gravity, its aerial roots reaching out in all directions. This is the world of Vanda orchids, a genus that has captured the interest of orchid enthusiasts and beginners alike.

Originating from the regions of tropical Asia, the Vanda genus has made its way into homes and greenhouses worldwide, thanks to these plants’ captivating beauty and unique growing habits. These orchids are not your typical potted plants; they thrive when suspended in the air, with their roots exposed.

But don’t let their exotic appearance intimidate you – with the right knowledge and care, even beginners can successfully grow and enjoy Vanda orchids at home. In this comprehensive guide, we’ll explore the 25 most common types of Vanda orchids, each with its own distinctive charm, and provide you with a beginner-friendly guide to nurturing these epiphytic plants within your home.

So, whether you’re an orchid enthusiast looking to expand your collection or a curious beginner eager to embark on a new horticultural journey, join us as we unravel the secrets of the Vanda orchid species and discover how to create a thriving environment filled with these mesmerizing aerial wonders.

Three Classifications of Vanda Orchids

Before we dive into the fascinating world of Vanda orchids, it’s essential to understand that they come in three distinct classifications of monopodial orchids based on their leaf shape and structure. Each type has its own unique characteristics and care requirements, making it crucial for indoor growers to identify which class their Vanda belongs to.

Strap-leaved

Imagine long, slender leaves that resemble straps or ribbons, gracefully arching from the plant’s central stem. These are the strap-leaved Vandas, the most common type you’ll encounter in the orchid world. Their leaves are typically flat and broad, with a leathery texture that allows them to store water and nutrients.

a bunch of purple strap leaved vandas

Terete

Now, picture a plant with leaves that look more like pencils or cylindrical stems rather than flat straps. Meet the terete Vandas, a unique class that has adapted to survive in high temperatures and more arid environments. Their round, fleshy leaves minimize water loss and enable them to thrive in it’s native habitat conditions that would leave other orchids struggling.

A singular terete vanda

Semi-terete

As the name suggests, semi-terete Vandas are a fascinating blend of the two previous classifications. They boast leaves that are partially round and partially flat, showcasing the best of both worlds. This adaptation allows them to be more versatile in their growing requirements, making them an excellent choice for beginners.

A semi terete vanda

Indoor Care Differences

While all Vanda orchids share some basic care needs, (since they all belong to the orchidaceae family), each classification has its own set of preferences that indoor growers should keep in mind:

  • Strap-leaved Vandas generally require more frequent watering, higher humidity levels, and bright, filtered sunlight or partial shade. They can tolerate some direct sun in the morning or late afternoon.
  • Terete Vandas, on the other hand, can tolerate drier conditions, less frequent watering, and higher light levels, thanks to their water-storing leaves. They thrive in bright, direct sunlight.
  • Semi-terete Vandas fall somewhere in between, offering a bit more flexibility in terms of watering, humidity, and lighting requirements. They prefer bright, indirect light or partial shade.

By understanding which classification your Vanda orchid belongs to, you’ll be better equipped to provide the tailored care it needs to flourish in your indoor space. In the next section, we’ll explore 25 of the most common Vanda orchid types, each with its own unique charm and allure.

25 Most Common Types of Vanda Orchids

Now that you’re familiar with the three classifications of Vanda orchids, let’s explore 25 of the most common and captivating varieties. Each of these species of vanda orchids has its own unique characteristics, from a wide range of colors to intriguing patterns and shapes.

1. Vanda coerulea

Known as the “Blue Orchid”, v. coerulea is a stunning strap-leaved species with large, round blue flowers in shades ranging from pale sky blue to deep indigo. Native to the Himalayan foothills, these blue vanda orchids are a true showstopper.

A bunch of vanda coerulea

2. Vanda sanderiana

Vanda sanderiana, also known as “Waling-Waling”, is a semi-terete Philippine native with large, flat flowers that can span up to 6 inches across. Its petals and sepals are adorned with a striking pattern of pink, purple, and yellow hues.

a cluster of vanda sanderianas with red and white

3. Vanda tricolor

As its name suggests, Vanda tricolor boasts a mesmerizing combination of three colors: white, yellow, and purple. This strap-leaved species is native to Indonesia and is known for its fragrant, long-lasting blooms.

A singular vanda tricolor

4. Vanda luzonica

Endemic to the Philippines, Vanda luzonica is a compact, strap-leaved orchid with charming, fragrant flowers in shades of pink and white. Its petals and sepals are often marked with darker pink spots or stripes.

A singular vanda luzonica

5. Vanda lamellata

Vanda lamellata is a terete species native to the Philippines and Taiwan. Its unique, pencil-like leaves and delicate, white and pink flowers make it a favorite among orchid collectors.

a cluster of vanda lamellatas

6. Vanda denisoniana

Native to Southeast Asia, Vanda denisoniana is a strap-leaved orchid with elegant, white and green flowers. Its petals and sepals are often twisted, giving the blooms a star-like appearance.

A singular vanda densionianaa cluster of vanda lamellatas

7. Vanda merrillii

Vanda merrillii, another Philippine native, is a compact, strap-leaved orchid with vibrant, reddish-orange flowers. Its petals and sepals are marked with darker red spots, creating a visually striking display.

A close up picture of a vanda merrilli

8. Vanda cristata

Native to the Himalayan region, Vanda cristata is a terete orchid with slender, cylindrical leaves and charming, star-shaped flowers in shades of green, yellow, and white.

two vanda cristata with their many shades of yellow green and red

9. Vanda bensonii

Vanda bensonii, native to Southeast Asia, is a strap-leaved orchid with stunning, golden-yellow flowers adorned with reddish-brown spots. Its blooms are known for their sweet, citrusy fragrance.

A few vanda bensonii together

10. Vanda limbata

Native to Indonesia and the Philippines, Vanda limbata is a strap-leaved orchid with attractive, mottled leaves and vibrant, orange and red flowers that bloom in clusters.

A brown speckled vanda limbata

11. Vanda tessellata

Vanda tessellata, native to India and Sri Lanka, is a strap-leaved orchid with unique, checkered patterns on its petals and sepals. Its flowers come in shades of green, yellow, and brown, with a subtle, sweet fragrance.

A singular vanda pumila close up a singular photo of a vanda tessellata

12. Vanda stangeana

Native to Northeast India, Vanda stangeana is a rare, strap-leaved orchid with striking, greenish-yellow flowers marked with reddish-brown spots and stripes.

a cluster of vanda stangeanas

13. Vanda pumila

Vanda pumila, native to the Himalayan region, is a compact, strap-leaved orchid with delightful, white and pink flowers. Its petals and sepals are often marked with darker pink spots or stripes.

A singular vanda pumila close up

14. Vanda coerulescens

Native to Myanmar and Thailand, Vanda coerulescens is a strap-leaved orchid with enchanting, bluish-purple flowers. Its petals and sepals are often marked A cluster of vanda coerulescenswith darker purple veins, creating a mesmerizing pattern.

15. Vanda insignis

Vanda insignis, native to Indonesia, is a strap-leaved orchid with striking, maroon and yellow flowers. Its petals and sepals are often marked with darker maroon spots or stripes.

Vanda insignis close up picture

16. Vanda flabellata

Native to Southeast Asia, Vanda flabellata is a strap-leaved orchid with charming, fan-shaped leaves and delicate, white and pink flowers that bloom in clusters.

a cluster of Vanda Flabellata

17. Vanda roeblingiana

Vanda roeblingiana, native to the Philippines, is a strap-leaved orchid with stunning, purple and white flowers. Its petals and sepals are often marked with darker purple spots or stripes.

A singular Vanda Roeblindiana

18. Vanda hindsii

Native to the Philippines, Vanda hindsii is a strap-leaved orchid with attractive, mottled leaves and vibrant, yellow and brown flowers that bloom in clusters.

an few Vanda hindsii with grow and yellow

19. Vanda liouvillei

Vanda liouvillei, native to Southeast Asia, is a strap-leaved orchid with enchanting, purple and white flowers. Its petals and sepals are often marked with darker purple veins, creating a captivating pattern.

Close up of a brown hue vanda liouvillei

20. Vanda ampullacea

Native to the Himalayan region, Vanda ampullacea is a compact, strap-leaved orchid with delightful, pink and white flowers. Its petals and sepals are often marked with darker pink spots or stripes.

a close up shot of a vanda ampullacea

21. Vanda dearei

Vanda dearei, native to Borneo, is a strap-leaved orchid with striking, yellow and brown flowers. Its petals and sepals are often marked with darker brown spots or stripes.

A bunch of yellow vanda dearei

22. Vanda javierae

Native to the Philippines, Vanda javierae is a compact, strap-leaved orchid with charming, white and purple flowers. Its petals and sepals are often marked with darker purple spots or stripes.

a couple of White Vanda Javiera

23. Vanda lilacina

Vanda lilacina, native to Southeast Asia, is a strap-leaved orchid with enchanting, lilac-colored flowers. Its petals and sepals are often marked with darker purple veins, creating a mesmerizing pattern.

A vanda lilacina with a focus of the white and purple

24. Vanda motesiana

Native to Southeast Asia, Vanda motesiana is a strap-leaved orchid with stunning, orange and red flowers. Its petals and sepals are often marked with darker red spots or stripes.

A Vanda Motesiana and its brown and yellow hues

25. Vanda subconcolor

Vanda subconcolor, native to the Philippines, is a compact, strap-leaved orchid with delightful, yellow and brown flowers. Its petals and sepals are often marked with darker brown spots or stripes.

A vanda subconcolor with the focus on its brown hue

26. Vanda Miss Joaquim

Vanda Miss Joaquim is a beautiful vanda orchid that has been named the national flower of Singapore! A hybrid of v. hookeriana and v. teres, this orchid’s large soft pink blooms have vibrant orange centers with reddish-purple spots.

With such a diverse array of Vanda orchids to choose from, there’s sure to be a variety that captures your heart and complements your indoor space. In the next section, we’ll dive into the beginner’s guide to caring for these captivating beauties, ensuring that your Vanda orchids thrive under your care.

picture of vanda miss joaquim and it's blend of yellow to pink

Beginner’s Guide to Caring for Vanda Orchids Indoors

Now that you’ve fallen in love with the enchanting world of Vanda orchids, it’s time to learn how to care for these epiphytic orchids indoors. While they may seem exotic and challenging, with the right knowledge and a bit of patience, you’ll be able to create a thriving environment for your Vandas to flourish.

Light Requirements

Vanda orchids have varying light requirements depending on their leaf type.

  • Strap-leaved varieties, with their broad, flat leaves, thrive in bright, indirect light for at least 6 hours a day. An east or south-facing window with sheer curtains is ideal, as it allows plenty of light to reach the orchid without the risk of sunburn.
  • Terete Vandas, with their cylindrical, pencil-like leaves, require even more bright light, preferably direct sunlight for 4-6 hours a day. These varieties can handle more exposure and are less prone to sunburn.
  • Semi-terete Vandas, with their semi-cylindrical leaves, fall somewhere in between, needing bright, filtered light for 6-8 hours a day. An east or west-facing window with some shading is often ideal for these varieties.

Sun peaking through some of the vandas

If you don’t have access to natural light, you can use artificial grow lights to supplement your Vanda’s needs. LED or fluorescent bulbs with a color temperature between 5000-6500K work best, mimicking the full-spectrum light of the sun.

Temperature and Humidity

Picture the balmy, humid air of the tropics enveloping your Vanda orchid. To keep your indoor orchid happy, aim to maintain warm temperatures that range of 60-85°F (15-29°C), with a slight drop in temperature at night to encourage blooming.

Vandas also thrive in high humidity levels, around 60-80%. You can increase humidity by placing a tray of water near your orchid, using a humidifier, misting the roots and leaves regularly, or placing your orchid in a naturally humid room like a bright bathroom or kitchen. Just be sure to provide adequate air circulation to prevent fungal growth.

Watering and Feeding

In their natural habitat, Vanda orchids are accustomed to frequent rainfall and quick drainage. To mimic this, water your Vanda thoroughly when the roots appear dry. For potted Vandas, allow water to run through the pot until a little water drains out the bottom. For mounted Vandas, water the roots and mount until they are completely saturated.

Depending on your indoor conditions, potted Vandas may need watering every 2-3 days, while mounted Vandas may require watering as often as twice a day during hot, dry spells.

Feeding your Vanda is crucial for healthy growth and blooming. Use a balanced, water-soluble orchid fertilizer once a week during the growing season. For potted Vandas, dilute the fertilizer to half-strength and apply it to the potting medium, allowing it to drain out the bottom. For mounted Vandas, dilute the fertilizer to one-quarter strength and spray or pour it over the roots and mount. Be sure to flush the roots with plain water every few weeks to prevent salt buildup. Do not fertilize your orchid in the winter months.

a green watering can watering a bunch of vandas

Potting and Mounting

Unlike most orchids, Vandas don’t require a traditional potting mix. In fact, they prefer to have their roots exposed to the air, making them perfect candidates for mounting on wood, cork, or tree fern plaques. You can also grow Vandas in hanging baskets with a coarse, well-draining media like charcoal, coconut husk chips, or large bark pieces.

To mount a Vanda orchid on wood, start by selecting a piece of untreated wood or cork bark with a flat surface. Use plastic-coated wire, fishing line, or plant clips to securely attach the orchid’s roots to the mounting surface. Position the plant so that the newest growth faces outward, and leave enough space between the plant and mount for the roots to spread. Avoid using moss or soil, as these can retain too much moisture and lead to root rot. When mounting your Vanda, ensure that the roots have plenty of room to grow and that the plant is securely fastened.

three vandas in hanging pots

Pruning and Grooming

To keep your Vanda orchid looking its best, remove any dead, damaged, or diseased leaves and roots as soon as you notice them. This helps prevent the spread of infections and allows your orchid to focus its energy on healthy growth.

After flowering, cut the spent bloom stalk back to the base, just above the nearest node. This encourages your Vanda to produce new growth and bloom again in the future.

A close up of a flower getting pruned

Common Pests and Diseases

Even with the best care, Vanda orchids can sometimes fall prey to pests and diseases. Some common issues to watch out for include:

  • Mealybugs and scale insects: These sap-sucking pests can be removed with a cotton swab dipped in rubbing alcohol or treated with an insecticidal soap spray.
  • Spider mites: These tiny arachnids thrive in dry conditions and can cause stippling on the leaves. Increase humidity and treat with a miticide if necessary.
  • Root rot: Caused by overwatering or poor drainage, root rot can be prevented by ensuring proper watering techniques and adequate air circulation around the roots.
  • Fungal infections: Leaf spots and black rot can occur in humid, stagnant conditions. Remove affected areas and improve air flow to prevent the spread of fungal diseases.

A handful of mealy bugs on a plant

By following these guidelines and staying attentive to your Vanda orchid’s needs, you’ll be well on your way to cultivating a stunning, thriving collection of these captivating plants. Remember, patience and observation are key – as you gain experience, you’ll develop a deeper understanding of your orchids’ unique preferences and quirks, making indoor Vanda care a rewarding and enjoyable journey.

As we conclude our journey through the world of Vanda orchids, we hope you’ve developed an appreciation for these unique plants. From the vibrant blue Vanda coerulea to the striking patterns of Vanda sanderiana, Vandas can add a touch of tropical beauty to any indoor space.

  • We’ve explored the three main classifications of Vanda orchids – strap-leaved, terete, and semi-terete – and how their leaf structures affect their care needs. Understanding these differences will help you provide the right care for your Vandas.
  • Our overview of 25 common Vanda types showcased the diversity within this genus, from the delicate Vanda flabellata to the vibrant Vanda merrillii. There’s a Vanda orchid to suit every preference.
  • With our beginner’s guide to indoor Vanda care, you now have the knowledge to create a suitable environment for your orchids to thrive. Providing the right light, temperature, humidity, water, and nutrients will encourage stunning blooms.

The key to successful Vanda orchid care is patience, observation, and a willingness to learn. Listen to your orchids and respond to their needs. With proper care, your Vandas will become cherished companions, filling your home with their exotic beauty for years to come.

Dive into the world of Vanda orchids and discover the joy of nurturing these incredible plants. Your indoor jungle awaits!

FAQs

As you embark on your Vanda orchid journey, it’s natural to have questions and concerns. In this section, we’ll address some of the most common queries about these captivating plants, helping you feel confident and prepared as you nurture your own indoor orchid collection.

How often should I water my vanda orchid?

The frequency of watering your Vanda orchid depends on various factors, such as the climate, humidity, and potting material. As a general rule, water your Vanda when the roots appear dry, which could be every 2-3 days or as often as twice a day during hot, dry spells. Always ensure that the water can drain freely and that the roots have ample air circulation to prevent rot.

What is the difference between Vanda and Cattleya orchids?

While both Vanda and Cattleya orchids are epiphytic, meaning they grow on other plants or objects, they have distinct differences. Vandas have a monopodial growth habit, with a single stem that grows upward, while Cattleyas have a sympodial growth habit, with pseudobulbs that store water and nutrients. Additionally, Vandas prefer higher humidity and more frequent watering compared to Cattleyas.

Can I grow vanda orchids in regular potting soil?

No, Vanda orchids should not be grown in regular potting soil. These orchids have evolved to grow with their roots exposed to the air, and traditional soil mixes can retain too much moisture, leading to root rot. Instead, opt for mounting your Vanda on wood, cork, or tree fern plaques, or use a coarse, well-draining media like charcoal, coconut husk chips, or large bark pieces in hanging baskets.

What is the lifespan of a Vanda orchid?

With proper care, Vanda orchids can live for decades, making them a long-term investment in your indoor garden. Some specimens have been known to thrive for over 50 years! The key to their longevity lies in providing the right growing conditions, regular maintenance, and prompt attention to any signs of stress or disease.

Can Vanda orchids take full sun?

While Vanda orchids generally require bright, indirect light to thrive, their specific light requirements can vary based on the variety. Terete Vandas, with their pencil-like leaves, can tolerate more direct sunlight compared to semi-terete and strap-leaved varieties. Semi-terete Vandas, with their semi-cylindrical leaves, need bright, filtered light, while strap-leaved Vandas, with their flat, broad leaves, require the most shade and should be protected from direct sun exposure.

Remember, every orchid is unique, and it may take some trial and error to find the perfect balance for your Vanda. By staying attentive to your plant’s needs and making adjustments as necessary, you’ll be well on your way to cultivating a thriving, beautiful Vanda orchid collection that brings joy and tranquility to your indoor space.

Read more

How to Care for Hyacinth in a Vase: Your Complete Guide to Indoor Hyacinth Maintenance

Picture of Hyacinth in a vase with the title How to Care for Hyacinth in a vase

Struggling to keep your hyacinths healthy and vibrant in a vase? Or maybe you’re wanting to have your own winter-blooming hyacinth bulbs like you’ve seen in your neighbor’s windowsill? You’re not alone! These bulbs have been showing off for many years, giving people fragrant blooms and color throughout the winter. Today I wanted to share with you how to care for your own hyacinth so you can also enjoy these beautiful blooms, no matter the time of year!

Here’s what we’re covering:

  • How to force hyacinths indoors
  • Indoor Hyacinth care
  • How to properly preserve and store your hyacinth bulbs
someone tending to pink and blue hyacinths with water and a large bowl

How to Force Hyacinth Blooms Indoors

Ever wonder how flower stores manage to have beautiful cut hyacinths all throughout the year? It’s because they force them! Forcing bulbs means that you are causing the plant to bloom at a time when it doesn’t naturally bloom (any time other than early spring). The fun part about bulbs is that you can really force them to bloom at any time of the year with some proper planning! And here’s how!

Place Bulbs in Cold Storage

First, you need to understand that hyacinth are spring bulbs, meaning that they need a period of cold temperatures (aka winter!) to tell them when it’s time to flower again. To simulate this indoors, you need to move your bulb to a “cold storage”. The best place to do this is in a dry refrigerator. (I personally place my bulbs in a paper bag in the vegetable box of my fridge, just don’t place them near any fruits or vegetables…) They need to stay in this cold environment for about 12-16 weeks to mimic winter temperatures

a pair of hyacinths being placed in the fridge

Note that if you are trying to force grape hyacinths (Muscari varieties), these are not true hyacinth bulbs. These techniques for forcing are similar, but they only need a minumum of 8 weeks for their chill period. This 12-16 week period is for dutch hyacinths. 

Another quick tip, is that sometimes you can order bulbs in the winter that have already been chilled, or have been partially chilled. This means that sometimes you can buy them already sprouting (the nursery has already chilled them for 12-16 weeks), or you can get some that have been partially chilled, meaning that you only have to keep yours in a cool spot for 5-6 weeks instead. This can be very helpful! 

Just be aware that if you are purchasing your bulbs in the summer time that they need to be either have their chill requirements already met, or you will need to do the complete 12-16 weeks of cold storage. This is because the warm temperatures during shipment can cause them to start to sprout! And without the proper cold storage, they might not be able to flower… (This is why most bulbs are sold in the winter or springtime!)

After this chill period has been met, then you can either place your hyacinth bulb in water (the most popular choice), or in soil. I will cover the instructions for each below.

Flowering Hyacinths in Water

After your chill period has ended, you can bring your bulb out of the cold and start the exciting part of the forcing process! The best way to force your hyacinth in water is to get a container that holds your bulb, but keeps it above and out of the water. They have created special vases for this, called a bulb vase or a forcing vase. These vases work the best, but I’ve also found this perfect glass vase at the Dollar Tree (what?!?!) that works perfectly as well. Ultimately, you are looking for something with a narrow neck and a larger top to fit the bulb into without having it fall down into the water. Comprende?

hyacinth bulb in a small vase with water

Once you have a vase that fits your bulb, you will want to add water into the bottom of the vase, leaving the final water level to barely touch the bottom of the bulb (also called the basal plate). You do not want the water surrounding your bulb! This can cause your hyacinth to rot and die, which is not the beautiful flower you are expecting! So leave it to just barely touch the base of the bulb, (where the roots form), and then you can gradually lower the water level as the roots get longer.

Next, you will want to place your vase with the hyacinth bulb in a warm location (normal indoor temps are fine from about 68 F to 75 F) and keep it in indirect light. Then once the roots start to grow and you see a green shoot emerging from the top of your bulb you can place it in direct sunlight. Just keep an eye out for any yellowing or bleaching of the leaves as this can be a sign that your light is too hot on the leaves. 

You should then have gorgeous flowers within a few weeks!

Growing Hyacinths starting to sprout in low light on a shelf

Flowering Hyacinths in Soil

Flowering hyacinth bulbs in soil is very similar to flowering them in water. The major difference is that you will want to make sure that they are placed in soil around the bulb, but not covering the tip. This bulb tip should be sticking up from the soil. You also need to make sure that the sides of the bulb is not touching the sides of your pot, or the sides of any other bulb if you are forcing more than one. 

A hyacinth sprouting in the dirt

Use a pot with good drainage (aka it has drainage holes in the bottom of it!) and use a well-draining soil mix like an indoor potting mix or a regular potting mix ammended with additional perlite or sand. 

Then you will want to water it thouroughly and place it in a warm location out of direct sunlight. Then water once the top inch of the soil is dry. And don’t water it too much, or it can cause bulb rot (where your bulb starts to get mushy and die…). Once the stem starts to grow you can move it into bright light. Just be sure to gradually transition it into any full sun location to avoid leaf burn.

Once you’ve transitioned it into bright light then your bulbs should really get going! Expect beautiful blooms within a few weeks!

a hyacinth sprouting in a pot in dirt

Hyacinth Indoor Care

Once in the light, your hyacinths will grow fast. This rapid growth could lead to a tall, thin flower spike which might require support to prevent it from falling over. You can support them using a narrow stick acting as a stake, or one of my favorite things is to use a chopstick (unused of course). 

If you are using a vase of water, keep the water level consistently bleow the bulb, but still within the root zone. Change the water regularly to keep it clean and to reduce the risk of disease. 

Indoor hyacinths like moderate temperatures – neither too hot nor too cold. Keep the room temperature around 68-75 degrees Fahrenheit. Avoid placing the bulbs near radiators, vents, or exterior doors to keep it away from drafts. These conditions may cause too much heat or cold drafts that can dry out or chill the bulbs excessively, inhibiting their growth.

Once the flowering period has ended, your bulb has used up a large amount of its nutrients. This will make it start to die off. Don’t worry, this is a normal part of a hyacinth’s life cycle. 

If you’ve forced your bulbs in water, the plants usually do not have enough energy to continue to bloom. They are then best to discard or compost after they have bloomed. If you’ve forced your hyacinth bulbs in soil, however, they might be able to continue to produce flowers if you continue the cycle of growth period followed by a dormant season (or the plant’s chilling period), back to the growth period. But remember that flowering requires a lot of nutrients from the plant so it will eventually stop blooming.

I’ve personally found the best results in growing hyacinths when I eventually move these bulbs into the garden. If you live in hardiness zones 4-8 this means that they will grow well for years to come. And if you live in a warmer climate then you will need to chill them every year before planting. And if you live in a zone colder than zone 4, then I am very sorry for you. Brrr!!!!

A pair of hyacinths in pots with a water can and a tag stating to please add light water and love.

How to Properly Preserve and Store your Hyacinth Bulbs

Understanding the life cycle of a hyacinth is vital to learning how to care for this plant, especially when it comes to preserving and storing its bulbs. It is important to note that once hyacinth bulbs are flowered in water, they cannot bloom again and must be discarded. This is a unique characteristic of hyacinths and something you should consider when deciding which bulbs to purchase.

However, there’s a way to extend the life of your hyacinth bulbs – by potting them in regular soil instead of growing them just in water. When your bulbs have finished blooming for the season, you can carefully remove them from the vase, let them dry out for a few days, and then plant them in soil. By doing this, you are effectively preserving the bulb for another season of beautiful blooms. Be sure to let them grow in the soil for several months to help restore the nutrients that they lost through flowering.

If you aren’t planting your bulbs in your garden, then after the growing season you will need to store your bulbs properly. Ideal storage conditions involve a cool, dry environment, where the bulbs won’t be affected by mold or insect activity. A paper bag stored in a cool dark place like a basement or garage would suffice. Simply dig them up, remove the soil and discard any bulbs that are unhealthy, and place them in your paper bag. By storing your bulbs properly, you can watch your hyacinth bloom year after year!

Conclusion

In this comprehensive guide, we’ve explored how to care for hyacinths bulbs in a vase, from ensuring their optimal growth to forcing fragrant winter blooms. Let’s quickly revisit the main points from this article:

  • Forcing hyacinth blooms includes moving the bulb plant to cold storage for a period of 12-16 weeks which can help expedite and intensify the bloom process
  • Once hyacinths have flowered in water, the bulbs cannot bloom again
  • It’s possible to pot hyacinth bulbs in regular soil to preserve them for future seasons

Now you’re ready to get your own hyacinth bulbs and start forcing them! Enjoy the sweet fragrance of these flower bulbs at any time of the year with some proper planning! For more personalized plant care information, check out my Indoor Plant Care Guide (A-Z) or join the Facebook group, Houseplants for Plant Killers! Happy Digging!

five hyacinths on a window sill blooming pink and blue

Hyacinth Care FAQs

Can hyacinths grown in a vase flower more than once?

No, once hyacinth bulbs have flowered in water, they cannot bloom again. The energy consumed during the blooming process depletes the bulb and it will not have enough energy to rebloom. After enjoying their vibrant display in a vase, the bulb should ideally be composted.

How can I ensure bright and rapid growth of hyacinths grown in water?

Proper care is key to bright and rapid growth of hyacinths in water. It’s essential to place the vase in a cool, bright place and change the water every few days to reduce the chance of the bulb rotting or becoming too dry. Also, avoid overheating the bulbs, which can result in failure to bloom or stunted growth. You also need to ensure that they received a proper chill period to ensure healthy flowers.

What does “forcing” hyacinth blooms mean?

Forcing hyacinth blooms involves encouraging the plant to flower outside of its natural blooming period. Hyacinth bulbs are moved to cold storage for 12-16 weeks to mimic a winter period and to trick them into dormancy. After this cold period, they are brought back into warm conditions (mimicing springtime), which causes them to sprout and bloom.

How can I preserve hyacinth bulbs for future seasons?

Hyacinth bulbs, once flowered, cannot re-bloom if flowered in water. However, to preserve them for future seasons, you can attempt to grow bulbs in pots with regular soil after blooming – these bulbs have a chance of reblooming the next year, provided they’re cared for correctly and have had a chance to regain some of the nutrients lost during their previous blooming.

What are the ideal conditions for storing hyacinth bulbs?

Hyacinth bulbs need to be stored in a cool, dry, dark location with good air circulation. Keep them away from fruits or vegetables, as the ethylene gas they emit can damage the dormant bulbs. You can keep them in a refriegerator (away from any fruit or vegetables), or in a cool basement or garage. Ideally keep them in the 35 to 48 F range.

How to Water Houseplants the RIGHT way! (+Watering Tips)

man watering dracaena with watering can

Last month my mom was visiting to help me with my new little baby girl. While she was visiting, she asked me about one of her houseplants. It was a pretty interesting conversation… and I’ll admit, she’s struggled through the years as many people have with her plants dying. She wasn’t sure how to correctly water plants.

So… what was the first question that she asked me? She asked if yellow leaves were a sign of overwatering or underwatering.

My honest reply was that it can be a sign of either over-watering or under-watering.

With an exasperated sigh, she threw up her hands and said “Then how do I know if I need to water it more or if I need to stop?!”

“Well…” I replied, “is the soil wet?”

This question always seems to get people thinking. Hmm… Is the soil wet? Most people wouldn’t know. My mom didn’t remember. She said her plant had died a while back and she couldn’t remember if the soil was wet or dry…

So the moral of this story is that watering can be hard, but don’t worry, you’re not alone! Watering indoor plants can be a tricky business, and even the most experienced plant parents sometimes struggle to get it just right.

In this article, we’ll dive deep into the world of watering houseplants. We’ll explore the factors that affect your plants’ water needs, learn how to recognize the signs of overwatering and underwatering, and discover the best techniques for giving your plants the hydration they crave.

So, grab a cup of coffee (or a watering can!), and let’s get started on this journey to becoming the ultimate houseplant hydration hero!

Want to watch different watering techniques? Check out my youtube video below!

Understanding Your Houseplants’ Water Needs

Before we dive into the nitty-gritty of watering techniques, let’s take a step back and understand what factors influence your houseplants’ water requirements. After all, you wouldn’t give a cactus the same amount of water as a fern, right?

Here’s the rewritten section with more explanation for each bullet point:

Factors Affecting Water Requirements

Several key factors come into play when determining how much water your houseplants need:

  • Plant type: Different plant species have varying water needs. Succulents and cacti are adapted to arid environments, storing water in their fleshy leaves and stems, so they require less frequent watering. On the other hand, tropical plants such as ferns and calatheas originate from humid, wet regions of the world and prefer consistently moist soil to thrive.
  • Pot size and material: The size of the pot affects how quickly the soil dries out. Smaller pots have less soil volume, causing them to dry out faster than a larger pot. Additionally, the pot material plays a role. Porous materials like terracotta allow for better air circulation and faster water evaporation, requiring more frequent watering compared to non-porous materials like plastic or glazed ceramic.
two snake plants in pots sitting in tupperware full of water. hand lifting one snake plant out to drain excess water.
  • Root-to-soil ratio: Root-to-soil ratio, or basically the size of your pot can have an effect on your frequency of watering as well. Small plants in small pots use a typical amount of water, but large plants (with lots of roots) in small pots will dry out much faster than the average houseplant. This is why if your plant’s soil starts to dry out quickly, it is a sign that you need to repot your plant into a larger pot. (aka, increase the amount of soil, so you have a more balanced root-to-soil ratio.
  • Soil type: Well-draining potting soil is essential for most houseplants to prevent waterlogging and root rot. A good potting mix should contain ingredients like perlite, vermiculite, or bark chips to improve drainage and aeration.
  • Light and temperature: Plants in brighter, warmer environments tend to dry out faster due to increased transpiration (water loss through leaves) and evaporation from the soil surface. Those in cooler, lower-light conditions will require less frequent watering.
  • Humidity: High humidity levels in the air can slow down water evaporation from the soil, reducing the need for frequent watering. Conversely, low humidity environments may cause the soil to dry out more quickly.

By considering these factors, you can start to develop a better understanding of your houseplants’ unique water needs.

Click here to subscribe

Signs of Underwatering and Overwatering

Even with the best intentions, it’s easy to miss the mark when it comes to watering. Here are some telltale signs that your indoor plants are crying out for help:

Underwatering:

  • Drooping or wilting leaves
  • Crispy, brown leaf edges
  • Dry, hard soil that pulls away from the pot’s edges
  • Slow growth or leaf drop

Overwatering:

  • Yellow, mushy, or falling leaves
  • Moldy or smelly soil
  • Fungus gnats flying around the plant
  • Brown, soft, or rotting roots
hand holding dry soil above houseplant in pot to tell how to water houseplants

Signs of overwatering and underwatering can sometimes look similar, but a telltale sign to look at is if the yellowing leaf is fat and mushy, like it has water inside, or if it is becoming dry and crinkly like all the water in the leaf is gone.

If you spot any of these signs, don’t panic! In most cases, adjusting your watering routine and letting the soil dry out a bit can help your plants bounce back.

Now that you have a better grasp on the factors affecting your houseplants’ water needs and the signs of watering woes, let’s explore when and how to water your green friends for optimal health and happiness.

When to Water Your Houseplants

Picture this: it’s a sunny Saturday morning, and you’re standing in front of your beloved houseplants, watering can in hand. But wait! Before you start dousing your leafy friends, let’s talk about when to water them.

Checking Soil Moisture Levels

The most foolproof way to determine if your plants need water is to check the soil moisture levels. Here are a few methods to try:

The finger test: Stick your finger about an inch deep into the soil. If it feels dry, it’s time to water. If it’s still damp, hold off for a day or two.

placing finger into houseplant soil.

The chopstick method: Insert a wooden chopstick or skewer into the soil, then remove it. If it comes out clean and dry, your plant is thirsty. If it’s covered in damp soil, wait a bit longer.

Moisture meters: These handy tools measure soil moisture levels with a simple probe, taking the guesswork out of watering.

soil moisture meter reading "moist" in houseplant soil

The weight test: When soil is dry, it is much lighter than when it is full of a lot of heavy water. One way you can test roughly how much water is in your soil is by doing a weight test. You basically lift the pot and see how light or heavy it is. For those who only have a few plants and who can get used to the plants’ weight, this can be a simple, quick guage for how much moisture is still in your pot.

hand lifting scindapsus plant in macrame hanger

Remember, the goal is to keep the soil consistently moist but not soggy. Overwatering can be just as harmful as underwatering!

Establishing a Watering Schedule

Once you’ve got a handle on your plants’ moisture needs, it’s time to create a watering schedule. Here are some tips to keep in mind:

  • Water in the morning: This gives your plants plenty of time to absorb the water before the heat of the day sets in.
  • Be consistent: Try to water your plants on the same days each week, adjusting as needed based on soil moisture levels.
  • Group plants with similar needs: Place plants with comparable watering requirements together to make your watering routine more efficient.

I like to keep a simple calendar reminder on my phone to help me stay on track with my watering schedule. It’s a small step that makes a big difference in keeping my plants happy and healthy!

When to Adjust Your Watering Schedule

As the seasons change and your plants grow, their watering needs may shift. Here are a few scenarios where you might need to adjust your watering routine:

  • Seasonal changes: Plants typically require less water in the cooler months (in the fall and winter months) when they’re not actively growing. Conversely, they may need more frequent watering during the hot, bright summer months.
  • Changes in light: If you move your plants to a brighter or dimmer spot, their water needs may change accordingly.
  • Plant growth: As your plants grow larger, they’ll likely require more water to sustain their increased size.

It’s a good idea to test your plants’ moisture levels each time you water. By staying attuned to your plants’ needs and making small adjustments to your watering schedule as necessary, you’ll be able to keep your plants watered correctly.

How to Water Houseplants Properly

Alright, you’ve figured out when to water your plants, but now you might be wondering, “How do I actually do it?” Don’t worry, I’ve got you covered! Let’s explore the best ways to keep your plants perfectly hydrated.

Choosing the Right Water Source

Not all water is created equal when it comes to your houseplants. Here are some tips for selecting the best water source:

  • Rain water or filtered water: These are the ideal choices, as they’re free from harmful chemicals and minerals that can build up in the soil over time.
  • Tap water: If you must use tap water, let it sit out for 24 hours before watering to allow any chlorine to evaporate.
  • Avoid softened water: Softened water contains salt, which can harm your plants in the long run.
  • Room temperature is best: Avoid giving your indoor plants water that is too hot or too cold. Room temperature (or around there) is best.

I typically water my plants with filtered water just because with all the kids I have around the house, if I leave a jug of tap water out to evaporate, it WILL get knocked over within 24 hours! Haha! So I have my plants’ water filter under my sink, ready to go whenever it’s watering time. So make sure that you find the type of water source that works for you and your plants!

You can check out my post on 5 Signs your Plants need Filtered Water if you’re unsure.

You can also check out my video where I tested my own water filter to see if it really removed the chemicals or not…

But now it’s time for knowing exactly HOW to water. Here are the two best methods of watering:

  1. The Soak and Drain Method (also known as Bottom-Watering): Place your plant’s pot on a tray or basin and slowly pour water into the tray, allowing the soil to absorb the water from the bottom up. Stop adding water once the soil surface is moist. Let the plant sit and soak for twenty minutes to a few hours, depending on the size of the pot, then discard any remaining water in the tray.
  2. The Top Watering Method: Use a watering can with a narrow spout to slowly pour water over the top of the soil, starting around the edge of the pot and working your way inward. Keep watering until you see water beginning to drain from the bottom of the pot.

Whichever method you choose, be sure to water slowly and evenly, giving the soil time to absorb the moisture. And don’t forget to empty any excess water from the saucer or tray to prevent root rot!

Want more information on which watering method you should choose? Check out my video below!

Avoiding Common Watering Mistakes

Even with the best intentions, it’s easy to make mistakes when watering your houseplants. Here are a few common pitfalls to avoid:

  • Overwatering: As tempting as it may be to give your plants a little extra love, resist the urge to water too frequently. Stick to your watering schedule and always check the soil moisture levels before watering.
  • Underwatering: On the flip side, don’t let your plants go too long without water (Or avoid only giving them little water sips at a time). If you notice drooping leaves or dry soil, it’s time to give them a good drink.
  • Watering at night: Avoid watering your plants in the evening, as the cooler temperatures and lack of evaporation can lead to fungal growth and root rot.

By choosing the right water source, avoiding improper watering techniques, and steering clear of common mistakes, you’ll be well on your way to becoming an indoor plant expert!

Caring for Houseplants After Watering

Congratulations, you’ve successfully watered your houseplants! But wait, there’s more! Proper post-watering care is just as crucial as the watering itself. Let’s dive into how to keep your plants thriving after they’ve had a good drink.

Allowing Proper Drainage

Picture this: you’ve just given your beloved fiddle leaf fig a thorough watering, but you notice water pooling in the saucer beneath the pot. What do you do?

The answer is simple: remove the extra water. Allowing your plants to sit in standing water can lead to a host of problems, including root rot and fungal growth. Here’s what you can do:

  • Use pots with drainage holes to allow excess water to escape.
  • Empty saucers or trays beneath your pots after watering.
  • If your pot doesn’t have drainage holes, use a moisture meter to avoid overwatering, or consider repotting your plant into a container with proper drainage.

I once had a beautiful dracaena that I didn’t notice the water pooling between the nursery pot (with drainage holes) and the designer pot (with no drainage holes). By the time I noticed, the roots had started to rot, and I had to perform some serious plant surgery to save it. Learn from my mistake and always prioritize proper drainage!

watering can spout adding water to ivy plant sitting in sink

Monitoring for Pests and Diseases

While proper watering is essential for healthy houseplants, it can also create an ideal environment for pests and diseases to thrive (especially if you tend to keep your plants on the moist side). So after watering, take a moment to inspect your plants for any signs of trouble:

  • Fungus gnats: These tiny flying insects love damp soil. If you notice them buzzing around your plants, let the soil dry out a bit more between waterings and consider only bottom-watering your plants for a time. This is the best method to keeping your plants clear of this annoying pest.
  • Mildew or mold: White, powdery spots on leaves or fuzzy growth on the soil surface can indicate a fungal problem. Ensure proper air circulation around your plants and avoid getting water on the leaves when watering.
  • Yellowing or wilting leaves: While these can be signs of overwatering, they can also indicate pest infestations or nutrient deficiencies. Inspect your plants closely and consider treating with a natural insecticide or fertilizer as needed.

By keeping a watchful eye on your plants after watering, you can catch any potential issues early and take action to keep your leafy friends healthy and happy.

Click here to subscribe

Well, there you have it, folks! You’re now equipped with the knowledge and skills to become a true houseplant watering pro. From understanding your plants’ unique needs to mastering the art of the perfect pour, you’ve got this!

Remember, the key to success is to pay attention to your plants. They’ll tell you when they’re thirsty, and they’ll show you when they’re thriving. Trust your instincts, and don’t be afraid to make adjustments as needed.

Watering your houseplants may seem like a simple task, but it’s one of the most important aspects of plant care. By taking the time to understand your plants’ needs and develop a consistent watering routine, you’ll be rewarded with a lush, vibrant indoor jungle that brings you joy and tranquility.

So go forth, my fellow plant parents, and embrace the wonderful world of houseplant watering! With a little love, patience, and a trusty watering can, you’ll be well on your way to creating a green oasis in your home.

Don’t get discouraged if you encounter challenges along the way. Every misstep is an opportunity to learn and grow as a plant parent.

Happy watering, and may your houseplants always be green, gorgeous, and thriving!

How to Water Air Plants the RIGHT way!

How Often should I water my Succulents?

FAQs

Alright, you’ve made it through the article, and you’re feeling pretty confident about your houseplant watering skills. But wait, what’s that? You still have a few lingering questions? Don’t worry, I’ve got you covered! Let’s dive into some of the most common queries about watering houseplants.

How often should I water my houseplants?

As a general rule of thumb, most houseplants prefer to be watered when the top inch of soil feels dry to the touch. This can range from once a week to once every few weeks, depending on the plant and the conditions in your home.
The best way to determine when to water is to check the soil moisture levels regularly and get to know your specific plants’ individual needs to know if you’re giving them enough water. With time and practice, you’ll develop a sixth sense for when your leafy friends are ready for a drink!

Is tap water safe for watering houseplants?

In most cases, tap water is perfectly fine for watering your houseplants. However, there are a few things to keep in mind:

– If your tap water is heavily chlorinated, let it sit out for 24 hours before watering to allow the chlorine to evaporate.
– If you have a water softener, the added salts can build up in the soil over time and harm your plants. Consider using rainwater or filtered water instead.
– Some plants, like carnivorous plants and certain orchids, are more sensitive to the minerals in tap water. For these picky plants, it’s best to use distilled or rainwater.

If you’re unsure about the quality of your tap water, you can always have it tested or opt for a safer alternative like filtered or rainwater.

What are the signs of overwatering and underwatering?

Overwatering and underwatering are the two most common culprits behind houseplant woes. Here’s how to spot the signs:

Overwatering:
Yellow, mushy, or falling leaves
Moldy or smelly soil
Fungus gnats flying around the plant
Brown, soft, or rotting roots

Underwatering:
Drooping or wilting leaves
Crispy, brown leaf edges
Dry, hard soil that pulls away from the pot’s edges
Slow growth or leaf drop

If you notice any of these signs, don’t panic! Adjust your watering routine accordingly and give your plant some time to recover. With a little TLC, most houseplants are remarkably resilient and can bounce back from the brink of disaster.

The Complete Proven Guide to Grow a Fiddle Leaf Fig Tree

The fiddle leaf fig plant, with its large, glossy leaves and striking appearance, has emerged as a beloved choice for indoor plant enthusiasts. Its elegant presence adds a touch of tropical beauty to any space whether you’re going for a minimalist, modern, or even a bohemian design scheme. This makes it a popular choice for interior decoration. However, as captivating as these plants are, the next question becomes, how do I take care of this plant? Believe me, I’ve seen my share of dying fiddle leaf fig trees. So here are my tips on fiddle leaf fig plant care to help your plant continue to look sleek instead of turning sad…

Fiddle Leaf Fig Plant Care: Light Requirements - East-facing windows are the absolute BEST for this plant!

Brief Overview of the Fiddle Leaf Fig Plant

Originally native to the rainforests of West Africa, the fiddle leaf fig (Ficus lyrata) belongs to the ficus genus and is renowned for its broad, violin-shaped leaves that lend it its name. While it can grow into a majestic tree in its natural habitat, when cultivated indoors, it adapts to a more manageable size, making it suitable for various living spaces.

Click here to subscribe

Despite many people labelling these tropical plants as beginner-friendly, I’ve found that successfully nurturing a fiddle leaf fig indoors requires more than just watering it occasionally. Adequate attention to factors such as lighting, watering, fertilizing, and pest control is crucial for ensuring the plant’s well-being and long life. Next up I’ll delve into the essential aspects of fiddle leaf fig care indoors, providing practical tips and guidelines to help you grow your own gorgeous ficus tree.

Fiddle Leaf Fig Plant Care: Light Requirements

Fiddle leaf figs, or ficus lyrata, need plenty of bright light. However, direct, hot sunlight will easily burn the leaves. So how do we find the perfect balance? The absolute best location is to place your fig tree in a location where it will get direct morning light, but where it will be shaded during the afternoon hours. Two great options are placed in an east-facing window, or put it to the west of a south-facing window (where the morning light will be slanted for a direct hit, but by the afternoon, it will get nice, indirect light). Once you’ve placed it in the optimal light conditions, make sure to rotate the pot every couple of weeks to keep the new growth from leaning towards the light. This is vital if you want a well-rounded, large tree that is not leaning!

Potting and Soil

Now that we’ve found the ideal spot for your fiddle-leaf fig tree, it’s time to talk pots and soil. Let me share some tips based on my own trials and errors in potting and soil selection.

Selecting the Right Pot Size

When it comes to pots, size matters! You’ll want to choose a pot that provides ample room for your fiddle leaf fig’s roots to spread out comfortably. Opt for a pot that’s about 2 inches larger in diameter than the current pot your plant is in. This will give the roots room to grow without being overwhelmed by too much space. Plus, a slightly larger pot helps prevent your fiddle leaf fig from becoming root-bound, which can stunt its growth. Trust me, I’ve learned the hard way that cramped roots lead to unhappy plants!

On the flip side, though, you don’t want a pot that is too large for your fiddle. If you go more than 2″ larger in diameter, then you can risk having too much soil that holds on to too much moisture. This can lead to root rot. It’s a good idea to err on the side of keeping your pot a little bit more snug than to overpot your indoor plants.

Choosing Well-Draining Soil

Fiddle leaf figs are not fans of soggy feet, so it’s crucial to use well-draining soil that allows excess water to escape freely. Look for a high-quality potting mix specifically formulated for tropical plants or make your own by combining equal parts peat moss, perlite, and pine bark (also called orchid bark). 

Avoid heavy soils that retain moisture for too long, as they can lead to root rot and other problems. But also remember, the lighter your soil, the more frequently you will need to water, but the harder it is to overwater! (So if you have issues with over-watering your plants, try adding more perlite to your soil mixes! hint, hint!)

Repotting Guidelines

As your fiddle leaf fig grows, it will eventually outgrow its pot and need to be repotted. Keep an eye out for signs such as roots poking out of the drainage holes or pushing against the sides of the pot. 

Also, if you are having to water your fiddle leaf fig more often than usual, it could also be a sign that it is time to repot.

Spring is the best time to repot your fiddle leaf fig, as it’s entering its active growing season, but if you need to, then you can repot it during any season. When repotting, gently loosen the roots and untangle any circling roots. Place the plant in its new pot, adding fresh soil around the roots. Then, don’t forget to give your fiddle leaf fig a good drink after repotting to help it settle into its new home.

By following these potting and soil tips, you’ll provide your fiddle leaf fig with all the space it needs to succeed indoors.

Fiddle Leaf Fig Plant Care: Water Requirements

This plant loves water… when it’s dry! The best way to water your fig tree is to wait until the soil is dry (feeling the top 1 inch of the soil to be sure), then water it thoroughly. In this case, “thoroughly” means to water it until there is water coming out the drainage holes. Let it sit for a few minutes, then empty any excess water. If you don’t have a pot with drainage holes, I would suggest that you add only enough water that it will dry out every 3 days or so (a bit longer in the winter, but dries out faster in the summer). This is your sweet spot. Just remember to water it less in the winter, and more in the summer.

One trick with the fiddle leaf figs that I’ve heard is that if your plant is getting too dry, its newest leaves will turn brown and die. On the other hand, if the plant is getting too much water, its older leaves will shrivel up and die. Just a good thing to use to troubleshoot any watering problems…

Brown spots on your plant? Find out what is causing it with this in-depth picture guide of fiddle-leaf fig brown spots!

And another bonus tip, since I’m apparently full of them today, is that if your fiddle’s large leaves are drooping, it could be a sign of your plant needing water. But if the leaves are yellowing and falling off, it could be a sign of too much water. Just be sure to feel the soil. Stick your finger down a few inches of soil and feel if it is wet or dry. If it is wet, then don’t water it. If it is dry, then your fiddle leaf fig would love some more water!

Fertilizing

Now that we’ve covered watering, let’s talk about feeding your fiddle leaf fig the nutrients it needs to thrive. Here are some fertilizing tips based on my own experiences in keeping my plant happy and healthy.

Importance of Balanced Fertilization

Just like humans need a balanced diet to stay healthy, fiddle leaf figs require regular feeding to support their growth and development. Look for a well-balanced liquid fertilizer specifically formulated for houseplants. If you have a garden fertilizer, I’ve found that a good rule of thumb is to dilute it to half strength to avoid overfeeding. Or just buy a houseplant fertilizer. There are plenty of them on the market. This is the houseplant fertilizer that I personally use and love!

Types of Fertilizers Suitable for Fiddle Leaf Figs

When it comes to choosing a fertilizer, there are plenty of options out there. I prefer to use a fertilizer with a balanced NPK ratio (nitrogen, phosphorus, and potassium) to promote overall plant health. You can also opt for a fertilizer specially designed for foliage plants, (Or a blend that is high in Nitrogen) which will provide the specific nutrients your fiddle leaf fig needs to thrive.

Fertilizing Schedule

First off, I would always follow the instructions on the back of your label for frequency of use. Some fertilizers are stronger than others, and some are slow-release (meaning they fertilize your plant over the course of several weeks). I also know that the Miracle Gro version of indoor plant food is actually a REALLY low dosage (something like 1-1-1), so it can be added every single time that you water your plants (because you aren’t adding that much each time. 

That being said, it is best to fertilize your fiddle leaf fig during the growing season (spring and summer). During the dormant season (fall and winter), you can cut back to fertilizing at half the frequency, or skip it altogether if your plant isn’t actively growing. Remember, less is more when it comes to fertilizing – it’s better to under-fertilize than overdo it and risk burning your plant’s roots.

Fiddle Leaf Fig Tree: Additional Care Tips

Avoiding Drafty Areas

While fiddle leaf figs enjoy a breath of fresh air, they’re not fans of drafty spots. Drafts can stress out these sensitive plants and lead to leaf drop or other issues. So, when choosing a location, steer clear of drafty areas near doors, windows, or air vents. Instead, opt for a cozy corner where your fiddle leaf fig can bask in the warmth without any chilly interruptions.

Don’t Move Locations

My second additional tip is to make sure that once you position your plant to its perfect location, that you do not move it! All indoor fig trees don’t do well with change. If you need to move it, expect there to be a few weeks of leaf drop, followed be another few weeks of recovery time. This is just what fig trees do when they are moved locations…

How to Make your FLF Bushy

The last tip I have for you is in getting your fiddle-leaf fig plant to look bushy. A lot of times people buy a single stalk that looks great, until it gets tall and thin. What you want to do, though, is to hold out until it grows to within a few feet of the height you want it to stay at. Then, cut off the top 1-2 feet of the plant. (Make sure there are still at least half a dozen leaves on your remaining tree!) When the top is cut, the plant will stop putting its energy into vertical growth, and will instead start growing out its lateral branches. This will give you that tall, bushy structure that you’ve been wanting without it branching all the way up the entire trunk. This process will take a while, but believe me… it will be well worth it!

Cleaning the Leaves

Over time, dust can accumulate on your fiddle leaf fig’s leaves, which can interfere with its ability to photosynthesize and thrive. Give your plant a spa day every now and then by gently wiping down its leaves with a damp cloth or sponge. Not only will this remove any dust or grime, but it’ll also leave your fiddle leaf fig looking fresh and rejuvenated. It can also help to wipe away any insects that might be trying to establish a home in your plant. So overall, cleaning the leaves is a win-win situation!

Common Pests Affecting Fiddle Leaf Figs Indoors

Fiddle leaf figs can fall victim to a variety of pests, including mealybugs, spider mites, and scale insects. Keep an eye out for signs such as sticky residue, tiny webs, or yellowing leaves (with no change in location or watering), which may indicate the presence of pests. Early detection is key to preventing a full-blown infestation, so be sure to inspect your plant regularly!

But if you do get an infestation, you do have a few options at your disposal. For minor infestations, try spraying your fiddle leaf fig with a mixture of water and mild dish soap to suffocate the pests. You can also wipe down the leaves with rubbing alcohol to remove any stubborn critters. For more severe infestations, though, you may need to resort to chemical pesticides, but be sure to follow the instructions carefully and avoid overdoing it.

Troubleshooting Common Issues

Even the most well-cared-for fiddle leaf figs can run into trouble from time to time, but don’t panic! With a little know-how and some quick thinking, you can overcome common issues and keep your plant thriving. Here are some troubleshooting tips based on my own experiences with these guys…

Leaf Droopiness or Browning

If your fiddle leaf fig’s leaves are drooping or turning brown, it could be a sign of underwatering, overwatering, or exposure to drafts. Check the soil moisture levels and adjust your watering routine as needed, and make sure your plant is situated in a draft-free location with stable temperatures.

Yellowing Leaves

Yellowing leaves can indicate a variety of issues, including nutrient deficiencies, overwatering, or pests. However, nine times out of ten the issue is overwatering. Take a close look at your plant and assess its watering, fertilizing, and pest control routines to identify the underlying cause. Also be sure to place your finger in the soil to see if it is moist. Or consider buying a soil moisture meter that you can use to see if the soil is moist further down in the pot. Then adjust as necessary to restore your fiddle leaf fig to health.

Leaf Loss

It’s normal for fiddle leaf figs to shed a few leaves now and then, especially as they acclimate to their environment or undergo changes in care. However, excessive leaf loss can be a cause for concern. Especially if you haven’t moved your plant recently. The biggest cause of leaf loss that I have found has been due to drafts or insects (usually spider mites). If you are seeing excessive leaf loss, then check one of these problems.

Addressing Root Rot

Root rot is a common issue in fiddle leaf figs caused by overwatering or poor drainage. If you suspect root rot, carefully remove your plant from its pot and inspect the roots. Trim away any mushy or discolored roots, repot your plant in fresh, well-draining soil, and adjust your watering routine to prevent future problems.

I’ve also heard that by adding hydrogen peroxide to your roots, that it can kill some of the bacteria that is causing the root rot. I haven’t personally done a bacterial swab on my plant roots pre- and post- hydrogen peroxide, but it does seem to help when I use it on a plant that is starting to have root rot in its root ball. 

How to Propagate Fiddle Leaf Figs

Propagation Through Stem Cuttings

One of the easiest ways to propagate a fiddle leaf fig is through stem cuttings. Simply snip off a healthy, leafy stem from your plant, making sure it’s at least 6 inches long and has a few nodes (where leaves are attached). Remove any leaves from the lower portion of the cutting, (to expose a few nodes), then place it in a glass of water or potting mix to encourage root growth.

Rooting in Water or Soil

You can root your fiddle leaf fig cuttings in either water or soil, depending on your preference. If using water, change the water every few days to keep it fresh and prevent rot. If rooting directly in soil, make a small hole in the soil with a pencil or chopstick, then gently dip the cutting in rooting hormone (shaking off the excess powder), then insert the cutting and firm the soil around it. Keep the soil evenly moist and provide bright, indirect light to encourage root development.

Providing the BEST Conditions for Successful Propagation

Successful propagation depends on providing the right conditions for root growth. Keep your cuttings in a warm, environment with plenty of indirect light, and be patient – it can take several weeks for roots to form. Another tip you can use is if you live in an area with low relative humidity, you could place an old bottle or container over the cutting. This will raise the humidity levels surrounding your cutting and can cause it to root faster. Once your cuttings have established roots, you can transplant them into their own pots and watch them grow into full-fledged fiddle leaf figs.

So there you have it! That’s how to care for your fiddle leaf fig plant! If you liked this article, please share it using the social tabs! And be sure to watch the videos above. For as they say, a picture is worth a thousand words… then I’m not sure how many words a video is worth?! But anyways, enjoy your beautiful fiddle leaf fig and have a fabulous day!

Happy Digging!

Click here to subscribe

FAQ’s:

How do you care for a fiddle leaf fig plant indoors?

To care for fiddle leaf fig plants indoors, make sure that it gets enough light, meaning that it gets bright, indirect light throughout the day. Then water it thoroughly once the top inch of soil has dried. And finally, find a place in your home where your FLF is happy, then don’t move it!

Why are fiddle leaf figs so hard to care for?

Fiddle leaf figs can be hard to care for if a person is not giving their plant enough sunlight, is giving it too much sunlight, or is constantly moving their plant from location to location. If these things are corrected, then fiddle leaf figs can be simple to care for. One only need to understand the core concepts of light, water, and soil that are covered in my course, Indoor Plants Accelerated!

How do you keep a fiddle leaf fig happy?

To keep a fiddle leaf fig happy, you must place it in a location where it gets bright, indirect light for most of the day. One of the best places I’ve found has been in an east-facing window where it can receive some direct sun in the morning, then be shaded in the afternoon. If you get the lighting right, then only water once the top inch of the soil is dry. And finally, make sure that you don’t move your FLF. Once it is in a location that it likes, it does not do well when it is moved!

Do fiddle leaf figs need direct sunlight?

No. Fiddle leaf figs can grow just fine in indirect sunlight only. Hot, direct sunlight can actually burn the green leaves of the FLF. But if it receives more light (like morning direct sunlight), then it should grow faster and larger for you!

How to Grow Mimosa pudica Indoors | Sensitive Plant Care

Have you ever heard of a plant that moves when you tickle it? Sounds like something out of a whimsical fairy tale, right? Well, it’s not a product of fantasy but a fascinating reality called the sensitive plant. With the scientific name of Mimosa pudica, this popular houseplant has captured the hearts of plant enthusiasts and skeptics alike. Why? Because it brings the magic of nature right into your living room. Imagine having a friend over, and as you gently touch the fern-like leaves of your sensitive plant, they immediately fold up, eliciting gasps of surprise and delight. It’s like having your very own botanical showpiece!

Growing a sensitive plant indoors isn’t just about the awe-inspiring reactions it has to physical touch. It’s a journey filled with learning, patience, and, let’s be honest, a bit of trial and error. But don’t let that daunt you! With a dollop of dedication and the right care tips up your sleeve, you can foster a thriving sensitive plant that might just become the talking point of your home. From the perfect soils to the nitty-gritty of watering schedules, this guide will walk you through the essentials of bringing your sensitive plant from seed to spectacular.

So, grab your gardening gloves, and let’s dig into the delightful world of growing sensitive plants indoors. Whether you’re a seasoned green thumb or a budding plant parent, there’s something incredibly rewarding about nurturing these responsive creatures.

Key Features of the Sensitive Plant

I wanted to start off with a few facts about the sensitive plant, also called the touch-me-not plant, shame plant, or humble plant. Because when we understand where our plants come from, we can then understand how to nurture them in our homes. 

Why is it Called a Sensitive Plant?

The sensitive plant, or Mimosa pudica, earns its common names from the remarkable way it responds to touch. When you brush your fingers against its leaves, they fold inward and droop down, almost as if they’re shy or attempting to defend themselves from potential harm. This isn’t just a party trick; it’s an evolutionary adaptation that protects the plant from predators in the wild. But don’t worry, the leaves of the mimosa pudica bounce back in no time, ready for the next gentle touch or gust of wind. It’s this dynamic interaction that makes it a favorite among garden enthusiasts!

Natural Habitat of the Sensitive Plant

The sensitive plant is in fact a tropical plant that is native to the tropical regions of Central America and South America, where it thrives in warm, humid environments such as tropical rainforests. To help it flourish indoors, replicating these tropical climates is crucial. Mimosa pudica requires sunlight and humidity to thrive, even in city settings. Understanding its natural habitat can assist in providing the necessary care for this plant in your indoor environments.

By acknowledging the plant’s origins and its unique sensitivity to touch, you can effectively care for a sensitive plant.

Step-by-Step Guide: Starting Sensitive Plants from Seed

Growing a sensitive plant from seed is a fascinating journey. Here’s the straightforward process to turn seeds into touch-responsive plants:

Germinating Sensitive Plant Seeds

First things first, let’s get those seeds ready to sprout. Sensitive plant seeds have a bit of a reputation for being, well, sensitive. Here’s a tried-and-true method to wake them up:

  • Soak the seeds: Start by soaking the seeds in warm water for 24 hours. This softens the hard outer shell and tells them it’s time to get growing.
  • Prepare your soil: While they’re soaking, get a small pot filled with a mix of potting soil and sand. Make sure it’s well-draining because soggy conditions are a no-go.
  • Sow the seeds: After their spa day, place the seeds on the soil surface and cover them lightly with more soil. They’re shy and don’t like to be buried too deep.
  • Moisture and warmth: Sensitive plant seeds germinate best in warm conditions. Keep the soil moist (not soaking) and in a warm spot but out of direct sunlight. You can also cover the pot with clear plastic such as an old bottle or plastic wrap to help boost the humidity while the seed is just starting out.

Keep an eye out, because in about 1-2 weeks, you should see the first signs of life as tiny green shoots break through the soil. It’s a moment of pure gardening bliss, trust me.

Transplanting Seedlings Into Pots

Once your seedlings have a few true leaves, it’s time for their next big move. Transplanting might sound daunting, but it’s just about giving your plant babies a new home with a little more room to grow.

  • Choose the right pot: A small pot with good drainage holes is key. Remember, sensitive plants don’t like wet feet.
  • Be gentle: Handle the tiny seedlings with care, especially their delicate roots. Use a spoon or a small stick to ease them out of their nursery soil.
  • The transplanting dance: Make a small hole in the soil of their new pot, settle your seedling in, and gently firm the soil around them. Water them lightly to help them settle in and place them in enough sunlight to have them grow, without burning their leaves.

Congratulations! You’ve just completed the nursery phase of the sensitive plant’s life. As they grow, these little troopers will need your care and attention, but seeing them respond to your touch for the first time is nothing short of magical. Ready for the next steps in the journey? Let’s keep the momentum going!

Sensitive Plants in Pots – Getting the Soil Right

Proper soil mix is key for your sensitive plant’s success. Learn how to create the ideal potting environment to keep your plant thriving and responsive. Follow these steps to ensure your sensitive plant is healthy and active.

Choosing the Right Soil Mix

Imagine wearing a tight, uncomfortable pair of shoes all day. Not fun, right? Well, the wrong soil mix can feel just as constricting to your sensitive plant. Here’s how to get it right:

  • Airy and light: Aim for a loamy soil mix that’s well-aerated and lightweight. This ensures the roots can breathe and grow without getting waterlogged.
  • Drainage is key: Add materials like perlite, coarse sand, or even a handful of small pebbles to promote better drainage within the pot.
  • Don’t forget nutrients: While drainage is important, so is feeding your plant. A mix that includes compost or worm castings will give your sensitive plant the boost it needs.

Getting the right blend might take a little experimentation, but when you see your sensitive plant thriving, you’ll know you’ve nailed it.

Selecting the Perfect Pot

Now, let’s talk pots. The right pot not only complements your home decor but also supports the health of your plant:

  • Size matters: Start with a pot that’s not too large. A pot that’s too spacious can lead to overwatering issues, as the soil stays damp for too long.
  • Material counts: Terra cotta or other breathable materials are fantastic for sensitive plants. They allow air and moisture to move through more freely than plastic pots.
  • Drainage holes are a must: This cannot be stressed enough. Ensure your pot has adequate drainage holes to prevent water from pooling at the bottom.

Choosing a pot is like picking a home for your plant; it needs to be just right for growth and health.

The Importance of Proper Drainage

Why all this fuss about drainage, you ask? Well, too much water is the arch-nemesis of this shy plant. It can lead to root rot, a villainous condition that spells doom for our green friends. Proper drainage ensures that water flows through the soil, moistening it just enough without waterlogging. It’s all about creating a comfortable, cozy environment for those roots to spread out and soak up the good stuff. Remember, happy roots equal a happy plant.

By focusing on the right soil mix, selecting the ideal pot, and ensuring proper drainage, you’re setting the stage for your sensitive plant to put on its best performance. Now, who’s ready to be the director of their very own leafy show?

Optimal Growing Conditions for Sensitive Plants Indoors

Growing a healthy sensitive plant indoors is all about meeting its specific needs. By understanding what it requires and providing the right environment, you can ensure your plant flourishes and stays happy. Let’s discover the ideal conditions that will help your sensitive plant thrive.

Lighting Requirements

Light is absolutely essential to your plant, especially indoors. Your sensitive plant desires bright, indirect light to flourish. Think of a spot near a window that’s draped with a sheer curtain, allowing soft sunlight to filter through. An ideal location would be an east-facing window where it could get a few hours of sun in the morning, but be shaded from the hot, afternoon light. This mimics the dappled sunlight of its natural habitat beneath taller trees and shrubs. Direct, harsh sunlight can be overwhelming, leading to leaf burn, while not enough light might stunt its growth and reduce responsiveness. Finding bright light that isn’t burning your plant is tricky, but when you get it right, your plant will thank you!

Watering: How Much and How Often

Watering is a bit of an art form. The goal is to keep the soil consistently moist, not drenched. Overwatering is a common misstep that can lead to root rot, while under-watering can stress the plant, causing it to shut down and stop performing its characteristic movements. A good rule of thumb is to water when the top inch of soil feels dry to the touch. And always ensure that excess water can drain freely to avoid soggy conditions. You want moist soil for several days, then you want it to dry out a bit before watering.

Temperature and Humidity Needs

Remember, the sensitive plant is a tropical soul at heart. It thrives in warm temperatures and high humidity. Aim to keep your indoor garden oasis between 60-75°F (15-24°C). If your home feels dry, especially during the winter months, a humidifier can work wonders, or you might place the pot atop a tray filled with water and pebbles to increase humidity levels naturally. Just be sure the pot isn’t sitting directly in water.

Fertilizing Your Sensitive Plant

Feeding your plant is like providing a buffet of nutrients. A balanced, water-soluble fertilizer applied every 4-6 weeks during the growing season will do the trick. However, moderation is key. Think of fertilizing as providing a well-rounded diet – too much can lead to nutrient burn, whereas too little might starve your plant. Finding that nutritional balance will encourage lush growth and ensure your plant remains lively and interactive. I’ve found that sensitive plants enjoy a high-potassium liquid fertilizer to give them a fast burst of new growth, especially in the spring, or late summer before they go dormant.

Common Challenges in Growing Sensitive Plants

Let’s face it, growing a sensitive plant can sometimes feel like you’re navigating through a jungle of challenges. But don’t let that deter you! Most obstacles are just stepping stones on the path to becoming a seasoned plant parent. Here’s how to tackle two of the most common hiccups you might encounter in growing your sensitive plant.

Dealing with Pests and Diseases

No garden is an island,even indoors, and sometimes unwanted guests show up to the party. Spider mites, aphids, and fungal infections can crash your sensitive plant’s vibe, leading to droopy leaves and a lackluster appearance. But fear not, for there are weapons in your arsenal:

  • Stay vigilant: Regular check-ups are key. Catching pests early can prevent an infestation.
  • Neem oil is a good idea: A natural insecticide, neem oil can ward off pests without harming your plant.
  • Aeration is crucial: Ensure your plant has good airflow to prevent fungal diseases. A cramped and humid environment is a breeding ground for trouble.
  • Dry leaves: After watering, make sure the leaves aren’t left wet, as this can attract fungi. If possible, water the soil directly to avoid getting the leaves wet.

Remember, the key is prevention. A healthy plant is less likely to succumb to pests and diseases.

Overcoming Low Germination Rates

Starting your sensitive plant from seed can sometimes feel like a gamble. But don’t fret if your first attempt doesn’t result in a greenhouse. Here’s how to up your odds:

  • Quality seeds: Make sure your seeds are fresh and sourced from a reputable vendor. Old or improperly stored seeds have lower germination rates.
  • Pre-soak: Soaking seeds before planting encourages them to wake up and get growing.
  • Consistent temperatures: Sensitive plant seeds like it warm. Consider using a heat mat to maintain a cozy germination environment.
  • Patience is key: Sometimes, seeds take their sweet time. Don’t give up too quickly; wait a few weeks before calling it quits.

Low germination rates can be discouraging, but they’re also an opportunity to learn and refine your approach. With each attempt, you’ll get closer to sprouting your very own sensitive plant.

Whether you’re battling pests or coaxing seeds to sprout, remember that challenges in gardening are par for the course. They offer chances to grow—not just for your plants, but for you as a caregiver and enthusiast. Armed with knowledge and a bit of persistence, you’ll find that these common hurdles only add to the rewarding experience of growing a sensitive plant.

Propagating Sensitive Plants

Ever wish you could clone your favorite sensitive plant? Good news—you can! Propagation is the plant parent’s version of a magic trick, turning one plant into two (or more)! Whether you’re a propagation pro or trying it for the first time, let’s dive into the two main methods of multiplying your sensitive plant family.

Using Seeds for Propagation

Starting from seeds is a journey of patience and excitement. It’s like hitting the plant jackpot when those tiny seedlings finally peek through the soil. Here’s how to ensure your seed propagation is a success:

For growing sensitive plants from seeds, refer to the previous tips mentioned for general seed propagation success.

Remember, while seed propagation is super rewarding, it takes time. Be patient, and you’ll see your efforts bloom before your eyes.

Cutting Propagation Methods

The best way to propagate your sensitive plant is through taking stem cuttings. Plus, it’s a bit like ensuring your new plants have the same awesome personality as the parent. Here’s your cutting propagation cheat sheet:

  • Choose healthy stems: Look for vibrant, healthy stems that are free from pests or damage.
  • Make the cut: Using sharp, clean scissors, cut just below a leaf node (that’s where the leaf joins the stem). Your cutting should be around 4-6 inches long.
  • Rooting hormone: Dip the cut end into rooting hormone. This isn’t a must, but it can help speed up the rooting process.
  • Plant your cutting: Stick the cutting into a moist potting mix. Keep it warm and moist, and in a few weeks, you should see new growth.

Whether you choose seeds or cuttings, propagating your sensitive plant offers a delightful peek into the circle of plant life. Each method has its charms and challenges, but the end result—a new plant to love and care for—makes the journey worthwhile. So why not give it a go? Your indoor jungle (and maybe a friend or two) will thank you for it.

How to Grow Sensitive Plants Outdoors

Taking your sensitive plant outdoors can feel a bit like sending your kid off to camp for the first time. Exciting, but slightly nerve-wracking. However, with the right conditions and a little prep, your sensitive plant can thrive and become one with nature. Let’s explore how to transition your indoor buddy to the great outdoors.

Outdoor Climate Requirements

The sensitive plant is tropical at heart, which means it has a preference for warm, humid climates. If you’re living in a region with mild winters, you might be able to grow your sensitive plant outdoors year-round. And for more technical terms, sensitive plant can survive between usda hardiness zones 9 to 11. Here’s the scoop on how to keep one alive outdoors:

  • Temperature: Keep in mind that Mimosa pudica doesn’t do well in temperatures below 60°F (15°C). If your area drops cooler than this, consider growing it as an annual or bringing it indoors when the temperature falls.
  • Sunlight: Choose a spot that gets filtered sunlight. Direct, full sun can be too much for the sensitive plant, leading to burnt leaves. Think ‘sun hat’ rather than ‘sunbathing’.
  • Soil: Just like indoors, your sensitive plant will love well-draining soil. If your garden soil is heavy, consider amending it with sand or growing your plant in a raised bed or well-draining pot.

Your outdoor space can be the perfect summer holiday spot for your sensitive plant, provided the conditions are just right.

Transitioning Indoor Plants Outdoors

Moving our indoor houseplants plant from the cozy indoors to the variable outdoors is a bit like acclimatizing to a new culture—it takes time and gentle exposure. Here’s how to make the transition smooth:

  • Start slow: Begin by placing your plant outside for a few hours each day in the shade or a partial shade area. Gradually increase the time it spends outdoors over the course of a week or two.
  • Avoid sunburn: Just like humans can get sunburned, plants can too. Ensure the first few outdoor excursions are in indirect sunlight to prevent leaf burn.
  • Monitor closely: Keep an eye on how your plant reacts to the outdoor environment. If you notice any signs of distress, such as wilting or browning leaves, adjust its location or bring it back inside sooner.

Transitioning your sensitive plant outdoors is a chance for it to enjoy the natural elements, from the caress of a summer breeze to the joy of unfiltered daylight. With a bit of care and attention, your plant will not only survive outdoors but truly flourish.

Growing a sensitive plant outdoors is an adventure, peppered with both challenges and rewards. It’s a testament to the resilience and adaptability of both the plant and the gardener. So, why not take the leap and give your sensitive plant a taste of the great outdoors? The fresh air, natural light, and expanded growing space might just bring out the best in your leafy friend.

Conclusion: Keeping Your Sensitive Plant Thriving

Master the art of nurturing your mimosa pudica plants for lifelong companionship. Here are the key essentials:

  • Perfect the soil and potting mix that allows for plenty of drainage.
  • Provide bright, indirect sunlight and a warm, humid setting.
  • Water wisely to keep the soil lightly moist.
  • Monitor for pests and diseases proactively.
  • Propagate for extra plant happiness.
  • Above all, enjoy growing one of these beautiful moving houseplants!.

Here’s to many rewarding years ahead!

FAQs

How Often Should I Water My Sensitive Plant?

For your sensitive plant, use the “touch test”. Stick your finger into the soil up to the first knuckle; if it’s dry, it’s time to water. This may be around once a week but varies based on plant size, pot, indoor climate, and season. Keep the soil evenly moist for your sensitive plant’s preference for consistency, akin to the perfect cup of tea balance. Yellow leaves could be a sign you are over-watering your sensitive plant.

Can Sensitive Plants Bloom Indoors?

Yes, they can! Under the right conditions, sensitive plants will bless you with pink, fluffy flowers that look like tiny pom-poms cheering you on. To increase your chances of seeing these blooms, ensure your plant gets plenty of indirect light, warmth, and humidity. And remember, patience is key. Just like waiting for your favorite series to drop a new season, anticipation is part of the fun!

Why Are My Sensitive Plant’s Leaves Not Closing?

If your plant is giving you the silent treatment and not closing its leaves, it might be feeling a bit under the weather. Common culprits include overwatering, underwatering, lack of light, or even just the need for some time to adjust to a new environment. Review your care routine and adjust as needed. Sometimes, all it takes is a bit of detective work to get back on speaking terms. And don’t worry, sensitive plants are forgiving. With a bit of TLC, those leaves will be moving again in no time.

Remember, growing a sensitive plant is a journey filled with learning, experimenting, and enjoying the small victories along the way. Whether you’re troubleshooting, watering, or eagerly awaiting blooms, every moment is a step towards becoming a more attentive and responsive plant parent. Happy gardening!

How to Repot Anthurium (Step-by-Step Guide & Care Tips!)

Struggling to keep your anthurium plant healthy and thriving? It could be that it needs repotting! And lucky for you, in this article I’m going to cover exactly how to re-pot your anthurium so you have total success (and happy plants!)

So follow this step-by-step guide with everything you need to know to get it right the first time!

Here’s what we’re covering:

  • The best soil mix for your anthurium
  • How to repot your indoor plant
  • Basic anthurium plant care
anthurium plants in bloom

How to Repot your Anthurium

Anthurium plants, often known as “Flamingo Flowers” or “Painted Tongue,” are tropical plants that tend to slow their growth rate during the winter months. Because of this, the best time to repot your flamingo flower is during the spring or summer. This is when the plant is actively growing, giving it the best chance of repairing any damaged roots before they become infected, as well as gives the plant the chance to produce nice, healthy new growth to fill in the pot before it goes dormant for the winter. 

Step 1: Choose the Right Soil

Choosing the right soil mix is essential when you’re repotting your flamingo flower. These tropical plants prefer a well-draining soil mix that can mimic their natural habitat. While pre-mixed potting soils specifically designed for anthuriums are available, you can also create your own soil mix. 

A good soil mix for anthurium contains a combination of:

  • peat moss
  • perlite
  • orchid bark

The peat moss will work to retain moisture and provides necessary nutrients. Perlite improves soil aeration, essentially making gaps for air to be in the soil. This prevents waterlogging and root rot. Lastly, orchid bark also creates large air pockets in the soil, creating excellent drainage at the same time as it recreates the natural environment of anthuriums, which often grow on trees in the wild.

anthurium potting mix: 2 parts peat, 1 part perlie, 2 parts orchid bark

For your perfect anthurium soil mix, add two parts of peat moss, one part of perlite and one part of orchid bark. Ensure that all materials are well mixed and free of clumps. With this mixture, your anthurium will have well-drained soil that holds onto the right level of moisture, while also letting excess water drain out of the soil. This balance or aeration and moisture retention, as well as the addition of bark to help mimic the plant’s natural environment is the perfect blend for your anthurium plant.

Step 2: Choose the Right Pot

For your pot selection, choose a pot that is only a size or two larger than your current pot. For anthuriums this might mean that your plant’s leaves will extend beyond the rim of the pot, and that’s okay. It is better to have a pot that is too small and to have to water it more frequently, than to have a pot that is too large and run the risk of the soil holding too much moisture where your plant’s roots can’t reach it. This causes excess moisture, which then can cause bacterial growth and root rot. Also be sure that your new pot has good drainage (it needs a few drainage holes in the bottom of it!). Because there’s no point in using well-draining soil if your pot doesn’t give the excess water anywhere to flow out!

*Note: This is an anthurium that has had some sun damage. I’ve been babying it, and it’s since produced some beautiful new growth… but I’ve kept the better of the damaged leaves so it wouldn’t shock the plant. That’s why there’s some leaves with the brown areas. Just FYI, I’m aware it’s not insta-fake. These are real plants! 😀

selecting the right pot for an anthurium

Step 3: Remove your Anthurium

Carefully take the anthurium out from its current pot. Keep a firm grip on the base of the plant and gently tug. If it’s stuck, do not pull hard on the stem. You DON’T want to accidentally break off your main plant stem! It’s better to use a butter knife to loosen the soil around the edges of the old pot. If it still is having a hard time coming out, you can also soak the rootball (getting it overly wet) to get your plant to slide out. Just be sure let your soil dry out a bit after it comes out!

pouring an anthurium out of its pot

Step 4: Inspect the Roots

Once removed, inspect the roots for signs of disease or rot. If you find any dead or discolored roots, trim them off with clean scissors. The roots should be white or orange. Any roots that are turning a dark brown to black or that are soft and mushy instead of firm are diseased and should be removed.

inspecting anthurium roots

Step 5: Add Soil to the New Pot

Add a layer of soil into the bottom of the pot and place your anthurium inside. Measure the height of the anthurium based around the soil level against the main stem of the old container and try to match it in the new container. Add more or less soil in the bottom of the pot to get the final soil level a few inches down from the top edge of the pot. Then fill in soil around the root system, lightly pressing it around the roots. Compact the soil enough to hold up your plant, but don’t be too rough that you are breaking the roots.

adding soil to a pot with an anthurium

Step 6: Water

After repotting, water your anthurium sufficiently. In the following few weeks, keep an eye on the plant and water when the top inch of soil feels dry. If done correctly (and it’s not fall or wintertime), then in a couple of months you should expect to see a flush of new leaves from your anthurium!

watering an anthurium that's on a side table with other plants

Anthurium Care Basics

Anthurium plants, are tropical plants famous for their waxy, bright flowers (that are technically not flowers, but more about that another time…). These plants are symbolic of hospitality due to their open heart-shaped flowers. Because all of their fame comes from their flowers, many plant parents are desperate to have their plants bloom over and over again. However, success with your anthurium plants lies in creating the perfect balance of light, warmth, and humidity. And once you have happy plants, then they will be more likely to give you equally stunning flowers.

Sunlight

Native to the steamy rainforests of Central and South America, these plants have adapted to survive under the canopies of wet and shady jungles. And this is key… they survive UNDER THE CANOPY which means they are used to getting lots of bright, indirect sunlight! Direct sunlight can scorch the leaves, while insufficient light can hinder growth and blooming. Therefore, it’s best to place your anthurium near a window with diffused light (bright, indirect light). If that’s not possible, fluorescent grow lights can also work since they add a lot of light without the heat of direct sunlight. 

closeup of a white-veined anthurium

Some plants don’t do as well with grow lights, but I have not personally seen any issues with anthurium. I will update this post if I ever do see any negative impact from grow lights. Just be sure to keep your lights several inches away from your plants’ leaves, since they can get quite hot and scorch your leaves. Just keep an eye on it. Any light brown spots, and you might need to move your light farther away, but long, leggy stems and you’ll need to move it closer to your plant or consider getting a brighter light. 

For more information on plant lights and lighting in general, check out my Indoor Plant Care Pack!

Watering

While anthuriums love humidity, it’s important not to overwater them. Too much water can lead to root rot, a common issue with this plant. As a general rule, wait until the top inch of the soil is dry before you water again. If you’re unsure, it’s better to underwater than overwater. These little guys are quick to die when they’re left in soggy soil!

Also, athurium plants can be sensitive to chemicals that are generally found in tap water. Consider leaving a pitcher of water out for 24 hours for the chlorine to dissipate, or you can consider watering with distilled or filtered water. Check out my post on 5 signs your Plants need Filtered Water for more information!

watering an anthurium in a pot

Temperature

Being tropical plants, anthuriums prefer warm temperatures ranging from 65 to 80 degrees Fahrenheit (18-27 Celsius). They don’t fare well in cold or draught, so avoid placing them near air conditioning vents or drafty windows. Anthuriums also love high humidity, so consider placing your plant on a humidity tray or near a humidifier.

Remember, every plant is different and may have slightly different needs based on its specific variety, age, and overall health. It’s important to monitor your anthurium regularly and adjust your care routine as needed. 

closeup of an anthurium in bloom

Conclusion

This should be everything you need to know to have success in repotting your anthurium. Remember that a lot of indoor plants have similar requirements while repotting, such as choosing the right pot and being gentle with the main stem. Once you get these basics down, then repotting your houseplants will become a breeze! So good luck, and for more information on how to successfully grow and care for your plants, check out my plant-killer to green thumb course, Indoor Plants Accelerated!

Happy Digging!

Anthurium Repotting FAQs

How often should I repot an Anthurium?

Generally, anthuriums should be repotted every 2-3 years. However, if you notice that the plant is outgrowing its pot or the roots are highly visible and wrapping around the pot, it might be time to repot, even if it hasn’t been 2 years yet. Also, if you typically have lots of new growth on your plant, but it has suddenly stopped growing (and it isn’t the fall or wintertime), then this could also be a sign that your plant is outgrowing its space or needs fresh soil.

What type of soil is best for repotting anthurium?

Anthuriums prefer well-draining soil. A mixture of equal parts peat moss, pine bark, and perlite is a good selection. This mix provides plenty of drainage and mimics the plant’s natural growing conditions. Just be sure that you still provide your plant with adequate drainage from the pot. This will ensure the soil mix is used properly.

Is it normal for my anthurium to droop after repotting?

Yes, it’s fairly common for anthuriums to experience a bit of shock after repotting, often evident as wilting or drooping. However, with proper care and adjustment time, your anthurium should recover and bounce back to its vibrant self. If there are brown leaves, however, this could be a sign of extensive root damage or overwatering during repotting.

How big a pot should I use for repotting?

The size of the pot depends on the size of the plant. Generally, select a pot size that’s about 2 inches larger in diameter than the current pot. This provides enough room for the roots to spread without making the plant prone to overwatering.

Easy Tillandsia Caput Medusae Care | Air Plant Guide

a t. caput medusae with the title how to care for tillandsia caput medusae

Ever wonder how you can skillfully care for and display the striking tillandsia caput medusae? You’re not alone; many indoor plant enthusiasts have been charmed by its unique, crazy look, but have struggled with keeping it alive. Here’s a complete guide on how to care for this air plant so it thrives and looks amazing with minimal time and care!

Here’s what we’re covering today:

  • Background and History of Tillandsia Caput Medusae
  • Caring for Your Tillandsia Caput Medusae
  • Creative Ways to Display Your Tillandsia Caput Medusae
a tillandsia caput medusae on a white background

Background and History of Tillandsia Caput Medusae

The Tillandsia Caput-Medusae, named after the mythical Greek goddess Medusa for its resemblance to her snake-haired head, is an air plant native to Central America, Mexico, and certain parts of the southern United States. This unique plant, belonging to the Bromeliaceae family, (so it’s a cousin to bromeliads) is often found growing on tree branches in its natural habitat. This hanging habit of its wildly twisted leaves have also given it the nickname of the octopus plant!

Indigenous cultures treasured tillandsia plants for their therapeutic properties and used it to treat minor ailments. This has created a large pharmaceutical value for tillandsia as a cash crop and has continued its cultivation. 

This, combined with the t. caput medusae’s distinct, tubular purple flowers and gray-green tendrils continues to make this variety an iconic member of the Tillandsia genus.

a large collection of t. caput medusae

Caring for Your Tillandsia Caput Medusae

The t. caput medusae air plant is similar to most other air plants in their care requirements. This makes it easy to care for, but for those who don’t have experience growing air plants, it can also be difficult. Here, I’ll share some essential, simple tips on how to care for your t. caput medusae in the best and easiest way possible!

Light Requirements

Tillandsia Caput Medusae loves bright, indirect light. As an indoor plant, place it in a well-lit room, preferably near a south, east, or west-facing window. Avoid direct sunlight as it can harm the plant’s foliage. Artificial light is also a good option if natural light is not abundant. This makes it do well even in artificially-lit offices. However, if your air plant is not growing or is looking long and spindly, this could be a sign that your tillandsia needs more light.

a tillandsia caput medusae on a shelf

Watering Your Plant

Watering is key to keeping your Tillandsia Caput Medusae healthy. This air plant species is native to dry regions, which means it doesn’t need excessive water. A good approach is to soak the plant once a week for about 15-30 minutes and let it dry completely afterwards. Too much water can lead to root rot, while too little can cause the leaves to curl and brown.

If your plant is becoming soft and mushy, this can be a sign that you have overwatered your plant. If it survives, try to add less water, drain excess water, or dry it out better after watering. For more information on how to water air plants (free-standing air plants, as well as plants that are glued to wood or rocks), check out my post on How to Water Air Plants the Right Way.

a t. caput medusae wet from soaking in a sink

Temperature and Humidity

Tillandsia Caput Medusae can tolerate a wide range of temperatures, from as low as 50 degrees Fahrenheit to as high as 90 degrees. However, the optimal temperature for its growth is between 70 and 80 degrees. This plant also appreciates good air circulation and humidity, which makes it a good choice for bathrooms or kitchens. Be aware, though, that if your plant doesn’t receive enough air circulation and it stays too wet, it can potentially die from leaf rot.

a t. caput medusae hanging from a white basket

Feeding Your Plant

Although Tillandsia Caput Medusae gets most of its nutrients from the air, occasional feeding can boost its growth. Use a bromeliad-friendly fertilizer once a month, diluted to quarter-strength. This will provide the plant with the necessary nutrients and allow it to thrive. For information on how to properly fertilize your tillandsia, check out my post on Air Plant Care

a tillandsia air plant fertilizer spray bottle

Creative Ways to Display Your Tillandsia Caput Medusae

The wild, curly tendrils of the t. caput medusae makes it a show-stopper, despite its relatively small size. So be sure to maximize this plant’s display to show off (and not hide!) this plant’s showy form!

One simple, yet fabulous way to display your tillandsia is to hang it. Since tillandsias are air plants, they do not require soil or traditional planters. You can hang them in glass terrariums or even directly from your ceiling or wall hooks to embrace a minimalist appeal.

a tillandsia in a glass case on a shelf

Alternatively, adhering these plants to a piece of driftwood or stone also creates an impressive display, bringing another piece of nature into your indoor space. Be careful when doing this, though, as hot glue can burn your plant.

Also, make sure that your natural plant stand is waterproof, since you will need heavy mistings to keep your air plant well watered. This, or you can soak the entire piece to water your air plant. Just make sure that whatever you choose doesn’t hold trapped water, since this can quickly cause your plant to die.

tillandsia caput medusae sitting on a crystal

Tillandsia caput medusae plants can also instill a botanical touch to your bookshelf, coffee table, or work desk when nested in a small ceramic or metallic holder. This adds a lot of texture to a small space, but it is a perfect decor piece for guests to “discover” that will bring a smile to their face!

t. caput medusae sitting in a metal teacup

Conclusion

In conclusion, here are the items we covered in this post.

  • Background: Understanding the history and origins of the tillandsia caput medusae give us a greater appreciation for this plant, as well as helps us better understand how to care for it as an indoor plant.
  • Plant Characteristics: We explored this plant’s physical attributes and growth habits, adding to the allure of owning a tillandsia caput medusae.
  • Care Guide: We covered essential care instructions for light, water, temperature, and nutrients to ensure your plant thrives.
  • Display Suggestions: We talked about various innovative methods to display this plant and how it can enhance your living or working space aesthetics.

Now that you know how to properly care for your tillandsia caput medusae, I hope you can have fun with this wild, twisted air plant! It is definitely one that is worth adding to your indoor plant collection!

Happy Digging!

Tillandsia Caput Medusae FAQs

Can Tillandsia Caput Medusae grow indoors, and what kind of lighting does it need?

Yes, Tillandsia Caput Medusae does well indoors. It needs bright, indirect light for optimum growth. Positioning it near a window with filtered light would be the ideal location indoors. Try to avoid hot, direct sunlight as this can dry out your plant and cause leaf scorch.

How often should I water my Tillandsia Caput Medusae?

This air plant variety generally needs to be watered once a week. However, in dryer climates or heated indoor areas, misting between waterings can help keep it hydrated. Locations with high humidity can get away with bi-weekly watering.

Why are the leaves of my Tillandsia Caput Medusae turning brown?

Brown leaves could be a sign of under-watering or too much sun. If housed in a bright location, consider moving it to a spot with lower light intensity. Increasing watering frequency can also help. Mushy, black leaves on the other hand are the most common problem with tillandisa and is caused by too much watering.

Do I need to fertilize my Tillandsia Caput Medusae?

While not a requirement, occasional fertilizing can support growth. You can use a bromeliad-friendly fertilizer at a quarter strength every month during the growing season for added nutrients. Add the fertilizer to your water during the usual soaking or misting of your air plant.

Why do Air Plants grow in the US + Tillandsia Care Guide

a group of air plants on a tree branch

Ever wondered why air plants are found in the southeastern United States? The unique distribution of air plants is no coincidence, but the result of fascinating ecological and environmental factors. Air plants are predominant in the southeastern United States due to the region’s favorable environment. This means that it meets air plants’ specific climate, temperature, and humidity needs, which are vital for their unique growth characteristics and adaptability. Their presence also plays a crucial ecological role in this region and significantly impacts the overall ecosystem.

Today we’re going to cover the following fun facts about air plants:

  • Unique Characteristics of Air Plants
  • Air Plants found in the Southeastern United States
  • Environmental Factors Influencing the Growth of Air Plants
  • Impact of Air Plants in the Southeast Ecosystem

Continue reading to uncover the intriguing reasons explaining this prevalence and how it impacts the regional ecosystem – and maybe get some ideas for your own air plant care while you’re at it!

two air plants on a large branch

Unique Characteristics of Air Plants


Air plants, a part of the bromeliad family, hold a unique position in the plant kingdom. These extraordinary plants have the ability to receive their needed nutrients and moisture directly through their leaves, rather than from soil like most other plant species. This evolution allows them to grow in a variety of locations, often using trees or rocks merely as a support to grow on. With more than 500 known species, this plant family also exhibit a wide range of shape, size, and color variations.

Air plants’ primary mode of water intake happens through tiny structures on their leaves called trichomes. These structures can absorb water from the air directly. Interestingly, these trichomes also give many air plants their distinctive silver or grey appearance. Their epiphytic nature allows them to thrive without soil and live on the surfaces of other plants without causing any harm to them, unlike other vining plants that can overtake and kill their host plants.

a tillandsia plant on the side of a tree

However, these unique qualities come with some vulnerabilities, particularly regarding climate and humidity requirements. And that’s where the southeastern United States comes into play. So, how does this geographical region support such a unique form of plant life? Let’s delve deeper into this topic.

Air Plants in the Southeastern United States

When it comes to distribution of air plants, they are found all over Central America and South America, but in the United States, they are mostly only found in the southeastern region and along warm coastal areas.

Several genera of air plants, such as tillandsia ionantha, tillandsia xerographica, and the well-known (and often photographed!) spanish moss, or tillandsia usneoides, are particularly widespread in the Southeastern U.S. Florida, specifically, has become a hotspot for these plants, due to its subtropical and tropical climate that mirrors the plants’ natural environment of Central and South America (and even throughout the west indies!).

In these locations, the air plants typically grow on other plants, such as the thick branches of trees, without harming them or drawing nutrients from them. They are common in the forests, mangroves, and swamps of the Southeastern U.S, notably in the Everglades National Park of Florida and the Okefenokee Swamp of Georgia. Like other epiphytes, they offer a unique layer of biodiversity, cohabiting with various other species in these ecosystems.

spanish moss hanging from a large tree

Environmental Factors Influencing the Growth of Air Plants

The southern United States provides an ideal environment for several varieties of air plants due to its specific climatic conditions and geographical features. This basically means that in these regions we find a lot of humidity, warm temperatures, and frequent rainfall. This is vital for the survival of air plants because of their lack of roots and their ability to absorb moisture from the air (through a process called atmospheric water uptake). If the air around them were to be too dry, then they would ultimately suffer. This keeps them from spreading to most of the northern and western United States, since these regions are warm enough, but lack the humidity and rainfall that are necessary for this plant’s survival. They can usually only be found along coastal regions where there are higher humidity levels and a more temperate climate.

Speaking of temperature, air plants are tropical plants, and as such, they like it warm! Because of the southeast region’s moderate winters and hot, humid summers, this area supports a year-round growing environment for air plants without the threat of frost damage.

Finally, the diversity and abundance of trees in the southeastern forests provide ample surfaces for air plants to latch onto and flourish. Being a Georgia transplant myself, I have been amazed at how many different types of trees naturally grow here! And the wide variety of trees within these extensive forests allow for an equally wide array of air plant species, each adapted to a slightly different niche within this rich ecosystem.

a grouping of air plants hanging from a tree branch

Impact of Air Plants in the Southeast Ecosystem

And air plants aren’t just around for the benefits. They also play a significant role in the ecological makeup of the southern United States. By living on tree branches and other surfaces, they add to the diversity and complexity of the ecosystem without competing for soil resources. These plants also are an important source of nectar for various pollinators such as bees, butterflies, and hummingbirds.

One notable way that air plants positively impact the ecosystem is through their innovative water and nutrient capture method. The adapted structure of their leaves allows them to collect water from rainfall and even fog, storing this water that can later be shared with other organisms in their environment, similar to other bromeliad species. As such, during periods of drought or scarce rainfall, these plants act as miniature reservoirs.

a closeup of an air plant with the light shining into the leaves

Air plants also serve as habitat providers, particularly for smaller creatures. As they grow, air plant colonies can create considerable networks of cover and shelter for insects, spiders, and other small organisms. They literally provide a “living” environment for many species, making them a crucial part of the broader biodiversity.

Their presence can also help us in our evaluation of the overall health of the ecosystem. Typically, healthy air plant populations signify good air quality and a well-balanced environment. If air plant numbers deteriorate, it could indicate bigger environmental issues at play, such as pollution, climate change effects or ecosystem disruption.

Understanding the role of air plants in the ecosystem and their connection to broader environmental health makes their conservation more critical. Ensuring their prevalence continues in the southeastern U.S. is important not just for the air plants themselves but also for the countless organisms that depend on them and the wellbeing of the ecosystem as a whole.

Growing your Own Air Plants

Now I wanted to mention that you can enjoy air plants, even if you don’t live in the southeastern United States. In fact, anyone can successfully grow air plants in their home or office! The main needs for your air plants is bright light (but not too much light), frequent watering, good air circulation, and a bit of protection during the cooler months. A little bit more about that below…

Lighting

To successfully grow your air plants indoors, make sure that you place it in a location with bright, indirect sunlight. Full sun can sometimes cause leaf scorch since our homes don’t usually maintain the same high humidity levels that Florida has! 

Watering

Next, to water your air plant, soak it in a water bath for 20-30 minutes every 1-2 weeks. Then shake off any excess water and let it dry completely before placing it back in its display case or stand. Too much water, especially in the cooler winter months, can cause these plants to rot…

a pile of air plants with several flowering

Tap water can be fine if you leave it out for about an hour to allow the chlorine to evaporate out. If, however, you are finding that the tips of your leaves are turning brown, you might need to find something with less chlorine in it, such as pond or aquarium water, rainwater, or bottled spring water. Avoid distilled water, since all of the nutrients are removed during the distillation process. 

For more information on how to water air plants correctly, whether it’s placed in glass globes, or glued to a pile of rocks (why Walmart, why?!), check out my post on how to correctly water air plants!

Flowering

​And finally, if you are making your air plant happy, it might even flower! Some species of air plant will let you know it’s ready to flower by changing its leaf tips from green to red! The most common of these are the tillandsia bulbosa and the tillandsia ionanthe. Then watch out because you’re going to have the cutest array of purple flowers or white flowers, depending on your variety. The only thing to remember though, is that once a tillandsia flowers, it will then start its decline. 

This is a good sign though, since your air plant will then start to make new plants all around the base of the mother plant. Then as the center of the plant dies away, the small baby plant(s) will then grow in to fill its space. This is how they grow and spread in their native habitat!

For more information on how to take care of your air plants, check out my more detailed post here on air plant care!

a large grouping of flowering air plants on a branch

​And now you should be an expert at growing air plants! Just kidding… it takes everyone some trial and error. But if you’d like more help, feel free to join the facebook group, Houseplants for Plant Killers today!

Conclusion

From the unique characteristics of air plants to their significant presence in the southeastern United States, we’ve covered some of the reasons why air plants are found in this region, as well as the role that they play. Air plants play a great role in this region and are a testament to the complex relationship between geography, climate, and biodiversity in the world of botany.

Air Plants FAQs

What makes air plants unique?

Air plants are unique because they are able to absorb moisture and nutrients from the air through their leaves, which eliminates the need for traditional soil-root system. This particular trait allows them to live in a variety of environments, including attached to other plants or objects.

Why are air plants predominantly found in the southeastern U.S.?

The southeastern U.S. has environmental conditions, including a warm climate and humid environment, that are highly favorable to the growth and survival of air plants. These conditions mimic the tropical and subtropical environments originally native to many air plant species.

What is the importance of air plants in the ecosystem?

Air plants contribute significantly to biodiversity and play a crucial role in their ecosystem. By thriving in a variety of habitats and growing on different surfaces, air plants aid in creating microenvironments for other species and cycling nutrients back into the ecosystem.

Can air plants survive in other climates?

Even though air plants prefer warm, humid climates, they are surprisingly adaptable and can survive in a variety of conditions. However, they may require additional care in drier or colder climates, such as regular misting or bringing them indoors during cold snaps. If you live in areas below zone 9, then it’s best to have them as indoor plants when temperatures fall below 50 F.