Money trees are sold for their beautifully braided trunks, their bonsai shape, or as a good luck charm that bring wealth and prosperity to the space. It’s no wonder this plant appeals to so many different people! But now the question becomes… how do I keep my money tree alive?!?! Because a dead money tree definitely won’t be bringing you any of its good luck charm! So here is what you need to know to properly care for your money tree!
Don’t have one of these awesome plants yet?! You can get one here!
**Note: This post contains affiliate links, which if purchased, I will receive a portion of the profits. This helps me to keep providing awesome information to all of you!**
Just to be clear… in this post, we are talking about the money tree, Pachira aquatica. There are two other plants that are commonly referred to as a money tree. These are jade plants, and Chinese money tree plants, or Pilea peperomioides.
Money Tree Plant Care: Light Requirements
Money trees are some of the best indoor plants due to the fact that they aren’t very picky when it comes to lighting. Try to give them bright, indirect light, but they will do okay in lower light settings as well, especially during the winter when the plant isn’t actively growing. Just be sure to keep it out of hot, direct sunlight. Money tree leaves are sensitive to direct sunlight and will easily burn. If your leaves are looking pale, white, and wrinkled on the edges, this is a sign of too much sunlight and you should immediately move it to a location with less sunlight.
Money Tree Plant Care: Water Requirements
Money tree is sensitive to root rot. This means that it doesn’t like being wet for too long without having a chance to dry out its roots. So to keep it happy, only water your plant once the top several inches of the soil is dry (more or less depending on how big your pot is). Then water thoroughly. Also make sure that your pot has good drainage to help it to dry out quickly in between waterings. But if your plant is still wet a week after watering, then you’ll need to increase your drainage, as well as add water in smaller amounts.
Money Tree Plant Care: Additional Tips
The last thing that I need to address is that money trees NEED high humidity. This can be achieved in several ways. You can either grow it in a group of several other high-humidity plants, spray it often, or purchase and use a humidifier nearby. You can also place it on a tray of pebbles that is filled with water. All of these methods can be used to boost humidity levels. And just like palm trees, if a money tree isn’t getting enough humidity, it’s leaf tips will start to turn brown. This is the plant’s signal that you need to increase the humidity.
Also, if you move your plant (like when you first bring your plant home), it might drop some leaves simply due to the change in environment. Because of this, try not to move your plant once it gets settled. And if you’ve recently moved your plant, then don’t be surprised by a few leaves dropping.
I hope these money tree plant care tips help you to keep your plant alive and healthy for years to come! Feel free to leave any questions or comments below! I love hearing from all of you! And for some plant inspiration, check out my list of easy, low-maintenance plants!
During the winter holiday season, poinsettias can be found EVERYWHERE! This can be stunning in the right settings, but what if your cat starts nibbling them? Or maybe your two year old keeps pulling off the leaves and putting them in her mouth? This begs the question… are poinsettias poisonous??? Should I feel safe having them in my home with my pets and small children?
Well the answer is yes, and no…
**Note: This post contains affiliate links, which if purchased, I will receive a portion of the profits. This helps me to keep providing awesome information to all of you!**
Is It Poisonous?
Eating the leaves of poinsettia plants won’t cause any harm. That being said, if a large amount of leaves are ingested, they can make children and pets mildly sick. However, this is usually not life threatening. But if you’re still worried, you can always call poison control here!
So not really anything to worry about as far as a few little nibbles.
What you Need to Worry About…
BUT the big thing that people NEED to be aware of is LATEX ALLERGIES. This plant’s sap contains latex, which will cause some people to form a rash where they come in contact with the sap.
The things you need to do if you have a latex allergy:
Use gloves any time you touch a poinsettia
Avoid touching your eyes and mouth after handling a poinsettia
Wash your hands thoroughly after handling a poinsettia
Watch for signs of difficulty breathing
Some people are extremely sensitive to latex and can have an allergic reaction just being in close proximity with poinsettias. Always be aware of yourself and others in areas with large concentrations of this plant. Although this reaction is extremely rare, it’s always best to stay informed.
So the takeaway from all of this is that poinsettias are not poisonous when eaten (aka they will not cause death), but people with latex allergies need to be aware that this plant can cause a reaction. So if this is you, please be careful and always wear gloves! I hope this article has helped, and feel free to leave any further questions or comments below!
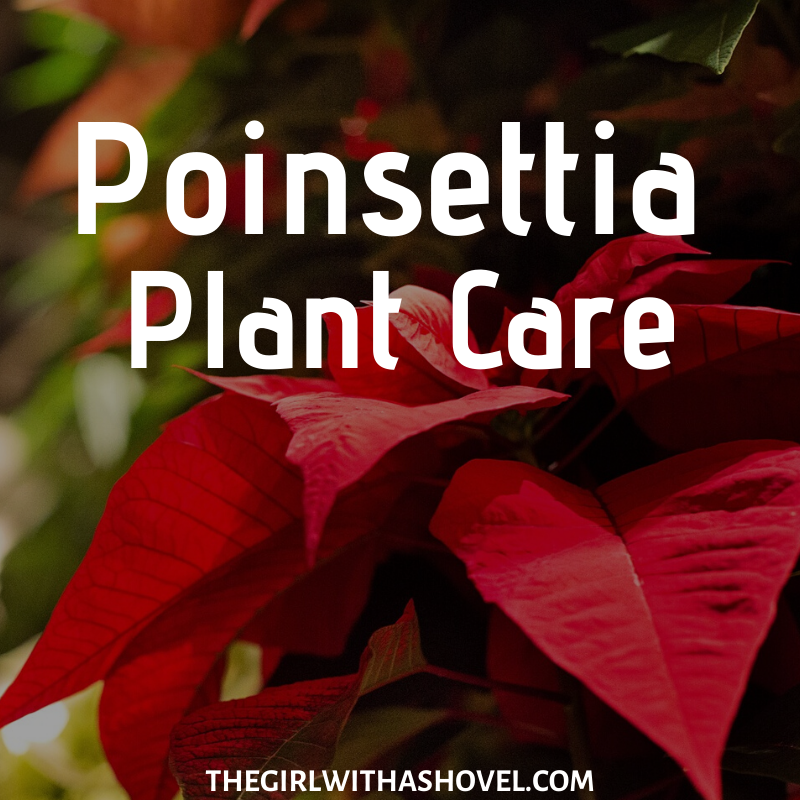
Tis the season to decorate the home with tinsel, trees, and poinsettias! But the hard part is that sometimes your poinsettia plant can be hit-or-miss as to if it will actually last until Christmas. But this doesn’t have to be the case! Follow these poinsettia care tips and your poinsettia will not only last the season, it’ll last all year!
Order your poinsettias here and get them delivered straight to your home!
**Note: This post contains affiliate links, which if purchased, I will receive a portion of the profits. This helps me to keep providing awesome information to all of you!**
Poinsettia Care Tip #1: Purchase a healthy plant!
So this all makes sense to people. Of course no one is going to buy the sad, dying plant in the corner. But poinsettias sometimes don’t look sick until they all-of-a-sudden keel over dead! Basically, they’re really good at pretending they’re just fine until the very end… so here’s what you need to do to make sure that your plant is healthy BEFORE you put down the money…
Before you buy!
1. Choose plants that are away from the door
The closer these guys are to the store’s door, the colder they get… and let me say, these guys HATE the cold!!! (They originate in Mexico, so it’s no wonder!) If there is a strip of poinsettias being sold, choose one from the end that is furthest from any cold, drafty doors!
2. Look for healthy flowers
At the center of the poinsettia plant lies the actual flowers. This isn’t the bright red part. These are actually special bracts that this plant produces. (Amazing, right?!?!) Instead, look at the center of the colorful bracts. These flowers should be green or yellow, small, and look healthy. If these are brown or wilted, this can be a sign of cold damage, improper watering, or just overall lack of vitality. So to make sure you have the best plant possible, make sure that these flowers look healthy!
3. Check the soil
Sometimes these department stores have people take care of their poinsettia supply, even though they don’t know anything about plant care. This can cause plants to die shortly after they are purchased. So feel the soil! If it is super dry, or if it is super wet (you push on the soil and a puddle of water forms), then it isn’t in the best place. You can definitely remedy this, but I’d suggest you simply buy your plants somewhere else.
Poinsettia Care #2: In Transit
Once you purchas your poinsettia, make sure that it stays warm during your trip home. If you are out shopping with another person, have them pre-heat the car and pick you up at the front of the store. This way your poinsettia has the least amount of shock from the cold as possible.
Another way to protect your plant is to place an extra bag around the top of your plant and try to seal it at the base with your hands. This will trap a small amount of the warm store-temperature air around the poinsettia to give it just a touch more protection as you travel to your car.
Next, as you’d imagine, make sure that you don’t leave your plant in a cold car, and that you bring it indoors (into warmer temperatures) as soon as possible. This will help it to stay as healthy as possible!
Poinsettia Care #3: At Home
Now that you’ve chosen a healthy plant and you’ve painstakingly protected it from the cold, let’s talk about what to do with it at your home! To keep your poinsettia happy, place it in a location where it will start away from cold drafts and where it will possibly get a few hours on sunshine. If you only want it to last through the season then low light is fine, but if you want to keep it longer, make sure it gets a few hours of direct sunlight, or several hours of indirect sunlight each day. Just keep it away from hot, afternoon sunlight as this can scorch the plant’s leaves.
When watering, remember that less is more. Only water it when the top of the soil feels dry. This should be anywhere between once every couple of days (for light watering), or once a week (for large, thorough watering). Just keep feeling the soil each morning that first week to give yourself a good gauge for watering times. Also, make sure to remove the decorative wrapping when watering. This is because it will catch the excess water, causing your plant to get too much water and eventually rot and die. So yeah. Just take it off, let the pot drain into a sink or bathtub for a few minutes, then put it back in! Keep it pretty, but also healthy!
That’s all the poinsettia care instructions I’ve got for you today! For instructions on how to get your poinsettia to bloom for next year, follow these instructions!
Also, to make your holiday season more meaningful, join thousands of people around the globe in the daily December challenge, Light the World! I hope you all have a wonderful Christmas season!
Growing chives indoors can be fun, easy, and tasty! The bright green, grassy look of this herb also makes it easy to decorate with! So now let’s talk about indoor chives plant care… cause you want to keep your plant healthy in order to keep your spice options open!
**Note: This post contains affiliate links, which if purchased, I will receive a portion of the profits. This helps me to keep providing awesome information to all of you!**
Indoor Chive Plant Care: Light Requirements
Chives like direct sunlight and can tolerate about 6 hours of direct sunlight each day. However, if your windowsill is full of other sun-loving herbs, this is your first herb to move away from the perfect spot. It does well with down to 4 hours of direct sunlight and also does well with artificial lighting. Just make sure that if it’s bending towards the light, that you consistently rotate your pot.
Indoor Chive Plant Care: Water Requirements
Chives like a little bit more water than most of your other Mediterranean drought-tolerant herbs. So make sure to water it slightly more than your other herbs. Also, make sure that you don’t over-water your plant. If the soil is spongy because it is so wet (the day after you water), then you should dry out the soil and try to add either more drainage to the pot, or a lighter soil (or both!).
Indoor Chive Plant Care: Additional Requirements
Make sure that when you are harvesting your chives that you leave at least 2 inches (5 cm) at the bottom of the plant untouched. Also, if the tips of your plant is turning yellow, this is a sign of too little water and too little humidity. If you feel that you are watering it enough (you aren’t letting the soil fully dry out in between watering), then try misting your plant a few times a week. Or you can place it on a tray of pebbles and add a layer of water to the tray. This will naturally boost the humidity as the water in the tray evaporates in the sun.
I hope these indoor chive tips help! I personally love my chives and have had an easier time growing these than all my other herbs! So have fun, and enjoy this awesome herb! Then, for information on how to start chives from seed, check out this post, How to Star Chives from Seed! Or, for more information about simple indoor herb gardens, check out my post on 5 Effortless Indoor Herb Garden Kits! And as always, please leave any comments or questions below! I look forward to hearing your experiences!
Thyme is a wonderful plant to add to your herb garden! It is generally easy to grow, but these plant care tips will help your indoor thyme stay healthy and happy, giving you years of harvesting this tasty herb!
Don’t have a thyme plant yet? You can buy one here!
**Note: This post contains affiliate links, which if purchased, I will receive a portion of the profits. This helps me to keep providing awesome information to all of you!**
Indoor Thyme Plant Care: Light Requirements
Thyme likes to have full to partial sun outdoors, which means that indoors we need to put it in a south-facing window or give it additional light with plant lights. If your plant is declining during the winter months, this could be your plant going into dormancy because of a lack of sunlight or because of lower temperatures. If this happens, make sure to add plant lights to give your plant longer day-lengths, and keep it away from cold winter drafts. This will help the plant feel more like it’s summer!
Indoor Thyme Plant Care: Water Requirements
This plant is drought-resistant, meaning that it is used to going for short periods of time without any water. Because of this, the biggest cause of death for thyme is being over-watered. Make sure that you only water your plant when the top 1 inch (2.5 cm) of the soil has dried. And also make sure that your pot has good drainage. If your soil doesn’t drain well enough, the roots can rot due to to much moisture and not enough air around their roots. So make sure to never over-water this plant!
Indoor Thyme Plant Care: Additional Tips
As with most herbs, make sure to remove any flower stalks before the plant flowers. This will allow the plant to put more energy into leaf production instead of into seed production. Them, as thyme gets older, the lower stem will begin to get thick and woody. If too much of your plant is getting woody, you can either propagate a new, young stem (by rooting it in straight water), or you can prune back the woody stems hard to encourage lots of new, young, and non-woody growth.
I hope you’ve enjoyed these plant care tips! Please leave any questions or comments below… I personally read every one of them, and I love hearing from you! And for more indoor gardening, check out this list of 5 Effortless Indoor Herb Garden Kits!
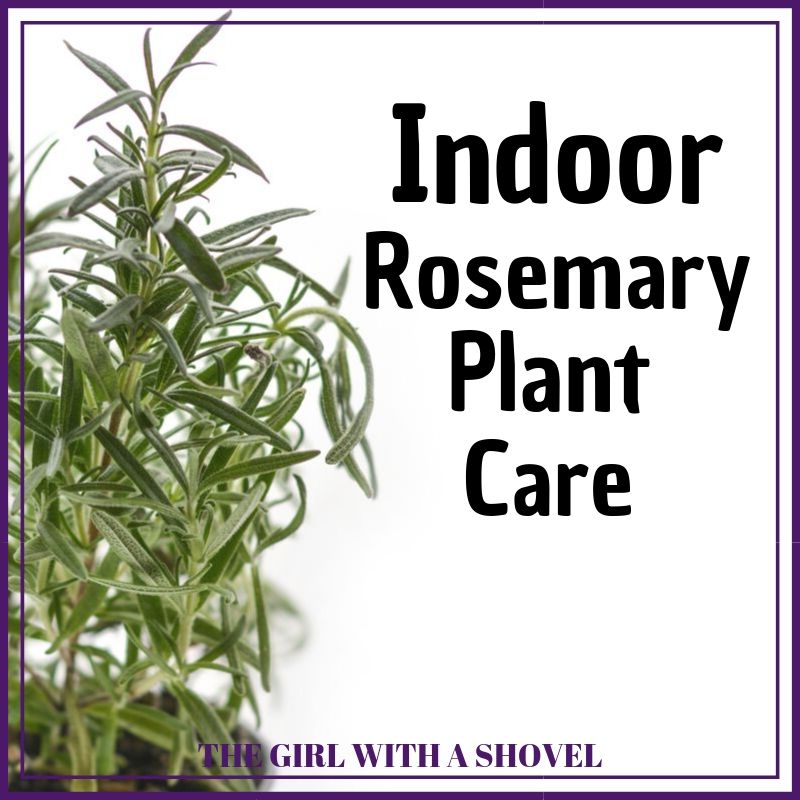
Herbs are definitely the beginner’s step into indoor gardening. However, if our herbs die a sad, pitiful death, we can end up never wanting to grow edible plants again… fortunately for you, rosemary is one of the easier herbs to grow indoors. Simply follow these rosemary plant care instructions, and you’ll feel empowered to take on the entire herbal collection!
Don’t have a rosemary plant yet? You can purchase one here!
**Note: This post contains affiliate links, which if purchased, I will receive a portion of the profits. This helps me to keep providing awesome information to all of you!**
Indoor Rosemary Plant Care: Light Requirements
Rosemary, just like most other herbs, likes plenty of direct sunlight. This means it would do well in your super-sunny south-facing window! Or, if you don’t have a lot of sun (or, like me, you already have your south-facing window full of succulents lol!) then you can give your plant supplemental light with plant lights. Here is my personal favorite! Just remember, rosemary likes to get around 5-7 hours of direct sunlight, so keep it around 8 hours with your plant light (since no light will ever be as bright as the sun…)
Indoor Rosemary Plant Care: Water Requirements
Rosemary likes to stay a little on the dry side. Make sure that you only water it when the top of the soil is dry. This plant is especially susceptible to root rot or to powdery mildew, both of which show up when you keep it too wet. Then, when watering, water the soil thoroughly in the summer months, but more sparingly in the winter. Your soil should be watered just enough to dry out every three days or so. This might mean that in the winter months you only add a fraction of the water that you would during the summer.
Indoor Rosemary Plant Care: Additional Tips
If your plant does get powdery mildew, it is important to IMMEDIATELY separate it from your other plants. One summer I didn’t separate mine fast enough and the majority of my indoor edibles got it too… I know… super sad… But from that, I found this awesome powdery mildew fungicide that works great for edibles. Just make sure that you don’t eat anything from the plant for 30 days, then wash everything before eating.
That’s all for my care tips! Leave any questions or comments below! And for some easy herb gardening, check out my list of 5 Effortless Indoor Herb Garden Kits!
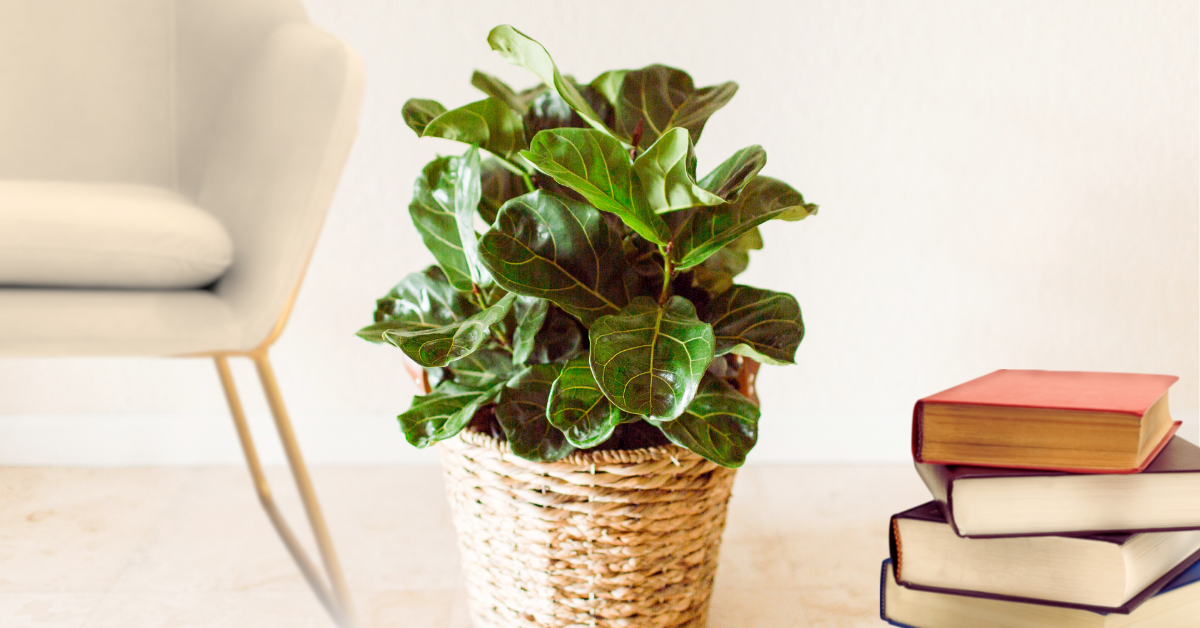
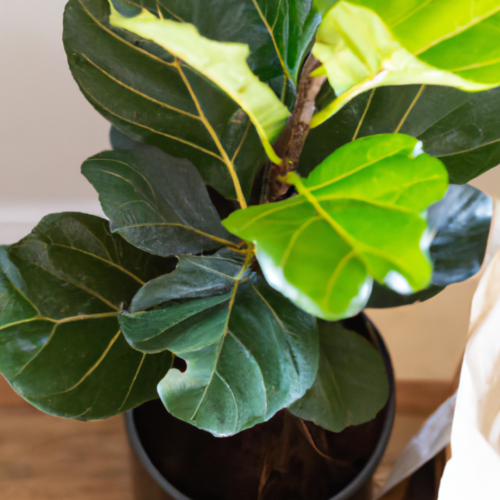
The fiddle leaf fig plant, with its large, glossy leaves and striking appearance, has emerged as a beloved choice for indoor plant enthusiasts. Its elegant presence adds a touch of tropical beauty to any space whether you’re going for a minimalist, modern, or even a bohemian design scheme. This makes it a popular choice for interior decoration. However, as captivating as these plants are, the next question becomes, how do I take care of this plant? Believe me, I’ve seen my share of dying fiddle leaf fig trees. So here are my tips on fiddle leaf fig plant care to help your plant continue to look sleek instead of turning sad…
Brief Overview of the Fiddle Leaf Fig Plant
Originally native to the rainforests of West Africa, the fiddle leaf fig (Ficus lyrata) belongs to the ficus genus and is renowned for its broad, violin-shaped leaves that lend it its name. While it can grow into a majestic tree in its natural habitat, when cultivated indoors, it adapts to a more manageable size, making it suitable for various living spaces.
Despite many people labelling these tropical plants as beginner-friendly, I’ve found that successfully nurturing a fiddle leaf fig indoors requires more than just watering it occasionally. Adequate attention to factors such as lighting, watering, fertilizing, and pest control is crucial for ensuring the plant’s well-being and long life. Next up I’ll delve into the essential aspects of fiddle leaf fig care indoors, providing practical tips and guidelines to help you grow your own gorgeous ficus tree.
Fiddle Leaf Fig Plant Care: Light Requirements
Fiddle leaf figs, or ficus lyrata, need plenty of bright light. However, direct, hot sunlight will easily burn the leaves. So how do we find the perfect balance? The absolute best location is to place your fig tree in a location where it will get direct morning light, but where it will be shaded during the afternoon hours. Two great options are placed in an east-facing window, or put it to the west of a south-facing window (where the morning light will be slanted for a direct hit, but by the afternoon, it will get nice, indirect light). Once you’ve placed it in the optimal light conditions, make sure to rotate the pot every couple of weeks to keep the new growth from leaning towards the light. This is vital if you want a well-rounded, large tree that is not leaning!
Potting and Soil
Now that we’ve found the ideal spot for your fiddle-leaf fig tree, it’s time to talk pots and soil. Let me share some tips based on my own trials and errors in potting and soil selection.
Selecting the Right Pot Size
When it comes to pots, size matters! You’ll want to choose a pot that provides ample room for your fiddle leaf fig’s roots to spread out comfortably. Opt for a pot that’s about 2 inches larger in diameter than the current pot your plant is in. This will give the roots room to grow without being overwhelmed by too much space. Plus, a slightly larger pot helps prevent your fiddle leaf fig from becoming root-bound, which can stunt its growth. Trust me, I’ve learned the hard way that cramped roots lead to unhappy plants!
On the flip side, though, you don’t want a pot that is too large for your fiddle. If you go more than 2″ larger in diameter, then you can risk having too much soil that holds on to too much moisture. This can lead to root rot. It’s a good idea to err on the side of keeping your pot a little bit more snug than to overpot your indoor plants.
Choosing Well-Draining Soil
Fiddle leaf figs are not fans of soggy feet, so it’s crucial to use well-draining soil that allows excess water to escape freely. Look for a high-quality potting mix specifically formulated for tropical plants or make your own by combining equal parts peat moss, perlite, and pine bark (also called orchid bark).
Avoid heavy soils that retain moisture for too long, as they can lead to root rot and other problems. But also remember, the lighter your soil, the more frequently you will need to water, but the harder it is to overwater! (So if you have issues with over-watering your plants, try adding more perlite to your soil mixes! hint, hint!)
Repotting Guidelines
As your fiddle leaf fig grows, it will eventually outgrow its pot and need to be repotted. Keep an eye out for signs such as roots poking out of the drainage holes or pushing against the sides of the pot.
Also, if you are having to water your fiddle leaf fig more often than usual, it could also be a sign that it is time to repot.
Spring is the best time to repot your fiddle leaf fig, as it’s entering its active growing season, but if you need to, then you can repot it during any season. When repotting, gently loosen the roots and untangle any circling roots. Place the plant in its new pot, adding fresh soil around the roots. Then, don’t forget to give your fiddle leaf fig a good drink after repotting to help it settle into its new home.
By following these potting and soil tips, you’ll provide your fiddle leaf fig with all the space it needs to succeed indoors.
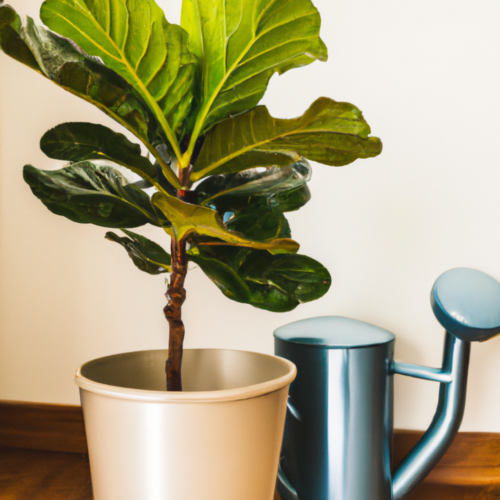
Fiddle Leaf Fig Plant Care: Water Requirements
This plant loves water… when it’s dry! The best way to water your fig tree is to wait until the soil is dry (feeling the top 1 inch of the soil to be sure), then water it thoroughly. In this case, “thoroughly” means to water it until there is water coming out the drainage holes. Let it sit for a few minutes, then empty any excess water. If you don’t have a pot with drainage holes, I would suggest that you add only enough water that it will dry out every 3 days or so (a bit longer in the winter, but dries out faster in the summer). This is your sweet spot. Just remember to water it less in the winter, and more in the summer.
One trick with the fiddle leaf figs that I’ve heard is that if your plant is getting too dry, its newest leaves will turn brown and die. On the other hand, if the plant is getting too much water, its older leaves will shrivel up and die. Just a good thing to use to troubleshoot any watering problems…
Brown spots on your plant? Find out what is causing it with this in-depth picture guide of fiddle-leaf fig brown spots!
And another bonus tip, since I’m apparently full of them today, is that if your fiddle’s large leaves are drooping, it could be a sign of your plant needing water. But if the leaves are yellowing and falling off, it could be a sign of too much water. Just be sure to feel the soil. Stick your finger down a few inches of soil and feel if it is wet or dry. If it is wet, then don’t water it. If it is dry, then your fiddle leaf fig would love some more water!
Fertilizing
Now that we’ve covered watering, let’s talk about feeding your fiddle leaf fig the nutrients it needs to thrive. Here are some fertilizing tips based on my own experiences in keeping my plant happy and healthy.
Importance of Balanced Fertilization
Just like humans need a balanced diet to stay healthy, fiddle leaf figs require regular feeding to support their growth and development. Look for a well-balanced liquid fertilizer specifically formulated for houseplants. If you have a garden fertilizer, I’ve found that a good rule of thumb is to dilute it to half strength to avoid overfeeding. Or just buy a houseplant fertilizer. There are plenty of them on the market. This is the houseplant fertilizer that I personally use and love!
Types of Fertilizers Suitable for Fiddle Leaf Figs
When it comes to choosing a fertilizer, there are plenty of options out there. I prefer to use a fertilizer with a balanced NPK ratio (nitrogen, phosphorus, and potassium) to promote overall plant health. You can also opt for a fertilizer specially designed for foliage plants, (Or a blend that is high in Nitrogen) which will provide the specific nutrients your fiddle leaf fig needs to thrive.
Fertilizing Schedule
First off, I would always follow the instructions on the back of your label for frequency of use. Some fertilizers are stronger than others, and some are slow-release (meaning they fertilize your plant over the course of several weeks). I also know that the Miracle Gro version of indoor plant food is actually a REALLY low dosage (something like 1-1-1), so it can be added every single time that you water your plants (because you aren’t adding that much each time.
That being said, it is best to fertilize your fiddle leaf fig during the growing season (spring and summer). During the dormant season (fall and winter), you can cut back to fertilizing at half the frequency, or skip it altogether if your plant isn’t actively growing. Remember, less is more when it comes to fertilizing – it’s better to under-fertilize than overdo it and risk burning your plant’s roots.
Fiddle Leaf Fig Tree: Additional Care Tips
Avoiding Drafty Areas
While fiddle leaf figs enjoy a breath of fresh air, they’re not fans of drafty spots. Drafts can stress out these sensitive plants and lead to leaf drop or other issues. So, when choosing a location, steer clear of drafty areas near doors, windows, or air vents. Instead, opt for a cozy corner where your fiddle leaf fig can bask in the warmth without any chilly interruptions.
Don’t Move Locations
My second additional tip is to make sure that once you position your plant to its perfect location, that you do not move it! All indoor fig trees don’t do well with change. If you need to move it, expect there to be a few weeks of leaf drop, followed be another few weeks of recovery time. This is just what fig trees do when they are moved locations…
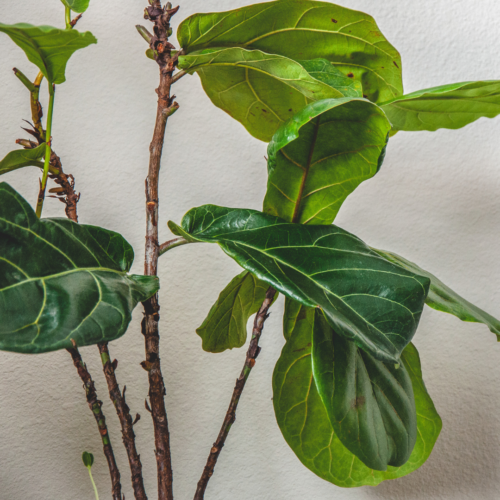
How to Make your FLF Bushy
The last tip I have for you is in getting your fiddle-leaf fig plant to look bushy. A lot of times people buy a single stalk that looks great, until it gets tall and thin. What you want to do, though, is to hold out until it grows to within a few feet of the height you want it to stay at. Then, cut off the top 1-2 feet of the plant. (Make sure there are still at least half a dozen leaves on your remaining tree!) When the top is cut, the plant will stop putting its energy into vertical growth, and will instead start growing out its lateral branches. This will give you that tall, bushy structure that you’ve been wanting without it branching all the way up the entire trunk. This process will take a while, but believe me… it will be well worth it!
Cleaning the Leaves
Over time, dust can accumulate on your fiddle leaf fig’s leaves, which can interfere with its ability to photosynthesize and thrive. Give your plant a spa day every now and then by gently wiping down its leaves with a damp cloth or sponge. Not only will this remove any dust or grime, but it’ll also leave your fiddle leaf fig looking fresh and rejuvenated. It can also help to wipe away any insects that might be trying to establish a home in your plant. So overall, cleaning the leaves is a win-win situation!
Common Pests Affecting Fiddle Leaf Figs Indoors
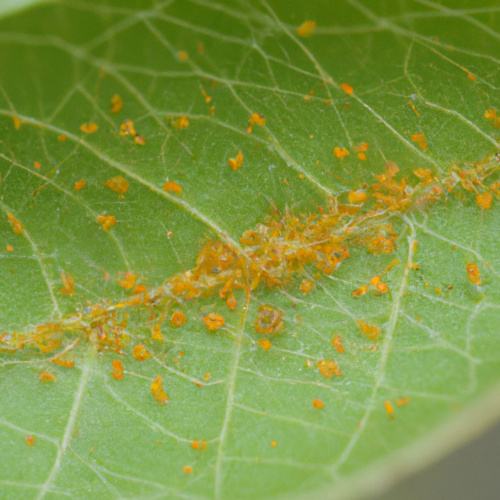
Fiddle leaf figs can fall victim to a variety of pests, including mealybugs, spider mites, and scale insects. Keep an eye out for signs such as sticky residue, tiny webs, or yellowing leaves (with no change in location or watering), which may indicate the presence of pests. Early detection is key to preventing a full-blown infestation, so be sure to inspect your plant regularly!
But if you do get an infestation, you do have a few options at your disposal. For minor infestations, try spraying your fiddle leaf fig with a mixture of water and mild dish soap to suffocate the pests. You can also wipe down the leaves with rubbing alcohol to remove any stubborn critters. For more severe infestations, though, you may need to resort to chemical pesticides, but be sure to follow the instructions carefully and avoid overdoing it.
Troubleshooting Common Issues
Even the most well-cared-for fiddle leaf figs can run into trouble from time to time, but don’t panic! With a little know-how and some quick thinking, you can overcome common issues and keep your plant thriving. Here are some troubleshooting tips based on my own experiences with these guys…
Leaf Droopiness or Browning
If your fiddle leaf fig’s leaves are drooping or turning brown, it could be a sign of underwatering, overwatering, or exposure to drafts. Check the soil moisture levels and adjust your watering routine as needed, and make sure your plant is situated in a draft-free location with stable temperatures.
Yellowing Leaves
Yellowing leaves can indicate a variety of issues, including nutrient deficiencies, overwatering, or pests. However, nine times out of ten the issue is overwatering. Take a close look at your plant and assess its watering, fertilizing, and pest control routines to identify the underlying cause. Also be sure to place your finger in the soil to see if it is moist. Or consider buying a soil moisture meter that you can use to see if the soil is moist further down in the pot. Then adjust as necessary to restore your fiddle leaf fig to health.
Leaf Loss
It’s normal for fiddle leaf figs to shed a few leaves now and then, especially as they acclimate to their environment or undergo changes in care. However, excessive leaf loss can be a cause for concern. Especially if you haven’t moved your plant recently. The biggest cause of leaf loss that I have found has been due to drafts or insects (usually spider mites). If you are seeing excessive leaf loss, then check one of these problems.
Addressing Root Rot
Root rot is a common issue in fiddle leaf figs caused by overwatering or poor drainage. If you suspect root rot, carefully remove your plant from its pot and inspect the roots. Trim away any mushy or discolored roots, repot your plant in fresh, well-draining soil, and adjust your watering routine to prevent future problems.
I’ve also heard that by adding hydrogen peroxide to your roots, that it can kill some of the bacteria that is causing the root rot. I haven’t personally done a bacterial swab on my plant roots pre- and post- hydrogen peroxide, but it does seem to help when I use it on a plant that is starting to have root rot in its root ball.
How to Propagate Fiddle Leaf Figs
Propagation Through Stem Cuttings
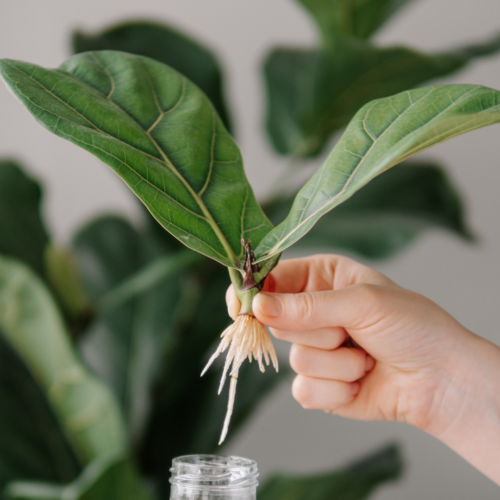
One of the easiest ways to propagate a fiddle leaf fig is through stem cuttings. Simply snip off a healthy, leafy stem from your plant, making sure it’s at least 6 inches long and has a few nodes (where leaves are attached). Remove any leaves from the lower portion of the cutting, (to expose a few nodes), then place it in a glass of water or potting mix to encourage root growth.
Rooting in Water or Soil
You can root your fiddle leaf fig cuttings in either water or soil, depending on your preference. If using water, change the water every few days to keep it fresh and prevent rot. If rooting directly in soil, make a small hole in the soil with a pencil or chopstick, then gently dip the cutting in rooting hormone (shaking off the excess powder), then insert the cutting and firm the soil around it. Keep the soil evenly moist and provide bright, indirect light to encourage root development.
Providing the BEST Conditions for Successful Propagation
Successful propagation depends on providing the right conditions for root growth. Keep your cuttings in a warm, environment with plenty of indirect light, and be patient – it can take several weeks for roots to form. Another tip you can use is if you live in an area with low relative humidity, you could place an old bottle or container over the cutting. This will raise the humidity levels surrounding your cutting and can cause it to root faster. Once your cuttings have established roots, you can transplant them into their own pots and watch them grow into full-fledged fiddle leaf figs.
So there you have it! That’s how to care for your fiddle leaf fig plant! If you liked this article, please share it using the social tabs! And be sure to watch the videos above. For as they say, a picture is worth a thousand words… then I’m not sure how many words a video is worth?! But anyways, enjoy your beautiful fiddle leaf fig and have a fabulous day!
Happy Digging!
FAQ’s:
How do you care for a fiddle leaf fig plant indoors?
To care for fiddle leaf fig plants indoors, make sure that it gets enough light, meaning that it gets bright, indirect light throughout the day. Then water it thoroughly once the top inch of soil has dried. And finally, find a place in your home where your FLF is happy, then don’t move it!
Why are fiddle leaf figs so hard to care for?
Fiddle leaf figs can be hard to care for if a person is not giving their plant enough sunlight, is giving it too much sunlight, or is constantly moving their plant from location to location. If these things are corrected, then fiddle leaf figs can be simple to care for. One only need to understand the core concepts of light, water, and soil that are covered in my course, Indoor Plants Accelerated!
How do you keep a fiddle leaf fig happy?
To keep a fiddle leaf fig happy, you must place it in a location where it gets bright, indirect light for most of the day. One of the best places I’ve found has been in an east-facing window where it can receive some direct sun in the morning, then be shaded in the afternoon. If you get the lighting right, then only water once the top inch of the soil is dry. And finally, make sure that you don’t move your FLF. Once it is in a location that it likes, it does not do well when it is moved!
Do fiddle leaf figs need direct sunlight?
No. Fiddle leaf figs can grow just fine in indirect sunlight only. Hot, direct sunlight can actually burn the green leaves of the FLF. But if it receives more light (like morning direct sunlight), then it should grow faster and larger for you!
Mint leaves are perfect for topping your favorite dessert, mixing into your summer drink, or even adding into your everyday meals! But for those of us with limited garden space, as well as those living in cold climates, growing mint can pose a problem. Not anymore! Learn how to care for your mint plant indoors to enjoy fresh mint leaves all year long!
This post is geared towards indoor mint plant care. To know how to grow your mint plant outdoors, check out my post Outdoor Mint Plant Care!
**Note: This post contains affiliate links, which if purchased, I will receive a portion of the profits. This helps me to keep providing awesome information to all of you!**
Indoor Mint Plant Care: Light Requirements
Mint plants growing indoors need at least 4-6 hours of direct sunlight daily. It is best if placed on a south-facing window, however, if you don’t have a lot of natural indoor sunlight, then you can still grow your mint plant with the help of a plant light! Here is one of my personal favorites, a cheap, full-spectrum, and hidden plant light!
Indoor Mint Plant Care: Water Requirements
This plant can be grown in either soil, or in straight water. When grown in soil, only water your plant once the top 1 inch (2.5 cm) of the soil has become dry. If your plant is falling over, but is staying green or yellow, then your plant is being over-watered. However, if your plant is green or brown and wilting, this is a sign of too little water. Make sure to feel the soil to know if your plant is too wet or too dry.
Indoor Mint Plant Care: Additional Requirements
Indoor mint plants will never be as vigorous as outdoor mint plants. This could be good, however, as mint plants can become very invasive. To propagate this plant, you can root cuttings in straight water, then plant them into damp soil. Also, make sure to remove your plant’s flowers before they set seed, or else your plant will grow the seeds, then quickly decline. So make sure to prune off the flower well before this happens.
I hope you’ve enjoyed this post and that you will soon have plenty of fresh mint leaves for years to come! Feel free to leave any questions or comments below!
Hey everyone! I know that we all LOVE air plants, but how the heck do you water something without any roots or any soil?!?! Well today I’m going to tell you exactly how to water your air plants so they stay happy and thriving!
Now there are two different methods. First is if your air plant is mounted/hot glued/fixed in any way to it’s stand. The second method (which is the preferred method) is for if your air plant is separate and can be removed from its mount, or if the mount is waterproof. So keep reading and use whichever method applies to you! But first, before you learn HOW to water your air plants, you need to make sure you’re using the correct TYPE of water…
If you want overall care tips for your air plant, check out my post here on air plant care!
Want to boost your air plant collection?! You can get some awesome air plants here!
**Note: This post contains affiliate links, which if purchased, I will receive a portion of the profits at no extra cost to you. This helps me to keep providing you with such awesome information!**
What Kind of Water to Use for Air Plants
Unlike most other houseplants, air plants DON’T like distilled water! If it’s a choice between distilled or tap water, go with tap water every time! The main harm with tap water is its chlorine. But for this, you can simply leave your water out for about 30 minutes to allow the chlorine to dissipate. This should be your easiest choice of water.
To go to the next level with your watering, choose a natural source, such as rain water, pond water, or lake water. While the rain water is what your plant is used to in its natural habitat, spring water, pond water, or lake water can also be extremely good for your air plants because it is usually rich in nutrients. Another alternative to these is if you have an aquarium. Aquarium water can also be highly beneficial to air plants as your air plant can get added nutrients from this water as well.
The only recommendation that I have, however, is if you use one of these water sources that already contains nutrients, then hold off on the fertilizer. If you use both, then it could potentially be too much for your little guy!
Now… on to the exact methods!
How to Water Air Plants Method 1: Fixed to a Mount
If your air plant is fixed to a mount or a stand, then the best way to water your plant will be through misting. This can be tricky though as most people who mist their air plants end up with rotted, dead plants. (Trust me! I know from personal experience!!!)
To correctly mist your air plant, the important thing is to think of it more like a shower than a misting. Spray it with a spray bottle or a misting bottle until the leaves are dripping with water. (I would recommend placing it in a sink or on a towel while you do this).
The next two tips are vital to avoid rotting your plant! These two tips are: turn your plant upside down, and give it good air circulation.
After you mist your plant you should place it upside down for 10-15 minutes to allow any excess water drain out of the plant. This is vital! Air plants aren’t like bromeliads that can keep water cupped in their leaves. If you do this to your air plant, it will most likely die on you. Instead, give it a good shake and place it in a position where all of the excess water can drain out.
This was my first big lesson with air plants. My first tillandsia was glued into a hanging glass globe. Little did I know that while I was spraying it down, all of the excess water was collecting in the bottom of those glued-in rocks, which was cradling the very center of my air plant… And let’s just say, it didn’t appreciate the long-term bath! So please remember to drain any excess water off of your air plant!!!
Next, make sure that your plant has good air circulation while it is drying. Normal indoor air circulation is fine, but if your plants are in glass terrariums, or in some of those glass globes (like my first air plant), then you’ll need to help it out a bit with a light fan. This will help to avoid any rotting from excess moisture.
Once it has finished soaking up all of the water and has completely dried, then you will be good to go! Simply follow this spray, shake, and circulate a couple times each week dependent on the temperature and the amount of indirect sunlight. Then watch your beautiful plant thrive!
How to Water Air Plants Method 2: Removable Air Plant
The soaking method, or the water bath method, is the preferred method of watering and I recommend purchasing your air plants separately from their container for this reason. It will be a lot easier for you and your plant in the long run. However, note that the xeric air plants, (most air plants with fuzzy leaves, such as the tillandsia tectorum, or the tillandsia xerographica) don’t like as much water and will do best with the misting method mentioned above.
So what you do for this situation is… once every 7-10 days, fill up a large bowl (or your sink or tub depending on how many air plants you own) with lukewarm water and place your air plants inside. Leave them to soak for several hours. Your goal here is to give your plants a good soak. Let them absorb as much water as they possibly can. I’ve heard of some people leaving their air plants to soak for up to twelve hours!
After they are done soaking, then you NEED to place them upside down on a towel or dish cloth to drain. Let them drain for about 4 hours, or until they are completely dry. If you live in a humid climate, you can also speed up the drying process by placing a fan nearby to increase air circulation.
After the plant is completely dry, then it is ready to place back on its stand and wait anther 7-10 days to water it again. If the tips begin to turn brown, lightly mist your plant a few times during the week, or increase your watering frequency.
How Often Do I Water my Air Plant?
To know how often to water your air plant, you will need to consider several different factors. First, it will help if you know the genus tillandsia that you have. This will help you know if it comes from a humid environment, like south america, or if it comes from a more arid climate, like found in central america. Then, factoring in how much indirect light it is receiving, you can start off with an estimate of whether it would like more frequent or less frequent waterings. A good rule of thumb is to give your air plant small amounts of water. Then, if the tips of the leaves begin to brown, you will know to slightly increase your watering.
I hope this helps! Let’s keep our air plants happy and well-watered (but not rotting!!!) And if you have any questions or comments, feel free to join the Facebook group, Houseplants for Plant Killers or follow me on Youtube! I love hearing from you!
Happy Digging!
Frequently Asked Questions:
How Often do Air Plants Need to be Watered?
The frequency of water will change with both the time of year, the indoor humidity levels, and how much light your plant is getting. As a general rule of thumb, however, you should expect to give your air plant a good soak every 7 to 10 days.
Can you Soak Air Plants in Tap Water?
Yes. You can use tap water to soak your air plants. The best practice, though is to fill your bucket of water, then leave it out for at least 15-30 minutes to let the chlorine evaporate out. This will be much healthier for your plant without you sacrificing too much of your time.
Do Air Plants Need Sun?
Yes. They need sunlight. But not all tillandsia species do well with DIRECT sunlight. Instead, they do much better with lots of indirect, bright light. In general, if your plant has a lighter, pale color, then it will do better with more sun. If your plant is more vibrant in color, then it will most likely be fine in lower light or fluorescent light conditions.
How do you Water an Air Plant without Soaking It?
To water an air plant without soaking it, you can use the spray/misting method mentioned above. This will require more frequent watering, but is necessary for plants that are secured to a non-waterproof base. If the spraying is still getting too much water on the plant stand, however, it would be better off to gently remove the air plant and soak once per week as recommended.
Hey guys! And welcome to another awesome post! Today I wanted to talk about proper plant care for growing mint outdoors. If properly taken care of, your mint plant will give you an endless supply of leaves all season long! Just follow these instructions to keep your plant not only healthy, but also keep it from overtaking all of your other plants!
**This post is geared towards growing mint outdoors. For information on indoor mint plant care, check out my post here!**
**Note: This post contains affiliate links, which if purchased, I will receive a portion of the profits. This helps me to keep providing awesome information to all of you!**
Outdoor Mint Plant Care: Light Requirements
Mint plants can tolerate a wide range of sun conditions from full sun to part shade. Be aware, though, that if your plant is coming from a garden center or from a sales location that is indoors, it will need to be slowly acclimated to a full-sun position. Also keep in mind that any decorative mint plants (with variegated leaves) will need to receive more protection from the sun and will instead do best in a partly shaded area.
Outdoor Mint Plant Care: Water Requirements
Watering will vary with how much sun your plant is getting and how well-draining your soil is. If your plant is in full sun, it will need more water. Also, if your plant is in well- draining soil (such as in sandy soil) then it will also need more water. A good thing to do is to go out several times during the season and feel how moist or how dry your soil is. Then adjust accordingly. Mint normally likes to be kept moist, but not drowning in water.
Outdoor Mint Plant Care: Additional Requirements
Mint can be an invasive plant. You need to take precautions to keep this plant from spreading itself all across your yard. These two maintenance steps are easy to do and essential if you want to keep this plant under control. First, you need to keep the root system separated from your ground soil. The best way to do this is to grow it in a pot (either without drainage holes, or with the drainage holes placed away from any soil). You can also grow mint in a raised garden bed, but make sure to remove all of the roots after every season or to simply designate a mint area and make sure to cut or weed it to its designated area several times each summer. The second step is to remove all flowers before they set seed. Doing this will greatly reduce the spreading of your mint plant, and you will be able to enjoy your plant rather than constantly be in battle with it!
I hope you’ve enjoyed this information! Please use the share buttons to share it with your friends or to save it to your social media account! Also, feel free to leave any comments or questions below! I personally read every single one of them!