Air plants are some amazing plants! Undergoing thousands of years of evolution, they’ve found unique ways to compete for water and sunlight among an entire forest! But now the question is how do we get these highly specialized plants to survive in or extremely different home environments?! Well, that’s what we’re going to talk about today!
Don’t have any air plants yet?! You can get some here!
**Note: This post contains affiliate links, which if purchased, I will receive a portion of the profits. This helps me to keep providing awesome information to all of you!**
Air Plant Care: Light Requirements
Air plants do best in bright, indirect light. The only time they can withstand direct sunlight is during the winter when temperatures are lower. If plants are in hot, direct sunlight, their leaves will burn and they could die.
Air Plant Care: Water Requirements
Incorrect watering is the main cause of air plant death. Because of this, and because of the unique way of watering, I’ve decided to create an entire post dedicated to show you how to water your air plant. You can check it out here!
Air Plant Care: Additional Tips
One of the craziest things about air plants is that they can absorb nutrients through their leaves! Fertilize your plant once every two weeks with a high-phosphorous fertilizer. This can be done by spraying the leaves with a liquid fertilizer and then shaking off any excess moisture. Only fertilize it during the spring and summer. Do not fertilize it during the fall or winter.
I hope you’ve enjoyed these tips about air plant care! And feel free to leave any further questions or comments about your own successes or failures below!
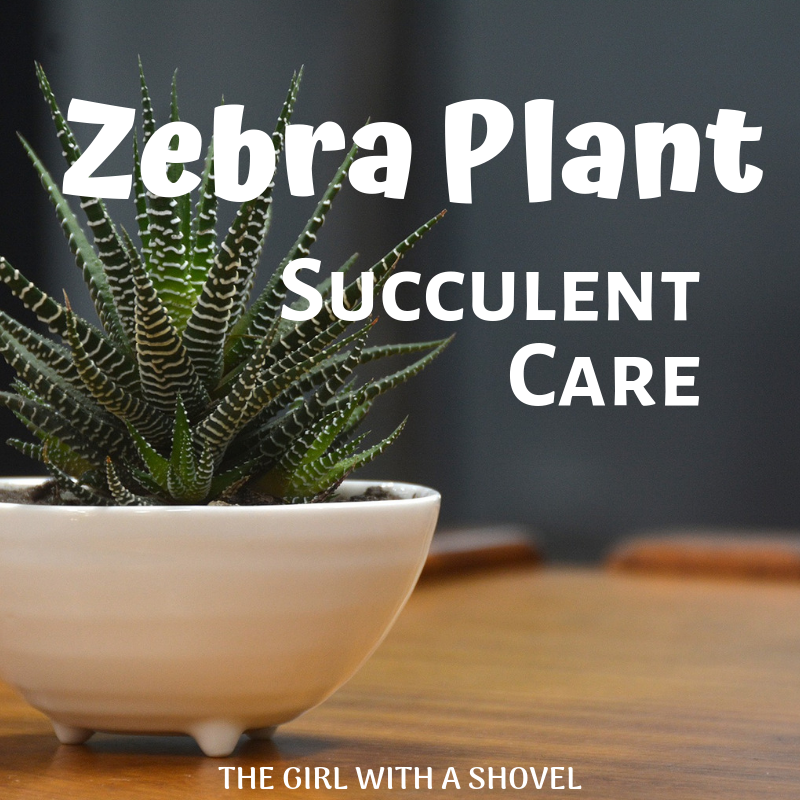
Hey guys! And welcome to another awesome plant care post! Today we’re going to talk about the Zebra plant! This is the Haworthia succulent to be specific… not the Calathea zebra plant. But Haworthia can be a little tricky. This is because there are two main types of Haworthias: the one with little white ridges on the underside of their leaves (hereafter referred to as the Zebra Haworthia), and the translucent or completely transparent wonders (hereafter called the Transparent Haworthia). These two types differ slightly in their care, but I’m feeling awesome today so I’m going to tell you about both!
**Note: This post contains affiliate links, which if purchased, I will receive a portion of the profits. This helps me to keep providing awesome information to all of you!**
Zebra Plant Succulent Care: Light Requirements
Haworthias generally need some direct sunlight but you need to be careful. Zebra Haworthias can tolerate some afternoon heat with its sunlight, but Transparent Haworthias are easily burned, so these little guys do better in east or west facing windows where they will still get some sunlight, but they will be protected from the heat of the day!
Zebra Plant Succulent Care: Water Requirements
In general, Haworthias need to be watered only once their soil has lightly dried up. However, during their dormant period, they use less water and should only be watered enough to keep the soil from completely drying out.
Zebra Plant Succulent Care: Additional Tips
I’m sure you’re asking, “When does my Haworthia go dormant?!” Well, that depends on what type of Haworthia you have. Zebra Haworthias go dormant from October through April and Transparent Haworthias go dormant from April through September. Why is this? Think of the northern and southern hemispheres… the Zebra Haworthia goes dormant during the northern hemisphere’s winter, but the Transparent Haworthia goes dormant during the southern hemisphere’s winter (from April to September!). Make sure to see which Haworthia you have and to care for it accordingly!
I hope this helps to clear up a few things! For propagation information on this plant, check out my post on Haworthia Propagation! Please leave any other questions or comments below! I know these are fun succulents, but any plant can be confusing sometimes! And for more expert tips sent weekly to your email, sign up for my email list! Every new subscriber gets a free welcome guide!
Welcome back everyone! Today I’m going to show you how to propagate your favorite Haworthia plant! There are two different ways that Haworthias can grow… either from seed or from separation of plant material. I’m not fortunate enough to have some Haworthia seed on hand to show you, but I will talk about the two most common types of propagation through plant material: propagation through leaf cuttings, and separation of offsets.
**Note: This post contains affiliate links, which if purchased, I will receive a portion of the profits. This helps me to keep providing awesome information to all of you!**
Haworthia Propagation through Leaf Cuttings
Haworthias can be propagated through leaf cuttings just like many other succulents. But beware because this plant is difficult to get the entire leaf off without ripping off the tip of the leaf. Because of this, most people choose to cut the leaves off with a small precision knife, cutting off a bit of the stem in the process to ensure that it will propagate. Others choose to propagate their entire plant at once and cut apart the inner stem as they separate all of the leaves.
Either way, this method is tricky and success rates are low for the zebra-type haworthias. Leaf cuttings are more successful in the round, thicker-leaf haworthias. That being said, if you don’t have any offshoots (or pups) on your zebra haworthia, then carefully remove a few leaves at the base of the plant. Then if the leaves aren’t successful, the plant should give you some new pups where the leaves were removed!
Just make sure that the entire leaf tip is removed and undamaged for this process to work. For step-by-step instructions, refer to my post on succulent propagation here!
Haworthia Propagation through Division of Offsets
In time, most Haworthia species produce offsets (little baby clones of the parent plant). This method of propagation is much easier and has much higher success rates than the leaf cutting propagation. These can be separated and potted in the following steps…
#1: Wait until the offset has at least four leaves to ensure that it is big enough to have formed its own roots and to survive the separation.
#2: Loosen the soil with water, then gently remove. We want to get as many of the roots out as possible so loosening up the soil first will be very helpful in saving those little guys.
#3: Gently brush the soil from the roots and separate the offset’s roots from the parent plant’s roots.
#4: Find where the offset is connected to the parent plant and gently cut them apart.
#5: Replant your Haworthias, making sure they are in well-draining soil and in small pots. Ignoring either of these will cause your plants to rot (and no one wants that!)
I hope you’ve enjoyed this post! Please leave any questions or comments below! I love hearing from you! Have a great day and good luck with your Haworthia propagation! And for Haworthia care information, check out my post on zebra plant succulent care!
Snake plants are awesome low-light, low-water plants that can tolerate quite a bit of neglect. No wonder they have been coming back into popularity! These modern, minimalist plants look great in any space! But now that you have your snake plant, the biggest question becomes… “How do I care for my snake plant?!” If this is you, then either watch the videos below, or keep reading!!!
Snake Plant Care: Light Requirements
Snake plant is known to do well in low-light situations, but it will grow faster and have brighter colors if it is placed in a medium- or high-light location. One thing to avoid, though, is direct sunlight. Hot, direct sunlight will easily burn your snake plant’s leaves. When a snake plant is getting too much light, it will start getting a pale brown color on its leaves, which will then lead it to turn a darker brown and begin to shrivel. Needless to say, do not put your snake plant in hot, direct sunlight!
Snake Plant Care: Water Requirements
Snake plant does best if it is kept lightly moist during the spring and summer. Then during the fall, decrease watering amounts until you are only watering your plant enough to keep the soil from completely drying out. Then boost watering once again to following spring.
Snake Plant Care: Additional Tips
Remember to water this plant according to how much light it is receiving. If it is in low light, then water lightly. If it is in a bright, indirect light location, then you can be more generous with your water. But due to this plant’s semi-succulent nature, the biggest killer of snake plant is overwatering.
To avoid overwatering, it is ESSENTIAL that this plant is in a pot with drainage holes, as well as is in a light, well-draining soil mixture (either a succulent & cactus soil mix, or a regular potting soil amended with perlite.)
Also, be sure to keep your snake plant away from cold winter drafts as sustained temperatures below 60 F (15 C) can cause the leaves to rot at the base.
Well, that’s all you need to know to keep this awesome plant alive! For more easy, low-maintenance houseplants, check out my list of Top 10 Hard to Kill Houseplants! Then, for more plant care information, join my email list! Every new member gets a free welcome guide! Then, be sure to leave any further questions or comments below!
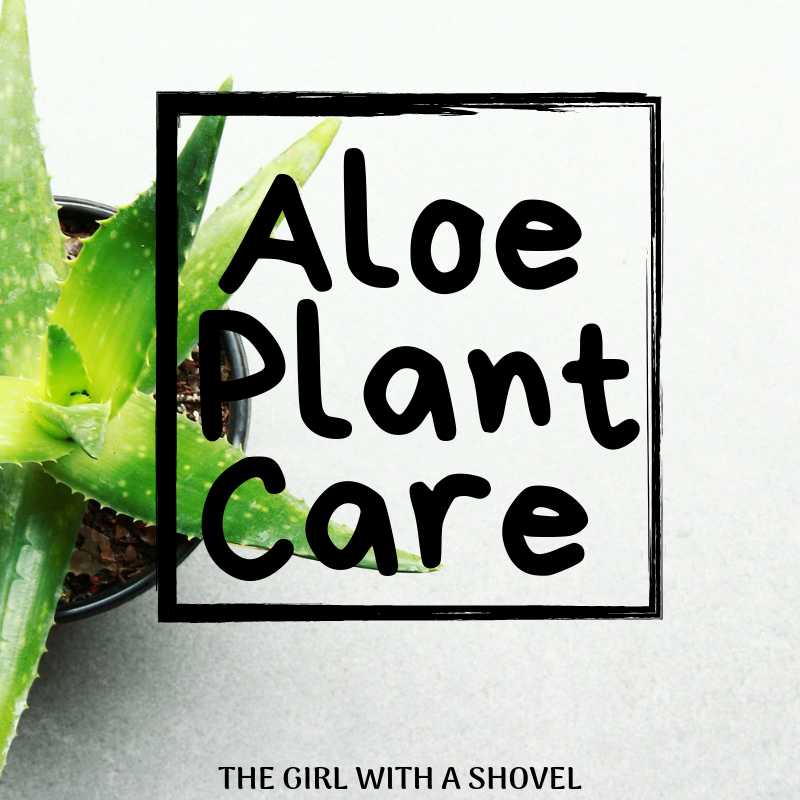
The aloe plant is not only popular for being a low-maintenance plant, but it is also widely sold for its healing properties! But you won’t get any of this plant’s healing juices if it is dead! So here is what you need to know for proper aloe plant care!
**Note: This post contains affiliate links, which if purchased, will give me a small commission. I only add products that I sincerely LOVE! If you have any issues with any of these products, please let me know!**
Aloe Plant Care: Light Requirements
This plant needs bright, direct sunlight. When you first purchase your plant, slowly acclimate it to your sunny spot. This is necessary because most aloe plants have been in a low-light store for some weeks before they are purchased. If they go from the low-light store to a bright, sunny window, they could potentially burn.
During the summer, aloe plants can be slowly acclimated to the outdoors and then slowly brought back indoors in the fall to avoid freezing temperatures.
Aloe Plant Care: Water Requirements
The aloe plant likes to be kept lightly moist when it is in direct sunlight and during the spring and summer. If in lower light conditions, or during the fall and winter, only lightly water your aloe once the top 1 inch (2.5 cm) of the soil has dried.
Additional Tips
When watering your aloe plant, do not water it in the center of the plant. This can lead to stem rot. It is also helpful to top-dress the soil with small pebbles to keep the neck of the plant dry. Just make sure that the top-dressing doesn’t cause you to over-water your aloe plant!
I hope you liked this post on aloe plant care! For more expert tips sent to your inbox every week, join my email list! Every new member will receive a free welcome gift! And last, feel free to leave any questions or comments below!
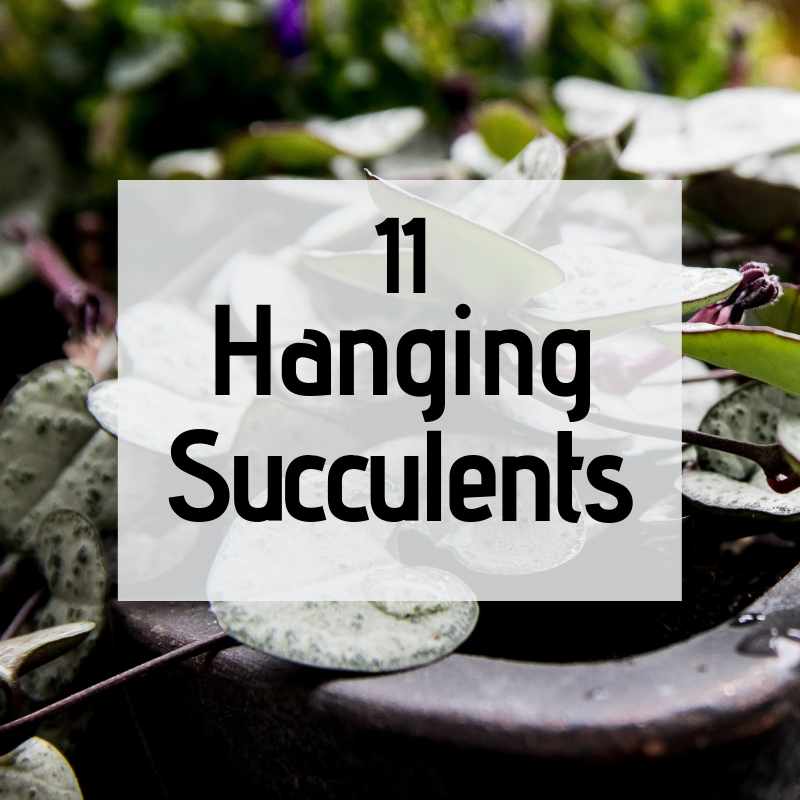
I know there are TONS of succulent lovers out there that are looking for fresh ways to display these awesome plants. So why don’t you check out this awesome list of 11 different hanging succulents! Because nothing looks prettier than a succulent that is cascading down the sides of a pot! So take a look at this list and consider getting a few of these hanging succulents!
**Note: This post contains affiliate links, which if purchased, I will receive a portion of the profits at no extra cost to you. This helps me to keep providing you with this awesome information!**
Hanging Succulents #1: String of Bananas – Senecio radicans
This is one of my favorite hanging succulents! It looks so cute with its glossy banana-shaped leaves! If provided with adequate care, this plant will also produce small, white flowers in the spring that have a slight cinnamon smell.
This sedum is a bit shorter and thicker than its brother, Donkey’s tail, or Sedum morganianum. This sedum is easy to care for and is extremely low-maintenance. It also is easily propagated, so you can start with one, and end up with many of this cute little plant to either keep, or to give away as gifts!
Hanging Succulents #3: String of Hearts – Ceropegia woodii
Hearts-on-a-string is a beautiful vine with heart-shaped leaves. It can be purchased with either green leaves, or variegated leaves. The variegated leaves are rising in popularity as they add plenty of interesting texture to your home!
Donkey’s tail is very similar to Burro’s tail, except that its leaves are a bit more elongated. This gives you more of a thick vine trailing down the sides of your pot. It is a very popular succulent, and for a good reason! This plant looks stunning in a hanging basket! Just make sure to place it in a low traffic area, as its leaves are sensitive and will fall off if brushed against.
This plant looks a lot like the fishhooks vine, except it is purple! Many people purchase this plant to add a bit of a different color to their succulent collection. And given enough sunlight, Ruby necklace will give you a constant pop of purple!
Hanging Succulents #6: String of Nickels – Dischidia nummularia
This is a fun succulent! String of Nickels produces thick, round leaves that will soften up any rough corner of your home. It is also very low maintenance and is easily propagated! So check out one of these cute little guys today!
Fishhooks is very similar to String of Bananas, though the actual leaves are thinner, thus resembling a fishhook instead of a banana! This plant is coming back in popularity as the succulent craze is growing. So while you may have a hard time finding it in your local garden center, it is easily found online. And enjoy your cute little fishhooks vine!
Hanging Succulents #8: Hindu Rope – Hoya carnosa ‘krinkle kurl’
Hindu Rope is a fun plant to have around! Its swirls of vine makes it stand out in any room. And if you give it plenty of bright light and high-phosphorous fertilizer in the summer, then mature plants will produce pink clusters of scented flowers!
This plant is actually a cactus, but its needles are actually soft (like a Monkey’s tail!) The plant can grow to around 2-3 feet in length and, when well cared for, will produce beautiful red flowers! And regardless of where it is placed, this plant will definitely make an impression!
This plant is most commonly sold as a single, rooted leaf. Its growth is slow, but when given time, it will grow into a beautiful vine with heart-shaped flowers. It is also extremely low maintenance and if given proper care, will produce pink balls of flowers! This is a rare succulent vine that will take a while to grow, but it is definitely worth waiting for!
Hanging Succulents #11: String of Pearls – Senecio rowleyanus
Last but definitely not least is the beautiful String of Pearls plant! It has definitely come back in popularity, as its little beads dangle from even the smallest of planters. It is also very easily propagated, so if you buy one plant, you can easily end up with many of them (or send them as a cute gift!) Just make sure to never overwater these succulents!
So there you have it! All the hanging succulents you could ever want! And plenty to fill your home with! If you have any questions about these plants, feel free to comment below! Have fun with these awesome succulents!
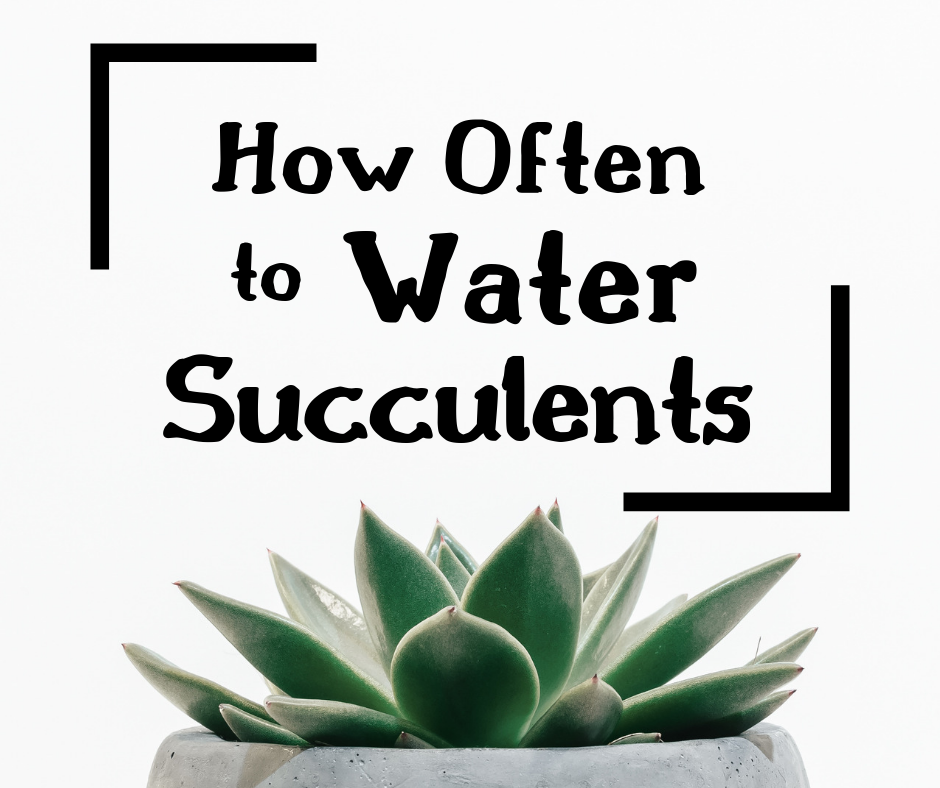
Hey y’all! So here’s a question that gets asked a ton!
“How often should I water my succulents???”
**Note: This post contains affiliate links, which if purchased, will give me a small commission. I only add products that I sincerely LOVE! If you have any issues with any of these products, please let me know!**
And do you know what? I can’t give you a solid number of days or anything because it varies so much!
Some things that affect how often your succulent needs water:
air humidity
temperature
hours and strength of sunlight
how large your succulent is
the type of pot you are using
the type of soil you are using
This is a TON to factor in, huh?!
So how do you know how often you should water your succulents?!
Here’s what I can tell you… (And I promise, it will help!!)
Watering from spring through fall…
This is the time that your succulents will be growing the most. At this time, water your succulent only when the top 1 inch (2.5 cm) of the soil is dry. If you let the soil dry all the way (to where the soil is so dry that it’s pulling away from the sides of the pot), then you’ve let it get too dry. But on the flip side, if you don’t let it dry enough, then you could cause root or stem rot on your plant!
So once again… water ONLY when the top 1 inch (2.5 cm) of the soil is dry. (Or when you stick your finger in the dirt, it doesn’t feel moist at the tip of your finger… then water!)
Winter watering…
This is when your succulent is usually growing less and is using less water. Cool temperatures are also keeping your succulent’s soil from drying out as fast. The key to winter watering is to only add small amounts of water as needed. All we are trying to do is to keep the soil from completely drying out.
Tip: If your succulent’s soil is still fully wet several days after watering, quickly remove it from the soil and re-pot into dry potting soil. After 24 hours, only lightly water.
So there you have it! During the summer, you might be watering your succulent every 1-5 days, but in the winter, you might find yourself only watering a little bit once a week (or even less!) Again, it all depends on your environment and your succulent, but make sure to check the soil moisture levels before you do any watering. Because nothing kills a succulent faster than too much water!
And if you’re still having issues with your watering, just go ahead and buy a soil moisture meter! Simply stick it into the soil, and this cool little meter will tell you how wet or dry your soil is! Just wait for it to get dry, then water! Simple, right?!
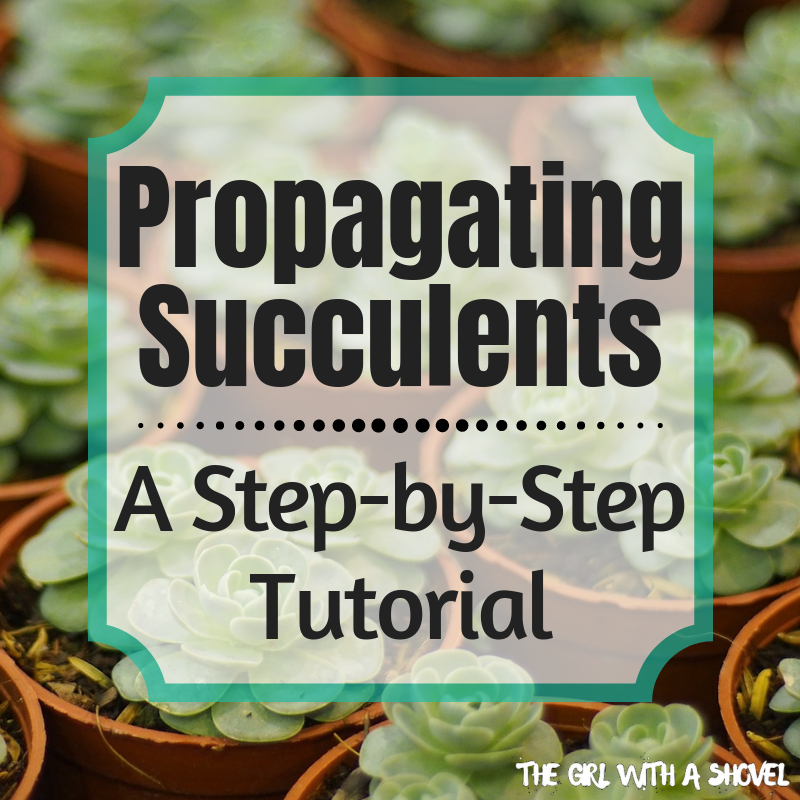
One great things about succulents is that they can be easily multiplied into many succulents! This task may seem daunting for people who have never done it before. But with this step-by-step guide you are sure to have success! So get started today and try your hand at growing your very own succulents!
*Note: All of the succulents pictured below were bought from The Succulent Source, where you can buy leaves, cuttings, and full-sized succulents for cheap! My personal go-to for succulents!*
**Note: This post contains affiliate links, which if purchased, I will receive a portion of the profits at no extra cost to you. This helps me to keep providing you with this awesome information!**
Propagation: the act or action of propagating: such as
increase (as a kind of organism) in numbers
the spreading of something (such as a belief) abroad or into new regions
enlargement or extension (as of a crack) in a solid body
One of the most critical parts of growing new succulents is to get a good leaf cutting. To do this, gently hold the leaf and wiggle it back and forth until it gently detaches from the stem. Usually lower leaves are a lot easier to remove. It might take a couple of tries before you start getting good cuttings. This is because you need to remove the leaf right at the joint without letting the tip get torn. If some of the stem is attached, this will still work. But if the leaf tip is torn, then your leaf will just shrivel up and die. No leaf stem, no new succulent.
Propagating Succulents Step 2: Dry
Leave your leaves to dry (haha!). Do not skip this step! The tear that you have made on the succulent needs time to dry before it is placed in soil or gets wet. This allows it to form a seal around the tear (kind of like a scab). This helps protect the leaf from too much water or from bacteria getting in. Simply leave the cutting out in a location where it will be protected from any direct sunlight. Leave it for about 24 hours before moving on to the next step.
Propagating Succulents Step 3: Place on Top of Soil
Some people like to place their cuttings into the soil, but this is not necessary and may actually increase the number of cuttings that rot. By simply placing your leaves on top of the soil, the root will still be able to grow out of the leaf and down into the soil. Make sure that the container is shallow and has good drainage. I use cactus and succulent mix potting soil to ensure that there is good drainage. This also lowers the rate of leaves rotting.
Propagating Succulents Step 4: Water
Water lightly for several weeks until roots and rosettes form. I personally use a spray bottle to gently water the plants several times a day. Make sure that the soil dries between watering. Excess moisture will kill your leaves faster than anything else! Once the roots have become established, they can handle a bit more water at a time and you can lower the times of watering to just once a day. Also keep out of direct sunlight and place in a warm location. All of these will help to keep the succulents happy and thriving.
Propagating Succulents Step 5: Re-pot and Enjoy!
Once the rosettes have formed and the root systems have developed, the new succulents can be removed from the shallow container and planted in individual pots. Make sure that these pots are still small (proportional to their size). As the succulent grows, it can be repotted into larger containers or in group plantings. Enjoy your new succulents!
Propagating Succulents from Stem Cuttings
When you order succulents as cuttings or take cuttings of your own succulents, the process is pretty simple… First you need to let the cutting dry out (just like the leaves). If you had a cutting ordered, it should already have dried enough. Next, you plant in cactus and succulent potting mix and water like normal. It should develop roots quickly. And that’s it! This is one reason why a lot of people like to order cuttings. They are much faster and easier to grow! This is where I bought mine!
Well, I hope you all enjoyed this tutorial on propagating succulents! And be sure to check out The Succulent Source for some awesome, cheap succulents! I got mine in the middle of winter and they’re still doing great! Also, for additional care info, check out my post on Succulent Care Tips! And feel free to leave any additional questions, tips, or comments below!
Ever struggle with keeping your succulents alive? I know I have. It’s taken some time to understand these plants that have become so popular. This is because indoor conditions don’t naturally support these cute little creations. We need to take special care of succulents to keep them thriving and happy all year round!
**Note: This post contains affiliate links, which if purchased, I will receive a portion of the profits at no extra cost to you. This helps me to keep providing you with this awesome information!**
Taking Care of Succulents: Water
The biggest factor for succulent success is proper watering. For these plants, always remember… less is more! Because their leaves are filled with water, they don’t need as much water in their roots. Only water your succulent when the soil is dry to the touch. Also, a huge factor in keeping your succulent from getting too much water is in making sure it has good drainage in the pot. Make sure that your succulent pots have holes in the bottom to let out extra water. Also make sure to use special soil, such as succulent and cactus mix, or regular potting soil mixed with vermiculite. These soils improve drainage and keep your succulent from sitting in water. Because nothing kills a succulent faster than too much water!
Janie over at Succulent Alley has an awesome post comparing the different types of succulent soil. So if you don’t have your own soil yet, definitely check this one out… Best Soil for Succulents!
*A way to tell if your succulent is getting too much or too little water is to look at the leaves. If they are getting wrinkled and turning brown, then you need to water more often. If they are staying fat and getting mushy, then your plant is getting way too much water.*
Another huge factor in succulent survival is where it is placed indoors. Succulents naturally occur in hot and warm environments. When choosing where to place your succulent think of sunny and warm. These plants need plenty of natural sunlight (from a south-, or east-facing window), or else they will start to stretch. This is the plant’s natural response as it tries to reach for additional sunlight. To keep your succulent healthy, it needs to be placed in a location where it will receive the proper lighting and temperature.
Taking Care of Succulents: Temperature
One last thing to watch out for is either too much direct sunlight in the summer, or cold drafts in the winter. If your succulent isn’t used to direct sunlight, then placing it in direct, afternoon sun can cause the leaves to burn. Leaf burn looks like brown, purplish patches across the surface of the leaf. If this is happening to your succulent, then immediately move it to a spot out of hot, direct sunlight. What they like best is direct morning or evening sun from an east- or west-facing window. But remember, if it starts to stretch, then it is a sign that it needs more sunlight. There is definitely a fine balance that succulents need.
Extra Bonus: Watering in Winter…
During the winter, succulents may need to be moved to a more sunny window… but beware of cold temperatures. The first sign that temperatures are too cold is that the water in the pot will take a lot longer to drain. Once this starts to happen, immediately start watering less! Most succulents only need a fraction of their usual water in the winter. The tip to remember here is that in the winter, only water enough to keep the soil from completely drying out. And only add small amounts of water each time.
If the succulent is getting too much water during the winter, then it will start to rot. This is seen when the leaves and stem begin to get mushy. This is the most common cause of death during the winter. Also be aware of your succulents that are placed directly on a windowsill or next to an exterior door. These might get too cold from drafts entering the space. If succulents get too cold, they will freeze. However, like I said before, your succulent is much more likely to rot due to overwatering in cold weather than it is to freeze.
Well, those are the main things to help care for your succulent! For information on growing more succulents, check out my post on Propagating Succulents! And for more quick tips on succulents and houseplants in general, check out Porch.com’s Everything About Plants Q&A!
Let me know if there are any tips or tricks that you’ve had success with, or if you have any specific questions for your own succulents… just join my Facebook group and share! I love to hear from you!
Hey y’all! So here’s a post I’ve been wanting to write for a while. Mainly because succulents are so awesome, but can be tricky too! When I bought my first succulent, I definitely had to adjust my normal indoor-plant thinking. But once you get a few tricks down, then these little guys can be a breeze! Especially the succulents on this list. This list of the easiest succulents to grow are both easy to keep alive and are the best succulents for beginners!
**Note: This post contains affiliate links, which if purchased, I will receive a portion of the profits at no extra cost to you. This helps me to keep providing you with this awesome information!**
Easiest Succulents to Grow #1: Aloe – Aloe vera
This is a great place to start! Not only is the aloe vera plant very attractive, but it is also widely used for its medicinal properties. Just cut off a leaf/stem and rub the juices onto a burn or a wound (just be sure that you aren’t one of those few who are sensitive to it first).
To ensure a healthy aloe vera plant, make sure you allow the soil to dry out between waterings. Also try to give it at least a couple hours of direct sunlight each day. This plant can have sharp edges on its leaves, so make sure that it isn’t in a location where people might brush against it and get scraped. Only repot plant it once the roots are starting to push out of the pot. Follow these guidelines, and you’ll have a super easy, super useful, and super awesome little succulent! Get it here!
Easiest Succulents to Grow #2: String of Pearls – Senecio rowleyanus
String of pearls is great for any beginner who loves hanging baskets. Used as a filler or as a main specimen, string of pearls looks almost unreal! Make sure that this little guy gets plenty of bright light, but don’t keep it in direct afternoon sun. It usually doesn’t need too much watering, but if it is in a warm climate and gets lots of bright light, then it may need a moderate amount of water. Just keep an eye on it and adjust accordingly. Get it here!
Easiest Succulents to Grow #3: Paddle Pant – Kalanchoe tetraphylla
This succulent definitely makes a statement in any modern-style home! With its red-tinted leaves and geometric shape, this succulent looks great in many different styles of containers. Make sure that it is only watered once the soil has become dry on the top. Don’t expose it to direct, hot sunlight, but do give it plenty of bright, indirect light to keep the edges red. Get it here!
Easiest Succulents to Grow #4: Jade Plant – Crassula ovata
Jade plant is one of my favorite succulents! I love that it can grow from a simple cutting up to the size of a small tree! Some tips to succeed with this plant is to not over-water it. Wait until the soil dries out completely before watering. But don’t wait until its leaves look dull or withered. This means you’ve waited for too long and most likely those leaves will eventually fall off. So find a happy medium, but err on the side of dry. Another nice thing about the jade plant is that because of its small root system, you won’t need to re-pot it that often. So sit back and enjoy the beauty of this large, but easy succulent! Get it here!
Easiest Succulents to Grow #5: Panda Plant – Kalanchoe tomentosa
This is another very cute succulent! Named for its fuzzy leaves, the panda plant can flower, but it is very rare indoors. So don’t count on it flowering, but instead enjoy the beautiful shape and tinted edges of this easy-to-grow succulent. Make sure that it dries out between watering and that it receives lots of bright, indirect sunlight. It can also deal with a few hours of direct sunlight in the morning, but keep it away from the strong afternoon sun. Also, this plant doesn’t grow well in cold drafts. Get it here!
Easiest Succulents to Grow #6 Burro’s Tail – Sedum morganianum
Here’s another great succulent to put into a hanging basket. Burro’s tail has thick rows of cascading leaves that can grow up to 2-3 feet long! However, place this little guy somewhere it won’t be disturbed because the leaves will fall off with the slightest touch. If you have young kids, I wouldn’t suggest this one for you. Go with the String of Pearls instead. But Burro’s Tail is pretty low-maintenance, especially during the wintertime when the plant enters dormancy and won’t need much watering at all. And this succulent can do well with bright to medium sun and can even be brought outdoors during the summer as long as it is carefully acclimated. Get it here!
Easiest Succulents to Grow #7: Lithops
Lithops have recently returned in popularity and it’s no surprise why! They are super easy to grow indoors, are low-growing and come in a wide variety of colors and designs. They can also bloom if given enough sunlight. These plants do well in poor soils, but need to stay well-drained and dislike too much water. Lithops also go through a dormant period in the winter where they will need little to no watering at all (depending on your climate). So enjoy these pretty, unique succulents! Get it here!
Easiest Succulents to Grow #8: Pincushion Cactus – Mammillaria
Pincushion Cactus is a very pretty cactus that got its name from its very sharp needles! This guy needs plenty of space as each needle has a hooked end that can be hard to get out of the skin. So once again, I wouldn’t suggest this plant for people with young children in the home. Pincushion Cactus is fairly easy to maintain, however. It just requires a lot of sunlight (if you have a bright south-facing window, that would be best). The soil also needs to dry out before its next watering. Pincushion Cactus will also need a period of no watering (during the wintertime) to allow it to go into dormancy. This is needed if you want it to produce those gorgeous blooms! Get it here!
Easiest Succulents to Grow #9: Snake Plant – Sansevieria trifasciata
This is another of my favorite indoor succulents as it’s one of the few thick, fleshy-leaved plants that does well in low light conditions. It is also on my list of Top 10 Hard to Kill Houseplants. And… it is also one of the large succulents that is also easy to grow! With its bright, vertical lines, Snake Plant does well in any room. Make sure to let the soil dry out between watering and plant in a well-draining soil. If left too wet, it may start to rot at the base. If given higher amounts of indirect lights, it is more likely to keep its colorful markings. Prune out any damaged leaves to keep it looking fresh and healthy, but know that once the tip has been clipped, it will no longer grow in height. Get it here!
Easiest Succulents to Grow #10: Zebra Cactus – Haworthia fasciata
Zebra Cactus is another of my favorite succulents because it is so easy to grow! Seriously, my 1-year-old got a hold of several of my succulents, killing several (sad day!), but being ripped out of its soil and tossed around the living room didn’t even seem to phase this guy! It has definitely earned its spot here on my list of easiest to grow succulents. I’ve heard some people say that the tips are sharp, but they aren’t too sharp in my opinion. It also helps that this succulent stays small, so there won’t be any worries of it outgrowing its space. Just re-pot every year or two with fresh, well-draining soil to give it needed nutrients. This cactus can also do well in a shallow pot, as its roots stay in the top portion of the soil. Make sure that your Zebra Cactus stays in bright, but indirect sunlight. Hot, direct sunlight can burn the leaves.For more care information, check out my post, Zebra Plant Succulent Care! Or you can purchase one here!
Easiest Succulents to Grow #11: Air Plants – Tillandsia
Air plants have recently gained more popularity due to the fact that they don’t require any soil to grow. However, they do need to be watered and given proper attention or they will die. But once you get a few simple tricks down, all of your air plants will thrive! So first, make sure that you water it correctly. This consists of lightly misting it once or twice a week (depending on how much light it is getting), and soaking it once a week for several hours. Then make sure that it completely dries out! This is one of my beginner mistakes with this plant. I bought one that was already glued into a glass orb and when it came time to dry it out, it was extremely difficult. This was because it couldn’t get enough airflow to it to allow it to dry out completely. So make sure that it soaks it all up, but then has plenty of time to completely dry out! For more care information, check out my post on Air Plant Care, or my post on How to Water Air Plants! Or you can purchase one here!
Easiest Succulents to Grow #12: Hens and Chicks
Last, but definitely not least is Hens and Chicks. Both Sempervivum and Echeveria species are often called Hens and Chicks because they not only look very similar, but they also both create small offshoots, or what is referred to as the ‘chicks’ part of the plant. These small chicks can be cut off and re-potted for more plants. Hens and Chicks does best in bright, indirect light, but can also tolerate some light shade. Just make sure that it is in well-draining potting soil and that it dries out a bit between watering. They will also need very little water in the winter months as they enter a dormancy period. And also make sure to keep water off the leaves while watering, as it can cause them to be permanently marked. Get it here!
So there’s my list of 12 Easiest Succulents to Grow Indoors! I hope you found the tips helpful! Make sure to check out my other post on Top 10 Hard to Kill Houseplants that includes the easiest non-succulent type plants to grow indoors as well. I hope you all have success growing some of these awesome succulents and feel free to leave any additional tips or questions below!


")


")


