3 Steps to Quickly Save your Overwatered Succulents

Overwatered. The one word that every succulent owner comes to know and fear at least once during their plant journey. But don’t worry. An overwatered succulent is on the path to dying, but by immediately doing these three steps, you might be able to preserve at least a part of your beloved plant! So here are the three things you need to do as soon as you notice that your succulent has been overwatered.

*Note: For those of you who want to watch all of the steps, here is my video where I go through exactly what you need to do to save your over-watered succulents!*

Click here to subscribe

Step #1: Prepare the Roots

Take your succulent out of its current pot and remove as much of the soil as possible from its roots. This can be done by holding your succulent above a bowl or a tray and gently massage the root system to allow the soil to fall into the tray. If your soil is very wet, then you might have to support some of the roots to keep the wet soil from ripping the roots off when it falls.

Another way to gently remove soil from the roots is to use water to wash off the soil. This is best done outdoors with a hose to avoid getting soil down an indoor drain system.

Overwatered Succulent Roots

Depending on how much root rot has occurred, some of you might still have a root system to work with, while others of you might not have any root system left. This is seen when the stem of the plant is mushy and separates from the root system easily. However, if you do have a root system remaining, then let any roots lightly air dry in a warm location for about 20 minutes to an hour. Make sure that this succulent (and its roots!) stay out of direct sunlight!

Step #2: Remove Dead Portions

If you have a root system that is still attached to your plant, then simply trim off and remove any black or mushy roots. Then pour hydrogen peroxide over the roots that remain. The hydrogen peroxide will help kill any bacteria rot in the roots!

Hydrogen Peroxide on Succulent Roots

If you don’t have a root system left, then assess the stem of your succulent. Trim off any portion of the stem that is discolored. This should leave you with only a top portion of the plant remaining. If the majority of the stem is discolored, try to take off a few of the best-looking leaves to prepare for the third and final step. Try to take leaves from the top of the plant as these are always the last to become affected by overwatering. Just keep in mind that you will want to try to choose any fully-formed leaves as leaves that are just starting to grow from the top won’t be as easy to propagate.

Step #3: Repot or Propagate

If your root system is still intact, then let it lightly dry out before repotting. When placing it back into soil, you will want to correct any issues that were causing it to be overwatered. Three things that you can adjust is to either repot your succulent into a smaller pot, repot it into a pot with better drainage (either switch to a clay pot, a pot with larger drainage holes, or both!), or repot it using a lighter soil (such as a cactus and succulent mix, or a perlite mix).

For those of you who only have a stem or leaves left, then you will need to start by drying your cuttings out for a few days (1-2 days away from direct sunlight). Then propagate them by using the instructions found in my post How to Propagate Succulents.

Another great tool to help you avoid overwatering in the future is to use a soil moisture meter. I have personally never overwatered a single plant since purchasing this soil moisture meter! It really is a game-changer!

Repotted succulent

Well I hope that this process goes well for you and your succulent. It can be a very delicate process as you save your succulent from being overwatered. I hope that this 3-step process has helped you to have success. And once again, be sure to buy a soil moisture meter to prevent this from ever happening again!

Please leave any additional comments or questions below and sign up for my email list to receive even more tips and tricks to help keep your houseplants alive!

Happy Digging!

Click here to subscribe
A picture ofa succulent and the title how to save succulents that have been overwatered

How to Stop Over Watering your Succulents

I get it. You buy a succulent, you lovingly water it, and then three days later it has died… What went wrong?! Then you discover the ugly truth. You’ve been over watering your succulents! Don’t worry. We’ve all been there. But how exactly do you stop? And how do you keep your little guys alive?! Keep reading, cause I’ll show you exactly how to stop over watering your succulents!

There are a couple of different reasons why your succulent is being over watered. First, it could be because you are simply adding too much water to its pot.

Click here to subscribe

Reason #1: Using Too Much Water

To fix this, only add small amounts of water each time you are watering.

Sounds simple, right?!

Well, it can actually be super difficult if you’re using a regular watering can to water those tiny little pots.

This is why it’s BEST to water your succulents with one of these!

Someone watering various plants

These succulent watering bottles are designed to give you the ultimate control over how much your succulent is watered. It also has a small nozzle, which positions the water stream to exactly where you want it! No more wet succulent leaves, and no more wet plant shelves!

Reason #2: Not Enough Drainage

The next thing to consider with over watering succulents is how fast your water is draining out of its pot.

In a succulent’s native habitat, water will move quickly into, then out of a plant’s reach. This is done either through the water quickly sinking down through the sandy or rocky soil, or water will escape through evaporation due to the sun’s heat. Either way, the soil does not stay wet for long.

Which means… succulents are not accustomed to having their roots constantly wet. In fact, they’re used to having moderately dry roots.

Because of this, we need to allow the water in our own pots to move down and out of the soil.

To do this, we will need:

  1. Soil that drains well
  2. Pots that drain well

Well-Draining Soil

For well-draining soil, either amend regular soil with sand and perlite (at a rate of 1/3 soil, 1/3 sand, and 1/3 perlite), or consider purchasing a pre-mixed soil, such as this cactus and succulent soil!

Picture of Perfect Plants Succulent soil

Well-Draining Pots

To have well-draining pots, first make sure that your pot’s soil-to-root ratio is correct. (A.k.a., don’t use a large pot for a small succulent). This is extremely important!!!

If your succulent is small, use a small pot.

Also, look for shallow pots. Don’t purchase anything too deep.

Then, make sure that your pots have drainage holes!!!

I can’t stress this enough! Succulents NEED pots with drainage holes!

If you want to group your succulents together, get a pot that is specifically made for grouping succulents. These will be shallow, wide, and have drainage holes. Check out these pots for succulent groupings.

A picture of DeeCoo Succulent Pots

And for pot ideas, check out my post on Indoor Plant Pots. Just make sure you pick out pots that are proportionate to the size of your succulents!!!

So remember, add less water, and improve drainage of your soil and your pots! If you do all of these above steps, you will never over water your succulents again! Let me know if you have any more succulent-related questions in the comments below! And for more succulent tips, check out my post on Succulent Care, or my post, How Often should I Water my Succulent?!

Happy Digging!

Click here to subscribe

Common Problems with Christmas Cactus and How to Fix Them

Isn’t it frustrating when your plant (that looked so great at the store!) comes home and slowly starts looking like it’s about to die?! If this is the story of you and your Christmas cactus, just know that it’s okay.

You are not the only person who has a hard time keeping this tropical cactus alive…

And today, I’m going to show you the five most common problems people run into with their Christmas cactus. Knowing these problems and implementing their solutions will turn your dying Christmas cactus back into its glorious cactus self again soon!

Click here to subscribe

Problem #1: Your Christmas Cactus’ Leaves are Limp & Droopy

Cause #1: There are two different reasons why your Christmas cactus’ leaves are limp and droopy. The first reason is if it is currently flowering. Producing flowers takes a lot of energy away from the plant and many people have said that their plants become droopy during and just after flowering.

Care: If this is you, then simply wait until your plant has finished flowering, then make sure to let it rest for a few weeks with no fertilizer and only little water. Only water it when the soil is dry to the touch. After these few weeks, you can then resume your care as normal.

Cause #2: The second reason for limp or droopy leaves is because of improper watering. This is also a cause for wilted or shriveled leaves. So if your plant’s leaves are limp and droopy, and it isn’t currently flowering, then improper watering is the cause.

Care: Refer to the next section for shriveled or wilted leaf care.

Christmas Cactus Limp Leaves
Image courtesy of Garden.org

Problem #2: Your Christmas Cactus’ Leaves are Shriveled or Wilted

Cause: Christmas cactus leaves will wilt and shrivel up when the leaves aren’t getting enough water due to improper watering. This can be from either over-watering or under-watering. Feel the soil several inches below the soil surface, or use a soil moisture meter to determine if your soil has been kept too wet or too dry.

Care #1: If your soil is too wet, then you will most likely have damaged roots. You should immediately re-pot your Christmas cactus into fresh soil that is only lightly moist. While re-potting, trim off any black or mushy roots and pour hydrogen peroxide over the root system. This will kill any remaining bacteria before you place it into fresh soil. Also, take stem cuttings at this time to propagate, following the directions in Christmas Cactus Propagation. This will ensure that even if your plants’ roots die, you will still have cuttings to re-grow your Christmas cactus.

Care #2: On the flip side, if your plant is too dry, then you will need to slowly increase the moisture levels over a few days. Slowly bring it from bone dry back to lightly moist. You will know you’ve been successful when your plant’s leaves perk back up! Just be sure that you don’t end up over-watering your plant at this time. Remember, let it barely dry out before you water it again.

Also note that if your plant’s soil is hard and difficult to press your fingers into, then you will need to re-pot your plant into fresh, well-draining soil, such as a cactus and succulent soil or a regular soil mixed with additional sand or perlite.

Shriveling Christmas Cactus leaves
Image courtesy of reddit.com

Problem #3: Your Plant’s Leaves are Pale or Red

Cause: Christmas cactus leaves begin to turn pale and then get a slight red tint if they are getting too much direct sunlight. The red tint can be pretty (and harmless in the right settings), but make sure that it isn’t getting burnt. Remember, these plants are tropical cacti, not desert cacti. So they are used to a very moist heat, not a dry heat like what you find in a home window. So if your leaves are turning a pale greenish-yellow color, or are excessively red, then it’s too much hot, direct sunlight.

Care: Move your Christmas cactus out of any direct sunlight. Indirect sunlight will be fine, but try to avoid any direct sunlight for at least a little while.

These plants can eventually become accustomed to higher light levels, but this would take a lot of acclimatizing. Instead, I would suggest you take the easier route and simply move it away from the hot sunlight.

Christmas Cactus leaves turning red
Image courtesy of houzz.com

Problem #4: You Christmas Cactus’ Stems are Falling Off

Cause: The reason why your plant’s stems are falling off is because of root- or stem rot at the base of the plant. This always happens as a result of over-watering.

Care: Follow the care instructions for over-watering under the “Wilted or Shriveled Leaves” section (Problem #2, Care #1). This will tell you exactly how to care for a plant that has been over-watered.

Christmas Cactus stems falling off
Image courtesy of reddit.com

Problem #5: Flower Buds Fall off Before they Fully Bloom

Cause: Christmas cactus flower are notorious for being overly-sensitive. The reasons why your buds fell off could be because of your plant getting too dry, staying too wet, or because it recently moved locations.

Care: When your plant is in bud, make sure to keep your watering schedule consistent. But, if something comes up (or you’ve just recently brought your plant home) and all of its buds fall off, sit tight.

Let it rest for a few weeks, keeping it a bit more dry than usual, and give it a chance to set new buds. Sometimes if it is healthy enough, a Christmas cactus is able to produce a second set of blooms. So don’t get frustrated! Your little plant might just need a bit more time!

Christmas cactus flower buds falling off before fully blooming
Image courtesy of gardeningknowhow.com

Those are the 5 most common Christmas cactus problems and how to fix them! Please let me know below if you have any questions or additional comments, and join my email list to get not only a special welcome gift, but to also receive all the latest tips and how-to’s straight to your inbox. Then, for more info on how to take care of your plant, check out my post, Christmas Cactus Plant Care!

Happy Digging!

Click here to subscribe
problems with christmas cactus pinterest image

3 Easy Ways to Propagate Christmas Cactus

Hey everyone! Welcome back to The Girl with a Shovel! Today I wanted to tell you all about Christmas Cactus propagation: when and how to successfully propagate your Christmas cactus!

Note: This post is written for Christmas cactus, however, everything discussed can also be used for a Thanksgiving cactus as well. Propagation methods are the same for both.

The springtime is usually the best time to propagate your Christmas cactus! You want to make sure that it is several weeks after the bloom time and at least a month before the fall dormancy period (this is when you should be giving it light treatment to stimulate Christmas blooms).

There are 3 different ways to propagate a Christmas cactus. These are: upright in soil, flat in soil, and in water. But first I wanted to cover how to get a healthy cutting, and then we will get into these three different rooting methods.

Click here to subscribe

Getting a Healthy Cutting

Each Christmas cactus branch is made up of several sections (or pads) linked together. At the very bottom of the pad (where it connects to another pad) is where you can get roots to grow. But the tricky part is that you need to separate the pads without tearing the bottom of the pad. If the bottom of the pad is damaged in any way, then the cutting will most likely fail.

If you’ve ever propagated succulent leaves, then you’ll notice the process of pulling off the leaves is very similar to pulling off the cactus pads. For a visual of good versus bad leaf cuttings, refer to my post Propagating Succulents.

The easiest way to ensure you get the complete, undamaged cactus pad is to gently twist it away from the bottom pad. By gently twisting the top pad, your cactus pads should easily come apart – no tearing involved. Got it?! Now let’s work on planting your cutting…

How to take a successful cutting for Christmas Cactus propagation.

Method #1: Propagating Upright in Soil

This method is the best if you’ve got some large cuttings (around 4 pads each) and if you have good, whole ends on your cutting (aka you took good cuttings without tearing the bottom of the pad).

Take your cutting and lay it in dry location for 1-2 days. Be sure to keep them out of direct sunlight as well. This resting period is important as it helps the plant transition from growing shoots to thinking about growing roots.

After 1-2 days, place your cutting into fresh potting soil (cactus & succulent soil mix is best), and place the end far enough down that the soil covers the bottom pad. Then water it lightly, letting it just barely dry in between watering. Give it 2-3 weeks for roots to form.

Low on cactus and succulent soil? Here’s how to mix your own! DIY SUCCULENT SOIL RECIPE!

Method #1 Summary

  • Used for large cuttings (4 pads each)
  • Dry for 1-2 days
  • NO direct sunlight
  • Use light, well-draining soil
  • Keep LIGHTLY moist
Christmas Cactus Propagation Method #!: Upright in Soil

Method #2: Propagating Flat (On Top of Soil)

This method is best for you if you want to do soil propagation, but you have smaller cuttings (2-3 pads), or if your cutting’s bottom pad has been damaged in any way. I personally used this method for a section of 2 pads that were cut off my parent plant and was missing the bottom section of the lower pad. (I wasn’t the one who took the cutting, I swear! Haha!)

Simply dry out the cutting for 1-2 days (again avoiding direct sunlight). Then, instead of planting in the soil, you will place the cutting horizontally on top of the soil. This also needs a light soil, such as a cactus & succulent soil mix. Make sure that there is good contact between the soil and the point where the 2 cactus pads meet. This is where the new roots are going to come from. Then keep it lightly moist and your cutting should root within 2-3 weeks.

A special precaution for this type of rooting… because the cactus pads are laid horizontally against the soil, it increases the chances that your cactus pad gets too wet and begins to rot. To avoid this, try to only get the soil wet when you water your succulent. Try to keep the actual cutting dry. If you find this difficult, then I would suggest you use one of the other two propagation methods.

Method #2 Summary

  • Use with shorter cuttings (2-3 pads)
  • Let dry for 1-2 days
  • NO direct sunlight
  • Lay horizontally on top of the soil
  • Use light, well-draining soil
  • Keep LIGHTLY moist
  • Get soil wet, but keep cutting relatively dry
Shorter cuttings with no direct sunlight laying horizontally on top of the soil

Method #3: Christmas Cactus Propagation in Water

Christmas cactus propagation in water has been proven to be the fastest way to propagate cuttings. Watching the video below, you’ll see how Christmas cactus cuttings in water grow roots weeks before the Christmas cactus in soil. However, when you root your cuttings in water, you will still have the extra step of transferring your cuttings to soil, which can be a delicate process. So be aware of the advantages and disadvantages of each method and choose your propagation method accordingly.

The key to having success with water propagation is to have a good callus. To do this, first, get a good cutting by following the instructions above. Then, make sure that you leave it out to dry. Keep it out of direct sunlight and let it dry to the point that the leaf gets thinner, but put it in water before it gets any wrinkles. If it starts to get wrinkle lines, then you’ve left your cutting out a bit too long.

Once your cutting has dried enough (but not too much!), it will have formed a good enough callus that you can put it in water without the risk of it rotting. If your cutting does rot, then this is a sign that it didn’t form a good enough callus and it should be left out to dry longer next time.

Leave your cutting in water for several weeks, or until it has roots that are about an inch or two in length. While your cutting is in water, make sure that you change out its water every few days. This keeps the water fresh and cuts down on the chances that you will have problems with bacterial rot on your cuttings or on your roots.

Once your cuttings are ready to pot, use a well-draining soil (such as cactus & succulent soil mix, or regular soil mixed with perlite), as well as a well-draining pot. This will be extremely important in successfully transitioning your plant from water to soil.

Transitioning from Water to Soil

As you transition your cuttings, plant them in soil just like you would with any other cutting, then water it thoroughly. Keep it in a warm location with a fair amount of indirect light. At this point it can also withstand some direct morning or evening sunlight as long as temperatures don’t get too hot.

Let your plant’s soil only get slightly dry before watering it again. This means that you will be watering these cuttings a lot more than your regular Christmas cactus. Slowly decrease your watering until your plant can withstand the soil becoming almost dry between watering. This transition should be over the course of a few months and will slowly transition your plant from being in water to being in soil.

Method#3 Summary

  • Let cuttings form a callous
  • Switch out water frequently
  • Use well-draining soil
  • Keep moist when potted in soil
  • Slowly transition from water to soil
Letting cuttings form a callous and kept moist in a pot in soil

So that’s how to have successful Christmas cactus propagation! Remember to choose the method that is best for your situation. And let me know how it goes! Leave any additional questions or comments below. And feel free to join my email list for more awesome tips on how to keep your plants alive and healthy!

Happy Digging!

Click here to subscribe
Christmas Cactus Propagation Pinterest Image

33 Stunning Succulents that are Safe for Cats

Succulents Safe for Cats Cover Image

Cats and houseplants. I get it. Your furry, feline friends are always exploring, touching, sniffing, and sometimes even taste-testing your houseplants. You can’t get them to stop, so instead you want to make sure that whatever plant you bring into your home won’t hurt them. This can sometimes make cat-owners hesitant to purchase houseplants. But today I’m going to show you 33 succulents that you can safely keep, as they are non-toxic to cats! So enjoy the peace-of-mind that comes with knowing your succulent collection can grow while your precious furry friend remains safe!

*Note: I have researched these plants to the best of my ability and have found them to be safe for cats. However, I hold no liability for any incorrect information or any harm or damages caused to yourself, your pets, or your property because of this information. For further details about plant toxicity levels and what to do if your pet ingests any of these plants, please visit aspca.org or call their help number at 1-(888)-426-4435*

*Each of these plants contain an affiliate link to purchase these products at succulentsbox.com. Unfortunately, succulentsbox.com does not ship outside of the continental USA. Any readers who live outside of the continental USA will have to find a local source to purchase these succulents. I am sorry for any inconvenience this may cause.*

Click here to subscribe
A Crinoline Ruffles Echeveria
#1: Crinoline Ruffles Echeveria

This beautiful Echeveria has ruffled leaves with light pink edges surrounding a blue-green center. Crinoline Ruffles is for anyone looking for something unique to add to their collection!

Purchase Crinoline Ruffles Echeveria

Cymbiformis var obtusa haworthia
#2: Cymbiformis var. obtusa Haworthia

Transparent tips??? Stunning! This Haworthia variety has thick, dense leaves that open up to transparent tips. These leaves can be somewhat soft, so make sure it is protected from tipping over.

Purchase Cymbiformis var. obtusa Haworthia

Red lion Sepervivum
#3: Red Lion Sempervivum

This deep red Sempervivum will definitely add some color to your succulent collection! The red leaves can also have green tints on the leaf edges depending on the plant and the amount of sunlight.

Purchase Red Lion Sempervivum

Ghost Echeveria
#4: Ghost Echeveria

The Echeveria lilacina (Ghost) has striking silver leaves that stand out when placed near other green succulents. This loose rosette also does not produce offsets very quickly, making it very happy in the same pot for a while.

Purchase Ghost Echeveria

Topsy turvy echeveria
#5: Topsy Turvy Echeveria

This large succulent has a very unique shape. Silver-green leaves twist into the center of the rosette, leaving this topsy-turvy succulent highly sought after.

Purchase Topsy Turvy Echeveria

Afterglow echeveria
#6: Afterglow Echeveria

Afterglow is another large Echeveria variety. It is characterized by its pink and purple leaves that form a loose, free-style rosette.

Purchase Afterglow Echeveria

Living stones lithops
#7: Living Stones Lithops

Known as “Living Stones”, Lithops are one of the coolest, trending succulents of the decade! As they grow, they produce a large flower in the middle of their two leaves, then they go dormant for several months, sometimes completely receding back into the soil. If you want an ultra low-maintenance succulent, then this is right for you!

Purchase Living Stones Lithops

Venosa haworthia
#8: Venosa Haworthia

This triangular succulent is sure to make a statement with its green, webbed leaves. It is also a fast producer of offsets, giving you plenty of little plants to either add to your collection or to gift to a friend.

Purchase Venosa Haworthia

Cubic frost echeveria
#9: Cubic Frost Echeveria

Cubic Frost is a soft pink succulent with wedge-shaped leaves. It also grows relatively fast for a succulent, making it perfect for the impatient gardener!

Purchase Cubic Frost Echeveria

Black knight echeveria
#10: Black Knight Echeveria

The ‘Black Knight’ Echeveria isn’t your typical soft pastel succulent. Instead, dark green centers fade to black edges! The more sun this plant gets, the darker its leaves… so plan accordingly!

Purchase Black Knight Echeveria

Click here to subscribe
Mardi gras aeonium
#11: Mardi Gras Aeonium

This colorful succulent shows the best of nature’s paint brush! Yellow and green stripes give way to purple tips on these stunning succulents.

Purchase Mardi Gras Aeonium

seacup variegata aeonium
#12: Suncup Variegata Aeonium

Each Suncup is a unique blend of green variegation on a yellow rosette. It is one of the smaller Aeoniums, but it does readily produce offsets to make up for its smaller size.

Purchase Suncup Variegata Aeonium

elegans echeveria
#13: Elegans Echeveria (Mexican snowball)

The ‘Mexican Snowball’ Echeveria has a dense, thick covering of blue-tinted leaves. These dense leaves remind us all why these succulents are called rosettes!

Purchase Elegans Echeveria

crested frosty echeveria
#14: Crested Frosty Echeveria

This unusual succulent is covered in soft white fur, which makes it a huge favorite! However, it’s name is deceiving as this Crested Frosty actually does not do well in the cold.

Purchase Crested Frosty Echeveria

cobweb sempervivum
#15: Cobweb Sempervivum

It’s no wonder this variety is known as the ‘Cobweb’ Sempervivum. The white threads would be worrisome on any other plant!

Purchase Cobweb Sempervivum

calcareum sempervium
#16: Calcareum Sempervivum

The Calcareum features dense leaves, all tipped with a deep red. This warns people of its somewhat sharp tips, though it’s still a lot safer than your cacti!

Purchase Calcarium Sempervivum

holiday cactus schlumbergera
#17: Holiday Cactus Schlumbergera

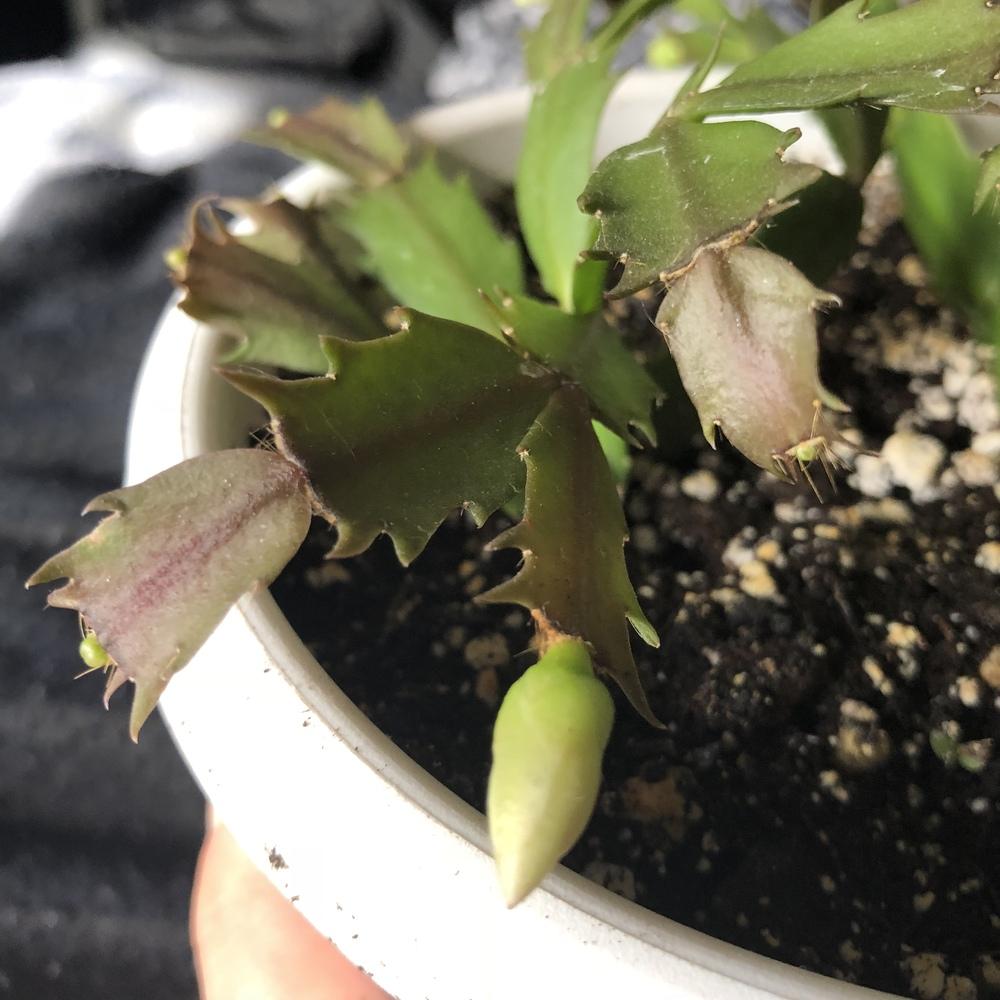
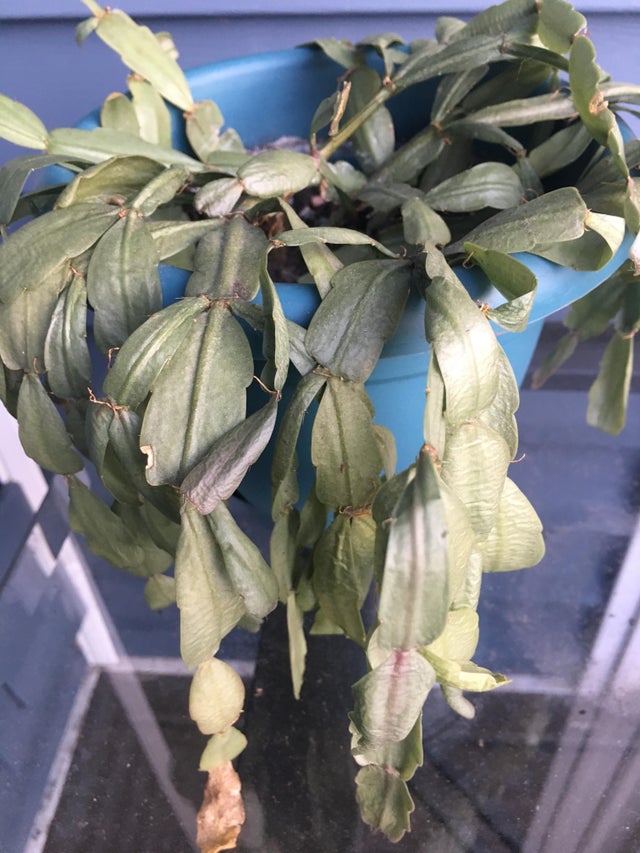
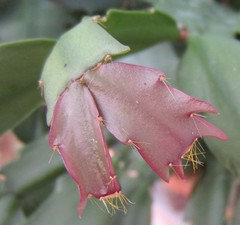
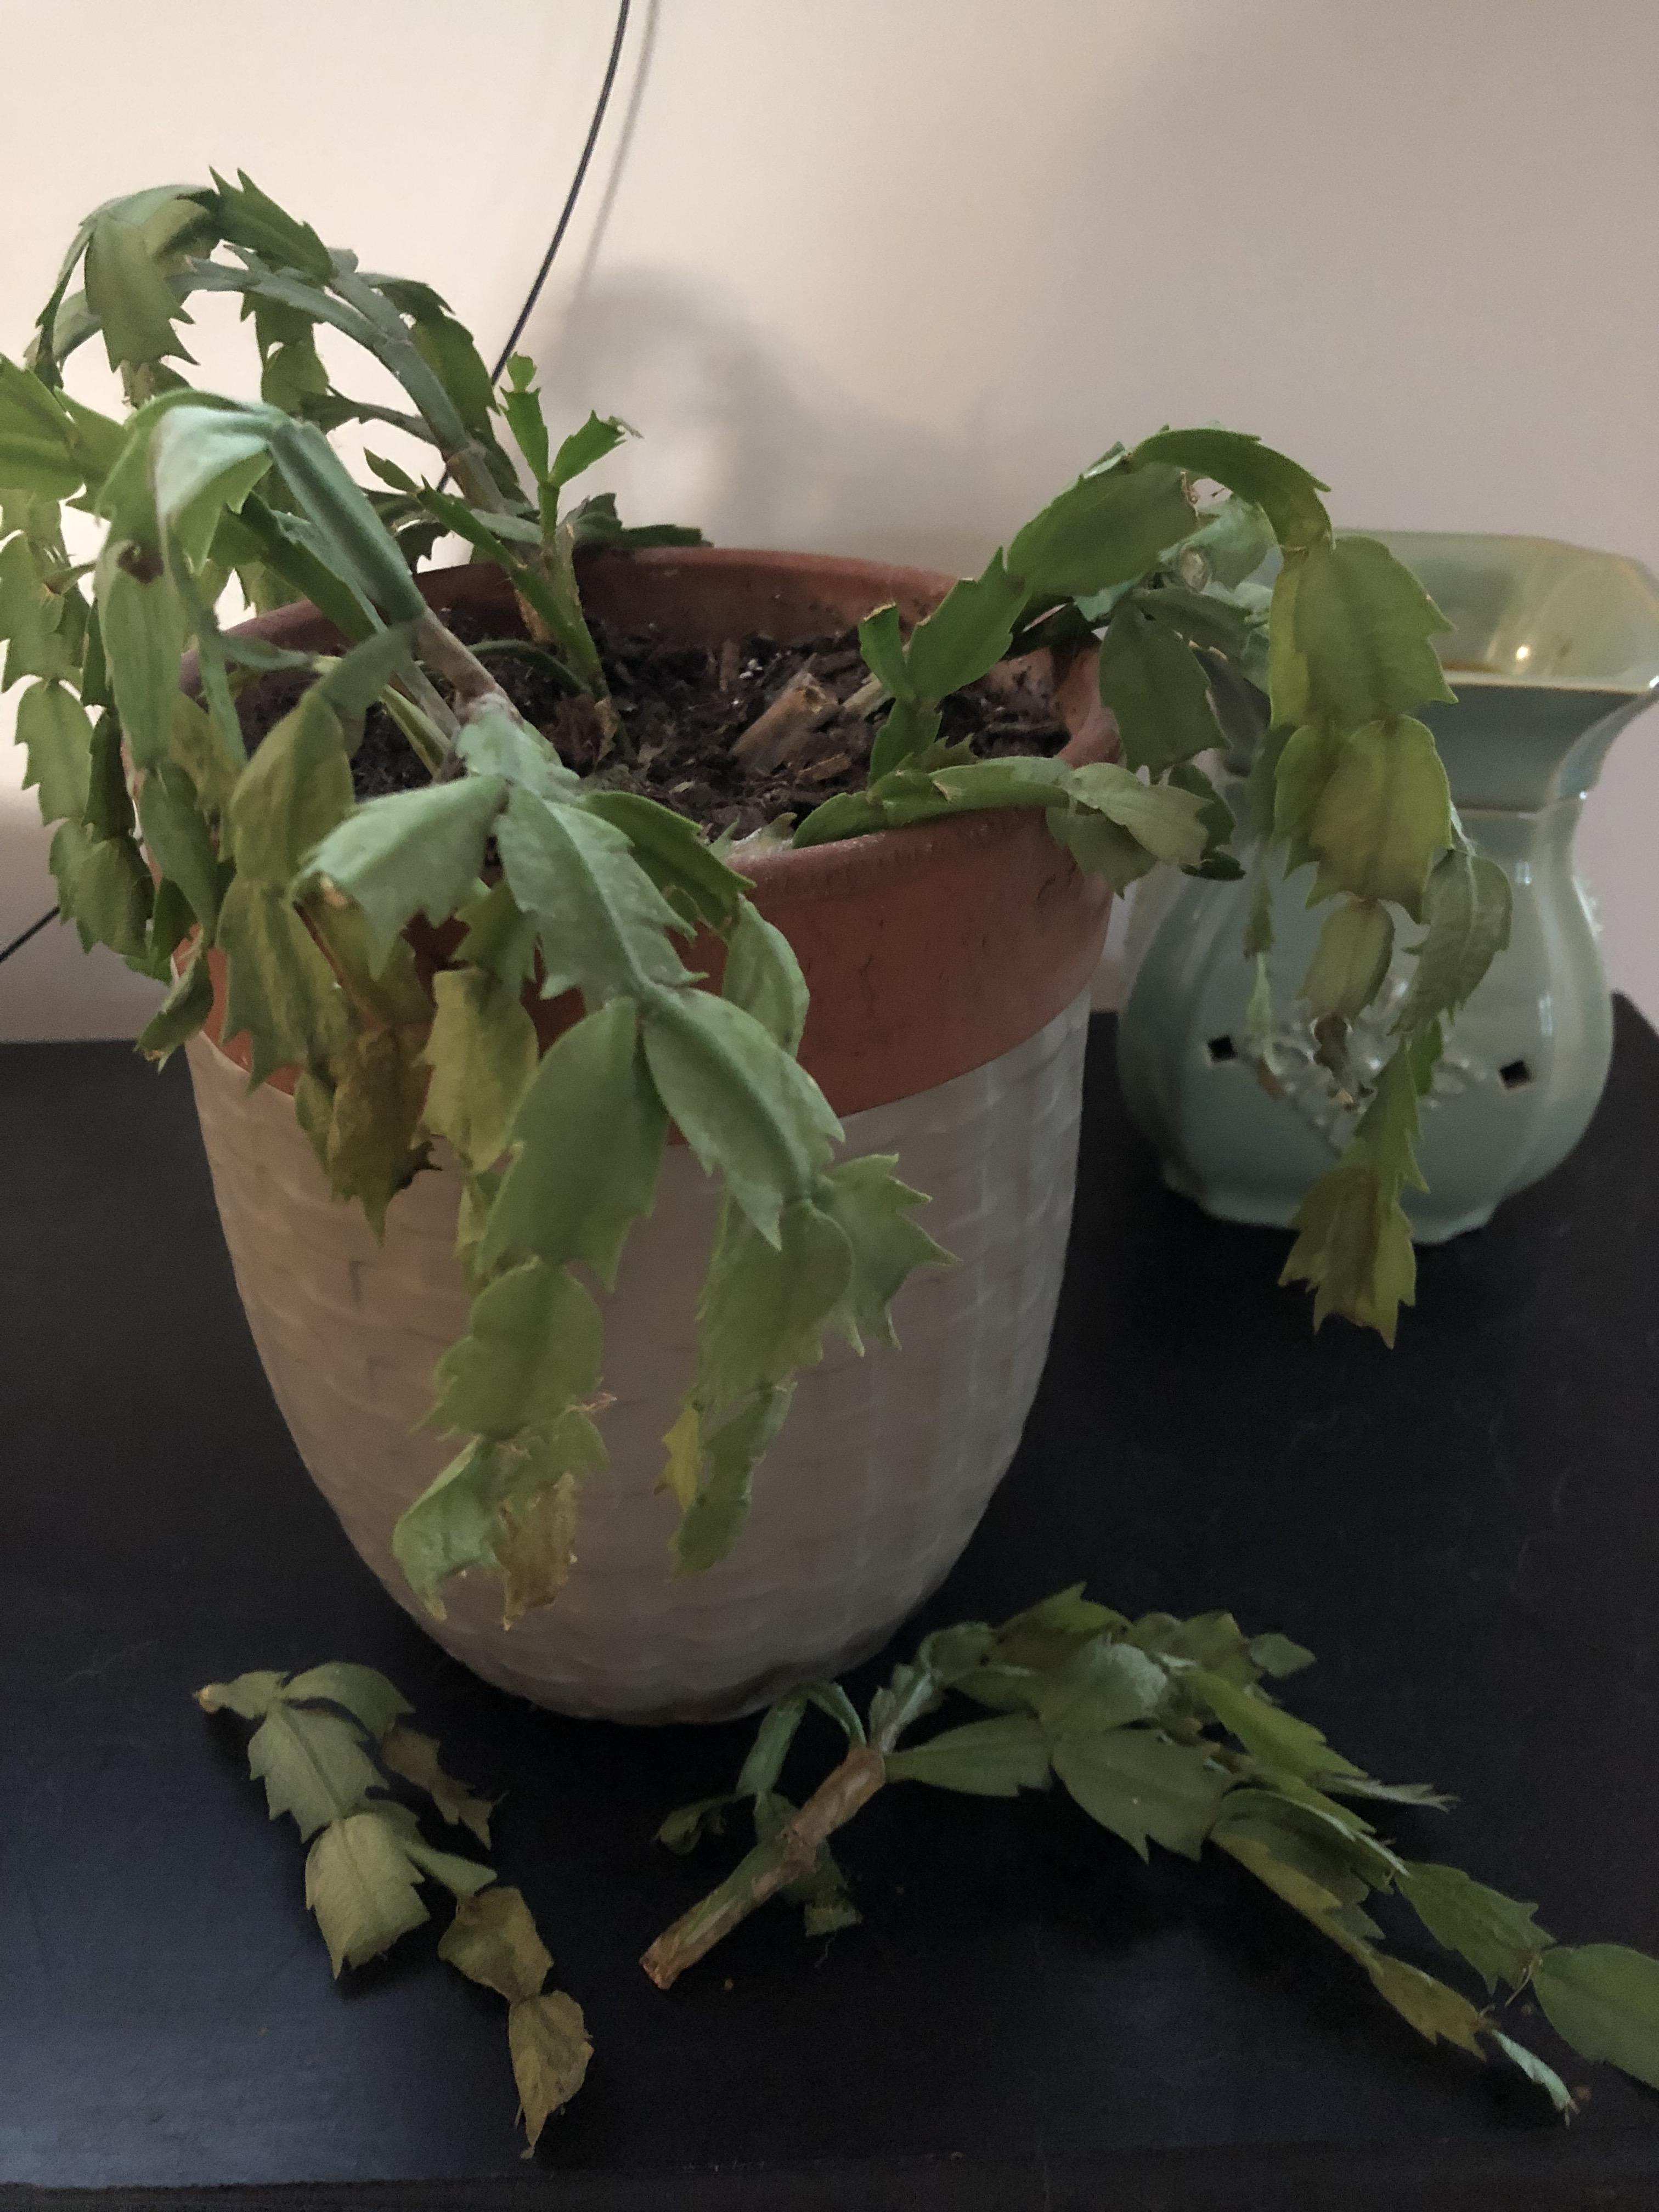
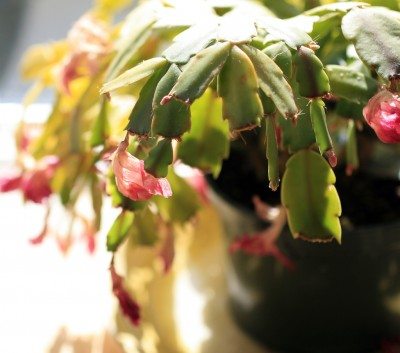
Speaking of cacti, this tropical cactus should be treated more like an orchid than a cactus. Long, scale-like stems bear large, bright flowers when given a strict lighting regiment during the fall.

Purchase Holiday Cactus Schlumbergera

mahogany sepervivum
#18: Mahogany Sempervivum

A more open version of the ‘Calcarium’, the ‘Mahogany’ also has red-tipped leaves. But the more sun this plant receives, the darker the leaves will become!

Purchase Mahogany Sempervivum

Click here to subscribe
violet queen echeveria
#19: Violet Queen Echeveria

The Violet Queen has long, blue-green leaves that take on a pastel pink color on the edges when it gets cold. It also produces offsets rapidly, so be prepared to have several of these cuties!

Purchase Violet Queen Echeveria

Black rose zwartkopf aeonium
#20: Black Rose Zwartkopf Aeonium

‘Black Rose’ is one of the most popular Aeonium varieties. And it’s no wonder! The deep black leaves with the green center is so stunning it makes everyone want to start up a succulent collection!

Purchase Black Rose Zwartkopf Aeonium

kiwi aeonium
#21: Kiwi Aeonium

The Kiwi is one of my personal favorites! Its leaves range from green to yellow to white depending on the amount of sunlight. And to top it off, the edges stay perfectly lined in an almost fruity shade of red!

Purchase Kiwi Aeonium

subsessilis echeveria
#22: Subsessilis Echeveria

For a softer shade of pink, get yourself a Subsessilis! The light pink tips paired with the blue-green color of its leaves makes it a dreamy pallet of soft pastels.

Purchase Subsessilis Echeveria

dinner plate aeonium
#23: Dinner Plate Aeonium

This succulent is named ‘Dinner Plate’ because of its large, flat shape that can get up to 2 feet in diameter! However, under good care it doesn’t stay flat and instead forms smooth, rounded hills of green.

Purchase Dinner Plate Aeonium

lily pad aeonium
#24: Lily Pad Aeonium

When people think of succulents, they usually picture something like the Lily Pad. Thick, fleshy green leaves form a picture-perfect rosette every time!

Purchase Lily Pad Aeonium

doris taylor echeveria
#25: Doris Taylor Echeveria

This furry succulent is the perfect companion to your own furry feline friend! The hard part will be keeping your hands off this little guy!

Purchase Doris Taylor Echeveria

perle von numberg echeveria
#26: Perle von Numberg Echeveria

Perle von Numberg is one of the most widely sold succulents. It’s easy to find this beautiful, pink Echeveria, so pick one up today, or feel free to have it shipped straight to your door!

Purchase Perle von Numberg Echeveria

painted nodulosa echeveria
#27: Painted Nodulosa Echeveria

The Painted Nodulosa is truly a masterpiece of dark green and wine red. And it’s beauty is only improved by the fact that it is one of our succulents that are safe for your cat! Just be aware that this plant tends to grow upwards instead of having a spreading habit.

Purchase Painted Nodulosa Echeveria

zebra plant haworthia
#28: Zebra Plant Haworthia

Zebra plants are easily identified for their white spines that travel up each individual leaf. As they continue to grow upward, they will also produce lots of new offsets at their base. This is why Haworthias are perfect for people wanting to fill their house with succulents!

Purchase Zebra Plant Haworthia

window haworthia
#29: Window Haworthia

The ‘Window’ Haworthia is a succulent that uses its transparent leaves as a window! This allows light to penetrate deeper into its leaves. This zero-waste succulent shows how something can be efficient and stunning at the same time.

Purchase Window Haworthia

blue rosette echeveria minima
#30: Blue Rosette Echeveria Minima

This succulent is one of the small varieties of Echeveria. However, this doesn’t stop it from producing lots of offsets. This succulent fills its pot with little blue rosettes in no time!

Purchase Blue Rosette Echeveria Minima

Click here to subscribe
chroma echeveria
#31: Chroma Echeveria

Each and every ‘Chroma’ Echeveria is slightly different! Leaf colors can be green, brown, purple, red, or even pink. This little succulent is definitely one-of-a-kind!

Purchase Chroma Echeveria

donkeys tail sedum
#32: Donkey’s Tail Sedum

This Sedum is widely known and loved! Very few people know that it’s actually one of our succulents that are safe for your cats! As if we need any more reasons to buy this beautiful trailing succulent!

Purchase Donkey’s Tail Sedum

raindrops echeveria
#33: Raindrops Echeveria

Raindrops is truly unique with its large ‘raindrops’ that grow on the tips of its leaves! This blue-green succulent can also get pink tips when given lots of sunlight!

Purchase Raindrops Echeveria

That’s it for my list of 33 stunning succulents that are safe for cats! Enjoy your succulents, while knowing that your curious cats are safe! And check out this list of Houseplants that are Safe for Pets for even more ideas!

If you have any questions or comments, feel free to leave them below. Then to get even more awesome tips, join my email list! Every new subscriber gets a free welcome gift!

Then, if you want some more help with your succulents, here’s my post that explains the secret to succulent watering! Here is the answer to How Often Should You Water Succulents?

Happy Digging!

Click here to subscribe

5 Effortless Indoor Herb Garden Kits

5 effortless indoor herb garden kits cover photo

Wouldn’t you love it if you could just press a button and have all the fresh culinary herbs that you want?! Some people might think this is crazy, but with modern technology, we are pretty close to having fresh, kitchen-grown herbs at just the press of a button! Still seem too good to be true? Well check out these five indoor herb garden kits that truly make growing herbs effortless.

Wouldn’t you love it if you could just press a button and have all the fresh culinary herbs that you want?! Some people might think this is crazy, but with modern technology, we are pretty close to having fresh, kitchen-grown herbs at just the press of a button! Still seem too good to be true? Well check out these five indoor herb garden kits that truly make growing herbs effortless.

As far as Indoor Herb Garden kits go, the two leading brands for ease of use and sustainability are Aerogarden and Click and Grow. While this post does contain affiliate links, this in no way swayed my opinion of these products. These grow kits really are as awesome as they seem! So here are the top 5 indoor gardens, along with the pro’s and con’s of each to ensure you get the one that fits your personal needs!

Click here to subscribe

#1: Click & Grow Smart Gardens

Click & Grow’s Smart Gardens are simple to set up and easy to grow. Just attach the light, pop in the seed pods, and add water mixed with the provided nutrients. Then when you plug it in, a timer will automatically start, setting you up for 16 hours of lights on, and 8 hours of lights off. This is convenient for people who struggle with setting manual timers, but it might require you to get up early one day if you want it to turn off earlier in the evening.

Click & Grow offers 3-pod systems, 9-pod systems, or a bundled shelving set of 3, 9-pod systems totaling 27-pods. All of the features are the same regardless of size, so simply purchase according to your needs!

Pro’s

  • 3-pod system one of the cheapest indoor garden systems
  • relatively quiet
  • lights blink when low on water (effective reminder)
  • comes with height extenders to make the light taller or shorter
  • automatic 16 hours on, 8 hours off

Con’s

  • no manual light settings
  • some people have difficulty refilling the water without spilling
  • low water lights (blinking) can be annoying to some people

#2: Tasty Sprout by Aerogarden

This is a unique system as it was a mix of Aerogarden’s indoor systems along with Tasty’s low-cost practical cooking methods. What you get is a small, recipe-driven indoor herb system that appeals to the masses, but only has a few of Aerogarden’s touches.

If you are limited on space, or you want a cheap option to get started with indoor gardening, then this is the kit for you!

Indoor Herb Garden Kit Tasty Sprout by Aerogarden & Tasty

Pro’s

  • Small, 3-pod design
  • Pods sold in recipe packs of southwestern, ranch, Caprese salad, and coctail/mocktail packs
  • inexpensive for an automatic growing kit

Con’s

  • no manual timing system – run 18 hours on, 6 hours off from time it’s plugged in
  • only 12″ tall
  • made from a light plastic material
  • uses an aerator pump, which some people find to be too loud

#3: Aerogarden Harvest

The Aerogarden Harvest is the most basic of Aerogarden’s indoor garden systems (aside from their Tasty hybrid). That being said, it is still an amazing system! It uses a water pump system instead of an aerator pump, making it run silently when compared to the Tasty Sprout. The Harvest also has several buttons on the front to manually set your light timings. It also keeps track of how many days you’ve been growing, as well as tells you how many more days you have until you need to add more liquid fertilizer (included in purchase).

Overall, this 6-pod system is perfect for anyone who is serious about indoor gardening, but not quite ready to take the leap to one of the more expensive models.

Indoor Herb Garden Kit Aerogarden Harvest

Pro’s

  • Cheapest of the mainstream Aerogarden systems
  • quiet pump system
  • adjustable manual lighting settings

Con’s

  • plastic build
  • takes up slightly more space than the 6-pod Harvest Elite

#4: Aerogarden Harvest Elite 360

At first glance, this system appears to be only a rounded, metal version of the Aerogarden Harvest. However, the Harvest Elite 360 has a few essential features that left customers feeling glad they made the upgrade.

First, the LCD display makes the system much more user-friendly than the Harvest. For example, you can simply choose the type of plants you are growing (such as herbs or flowers), and it will automatically set up the optimal growth settings for you.

Another game-changer is the vacation mode. By activating vacation mode, your system will automatically shorten the light times and decrease the water usage so you won’t have to worry about running out of water while you’re gone! This system really takes care of you! So if you want an indoor garden system that won’t die during your extended holidays, then you should consider the Harvest Elite!

Indoor Herb Garden Kits Aerogarden Harvest Elite 360

Pro’s

  • LCD display with manual timing adjustments
  • Suggested settings for different plant types
  • smaller than Harvest, but still fits 6 pods
  • Stainless Steel build
  • Vacation mode!!!

Con’s

  • Several people complained that their LCD display was broken out-of-the-box and they had to get a replacement system from the company (free of charge, but took longer)
  • More expensive than the Harvest system

#5: Aerogarden Bounty Elite

Now this system truly has it all! With a touchscreen display you can connect it to your WiFi and use either your Alexa device or the Aerogarden app to adjust any settings, turn on/off your lights, and check on the status of your plants. The lights are also dimmable with the touch of a button, as well as has a sunrise/sunset setting to slowly fade in or out of the day.

Overall, this indoor herb garden kit has everything you need to be as involved or as hands-free as you want in the growing process! From the suggested settings and vacation mode, to the voice-command lights off, this system is any smart gardener’s dream come true!

Indoor Herb Garden Kits Aerogarden Bounty Elite

Pro’s

  • Touchscreen manual adjust settings
  • WiFi enabled
  • Alexa compatible
  • 9-pod capability
  • Water-level indicator
  • Vacation mode
  • Suggested settings based on plant type
  • Choice to have water and fertilizer alerts sent to cell phone
  • 1-touch light dimmer
  • Sunrise/Sunset mode

Con’s

  • Takes up slightly more space
  • Most expensive of the Aerogarden systems

That’s it for the top 5 effortless indoor herb garden kits! Honestly, all of these systems require very little setup and maintenance and will have you harvesting your favorite herbs all year long! For some quick inspiration, check out this list of The 5 Best Vegetables to Grow Indoors. And as always, feel free to leave any questions or comments below, including any comments of any experiences you’ve had with any of these machines! Then, make sure to join my email list to get more awesome tips, as well as to receive a free welcome gift straight to your inbox today!

Happy Digging!

Click here to subscribe

Lucky Bamboo Plant Care

How to keep your lucky bamboo alive and healthy cover photo

Lucky Bamboo is a common houseplant that is famous for its ability to grow in pure water. But this ability also comes with its own challenges. So here is everything you need to know about lucky bamboo plant care. Let’s keep your plant green, growing, and pest-free!

*Don’t have one of these plants yet? You can buy lucky bamboo plants here!*

**Note: This post contains affiliate links, which if purchased, I will receive a small portion of the profits. This helps me to keep providing awesome information to all of you!**

Click here to subscribe

Lucky Bamboo Plant Care: Light Requirements

As you might already know, Lucky Bamboo isn’t actually a bamboo plant. Instead, it is actually a Dracaena. Because of this, it needs to be treated like a dracaena, especially when it comes to lighting.

Place your lucky bamboo somewhere it will only get indirect sunlight. Keep it out of direct sunlight. This plant will easily burn if it gets too much direct sunlight. If this happens, the leaf will begin to turn a pale yellow color. These portions can be trimmed off and removed, only make sure that it is safe from getting sunburned in the future. This plant also does well in low light situations but growth will be slower.

Lucky Bamboo Plant Care - Keep your lucky bamboo out of direct sunlight.

Lucky Bamboo Plant Care: Water Requirements

I usually see one of two problems with lucky bamboo watering. First, people buy large, tall vases for their bamboo plant and fill the entire, tall base with water. This can be very bad for your plant. IF the water level is too far above the root system, then it has to potential to cause stem rot. Instead, only water your plant until the roots have about an inch of water covering them.

The second problem that I see is watering with tap water. Dracaenas are particularly susceptible to the chlorine and mineral deposits that are contained in tap water. If the sides of your container has a white, crusty layer, or if the tips of your plant are turning yellow, this is a sign that you’ll need to switch to distilled or bottled water.

Lucky Bamboo Plant Care - Here's how much water you should have in your pot.

Lucky Bamboo Plant Care: Additional Tips

I’ve heard people go back and forth on fertilizer needs of this plant, but I highly recommend it. To fertilize correctly though, purchase special lucky bamboo fertilizer. Then, only fertilize two to three times each summer, starting with a single application in the spring once your plant is starting to produce new growth.

Next, make sure that you are changing out the water in your container. This is very important to do, as algae or bacteria can start growing in your containers and can even cause root rot in your plants. Change out the water every 2 weeks.

If you see any algae or bacterial growth, thoroughly clean your container and any pebbles or rocks you have in it. Then, rinse your plant’s roots well and place it back in the container. Repeat this once a week until no algae or bacteria has been seen for a month, then you can go back to changing out the water every two weeks.

It is also best to fertilize your plant when you add new water so your lucky bamboo will have a week or two to absorb the nutrients before the water is switched out.

Lucky Bamboo Plant Care - Fertilizer and changing out the water will keep your plant healthy and green.

I hope you enjoy carrying for your lucky bamboo plant and that it brings you added prosperity and happiness! Leave any additional comments or questions below!

Happy Digging!

Want More Care Info? Grab the Free PDF!

Want more info - grab the free pdf

Get even more detailed information on how to care for this awesome plant!

  • Stop struggling to keep it alive!
  • Stop wondering what it needs!
  • Get info on light, water, soil, fertilizer, propagation, and more with these easy-to-digest pages!

And the best part… it’s free!

How to Care for Christmas Cactus

Care for Christmas Cactus Cover

A Christmas cactus can be a beautiful and fun houseplant to own! Not only does it add a bit of warmth to the holidays, but if given good treatment, it can bloom every Christmas for up to 30 years! Now that’s one long life for a plant! But to keep our Christmas cactus alive and well for all those years, we need to know how to properly care for our Christmas cactus! So here’s what you need to know…

Don’t have a Christmas cactus yet? You can get one here!

**Note: This post contains affiliate links, which if purchased, I will receive a portion of the profits. This helps me to keep providing awesome information to all of you!**

Click here to subscribe

Care for Christmas Cactus: Light Requirements

For proper care, we first need to realize that this cactus, a Schlumbergera species, is not like or normal cacti originating from central America to the western United States. Nope… this cactus actually originates from a coastal climate in Brazil. So that being said, it isn’t used to those long hours of hot, direct sunlight. Instead, place it in an east- or west- facing window so that it gets direct sunlight in the mornings or evenings, but it stays protected from any hot, afternoon sunlight.

Here's what you need to know to care for christmas cactus... light requirements...

Care for Christmas Cactus: Water Requirements

Being a coastal cactus, this plant needs some interesting watering techniques. First, only water your Christmas cactus when the soil feels dry to the touch (about 2 inches or 5 cm down from the surface). Too much water, and your cactus will start turning yellow and the leaves will get fast and mushy. If this happens, it’s best to take some cuttings from the healthy part of your plant to propagate in case your entire plant dies from being over-watered. Here are the 3 methods you can use for Christmas Cactus Propagation. So basically let’s avoid this by only watering once the soil feels dry to the touch!

The next tip I have for you is to give your plant higher humidity levels, especially during the time when it had buds on it. If your plant doesn’t get enough humidity, or it is getting either too little water or too much water, it will drop all of its buds. So once your plant’s buds form, lightly mist it every day.

Water requirements for Christmas cactus care...

Care for Christmas Cactus: Additional Tips

As well as misting, once your plant’s buds form, you will also want to be giving it a high-phosphorous plant food once every two weeks. This will help it to stay healthy while it is at it’s most vulnerable. Next, to help with correct watering, it is VITAL that you keep it in a light, well-draining soil, such as in a cactus and succulent potting soil.

Also, as your plant blooms, remove any dead or wilting flowers. This helps it to produce even more flowers as it senses that it’s seeds didn’t fully ripen. It also keeps your Christmas cactus looking fresh and healthy! Then, once your plant has finished blooming, re-pot it into fresh soil, keeping the pot small enough to have the roots just a little cramped. Then just let it sit and enjoy it’s morning or evening sun until the following September when you’ll want to prompt it to start blooming once again!

Here are the additional tips for care for Christmas cactus...

That’s how to care for your Christmas cactus! And once again, for information on how to propagate your plant, check out my post, 3 Easy Ways to Propagate Christmas Cactus! If you enjoyed this post, please share it with your friends! Simply click on your favorite social button and it will let you share this post, no copying and pasting required! I hope you all have a wonderful holiday season and I hope your Christmas cactus stays beautiful all year round!

Happy Digging!

Click here to subscribe

Money Tree Plant Care

Money Tree Plant Care Cover Photo

Money trees are sold for their beautifully braided trunks, their bonsai shape, or as a good luck charm that bring wealth and prosperity to the space. It’s no wonder this plant appeals to so many different people! But now the question becomes… how do I keep my money tree alive?!?! Because a dead money tree definitely won’t be bringing you any of its good luck charm! So here is what you need to know to properly care for your money tree!

Don’t have one of these awesome plants yet?! You can get one here!

**Note: This post contains affiliate links, which if purchased, I will receive a portion of the profits. This helps me to keep providing awesome information to all of you!**

Click here to subscribe

Just to be clear… in this post, we are talking about the money tree, Pachira aquatica. There are two other plants that are commonly referred to as a money tree. These are jade plants, and Chinese money tree plants, or Pilea peperomioides.

Money Tree Plant Care - Jade Plant - Crassula ovata - Do not confuse this plant with the money tree!
Money Tree Plant Care - Pachira aquatica
Money Tree Plant Care - Chinese Money Plant - Pilea peperomioides - Do not confuse this plant with the money tree!

Money Tree Plant Care: Light Requirements

Money trees are some of the best indoor plants due to the fact that they aren’t very picky when it comes to lighting. Try to give them bright, indirect light, but they will do okay in lower light settings as well, especially during the winter when the plant isn’t actively growing. Just be sure to keep it out of hot, direct sunlight. Money tree leaves are sensitive to direct sunlight and will easily burn. If your leaves are looking pale, white, and wrinkled on the edges, this is a sign of too much sunlight and you should immediately move it to a location with less sunlight.

Money Tree Plant Care Tips 1: Keep your money tree out of direct sunlight. Hot, afternoon sun will burn your plant's leaves!

Money Tree Plant Care: Water Requirements

Money tree is sensitive to root rot. This means that it doesn’t like being wet for too long without having a chance to dry out its roots. So to keep it happy, only water your plant once the top several inches of the soil is dry (more or less depending on how big your pot is). Then water thoroughly. Also make sure that your pot has good drainage to help it to dry out quickly in between waterings. But if your plant is still wet a week after watering, then you’ll need to increase your drainage, as well as add water in smaller amounts.

Money Tree Plant Care Tips 2: Make sure that you water your money tree correctly, as this plant is prone to root rot.

Money Tree Plant Care: Additional Tips

The last thing that I need to address is that money trees NEED high humidity. This can be achieved in several ways. You can either grow it in a group of several other high-humidity plants, spray it often, or purchase and use a humidifier nearby. You can also place it on a tray of pebbles that is filled with water. All of these methods can be used to boost humidity levels. And just like palm trees, if a money tree isn’t getting enough humidity, it’s leaf tips will start to turn brown. This is the plant’s signal that you need to increase the humidity.

Also, if you move your plant (like when you first bring your plant home), it might drop some leaves simply due to the change in environment. Because of this, try not to move your plant once it gets settled. And if you’ve recently moved your plant, then don’t be surprised by a few leaves dropping.

Money tree plant care tips 3: give your plant plenty of humidity and avoid moving it from place to place!

I hope these money tree plant care tips help you to keep your plant alive and healthy for years to come! Feel free to leave any questions or comments below! I love hearing from all of you! And for some plant inspiration, check out my list of easy, low-maintenance plants!

Happy Digging!

Click here to subscribe

Are Poinsettias Poisonous?

Are poinsettias poisonous? The answer is yes and no... Find out exactly how poinsettias can hurt you and what to do to avoid it!

During the winter holiday season, poinsettias can be found EVERYWHERE! This can be stunning in the right settings, but what if your cat starts nibbling them? Or maybe your two year old keeps pulling off the leaves and putting them in her mouth? This begs the question… are poinsettias poisonous??? Should I feel safe having them in my home with my pets and small children?

Well the answer is yes, and no…

**Note: This post contains affiliate links, which if purchased, I will receive a portion of the profits. This helps me to keep providing awesome information to all of you!**

Click here to subscribe

Is It Poisonous?

Eating the leaves of poinsettia plants won’t cause any harm. That being said, if a large amount of leaves are ingested, they can make children and pets mildly sick. However, this is usually not life threatening. But if you’re still worried, you can always call poison control here!

So not really anything to worry about as far as a few little nibbles.

What you Need to Worry About…

BUT the big thing that people NEED to be aware of is LATEX ALLERGIES. This plant’s sap contains latex, which will cause some people to form a rash where they come in contact with the sap.

Are poinsettia plants poisonous? No. They won't kill you, but may cause you to get mildly sick. Find out what to do here!

The things you need to do if you have a latex allergy:

  1. Use gloves any time you touch a poinsettia
  2. Avoid touching your eyes and mouth after handling a poinsettia
  3. Wash your hands thoroughly after handling a poinsettia
  4. Watch for signs of difficulty breathing

Some people are extremely sensitive to latex and can have an allergic reaction just being in close proximity with poinsettias. Always be aware of yourself and others in areas with large concentrations of this plant. Although this reaction is extremely rare, it’s always best to stay informed.

Are poinsettias poisonous? If you are sensitive to latex, find out what to do to keep yourself safe around these plants!

So the takeaway from all of this is that poinsettias are not poisonous when eaten (aka they will not cause death), but people with latex allergies need to be aware that this plant can cause a reaction. So if this is you, please be careful and always wear gloves! I hope this article has helped, and feel free to leave any further questions or comments below!

Wishing you a safe, and joyful holiday season!

And of course… Happy Digging!

Click here to subscribe